When you purchase through links on our site, we may earn an affiliate commission. Here’s how it works.
How to Unlock an iPhone Without a Passcode or Face ID
To unlock an iPhone, you need to pass a Face ID scan or input a passcode. On top of that, you have a limited number of attempts before your iPhone asks you to connect it to your computer. So, what can you do if you can’t remember your passcode? Is there a way to unlock an iPhone without a passcode or Face ID? Well, as it turns out, there are several things to try.
Among the solutions offered in this article, we’ll go over unlocking your iPhone via specialized software, you can also use iTunes (to restore your smartphone), and you can also try iCloud on the Web. All of those methods can help you unlock an iPhone without a passcode or Face ID – but there is one thing to keep in mind. They will also erase your iPhone’s contents in the process. Therefore, be prepared to spend some time setting it up again.
3 Methods to Unlock an iPhone Without a Passcode or Face ID
Know that you’ll find plenty of different solutions online, promising to help you unlock any iPhone no matter how many times you’ve tried to enter a passcode. However, based on our experience, the following three methods are the most effective options in 2021.
Method 1: Unlock Your iPhone Using a Dedicated Third-Party Software (Windows & Mac)
We recommend going through this method first because it’s the most effective method available. Using specialized (third-party) software, you can unlock even a permanently locked iPhone (if you’ve exceeded all your passcode attempts). So, here’s what you need to do.
- You’ll find many specialized applications, but we recommend Dr. Fone by Wondershare. You can use it free-of-charge, and it’s available for Windows and macOS. Start by clicking on the provided link, and then download and install the software.
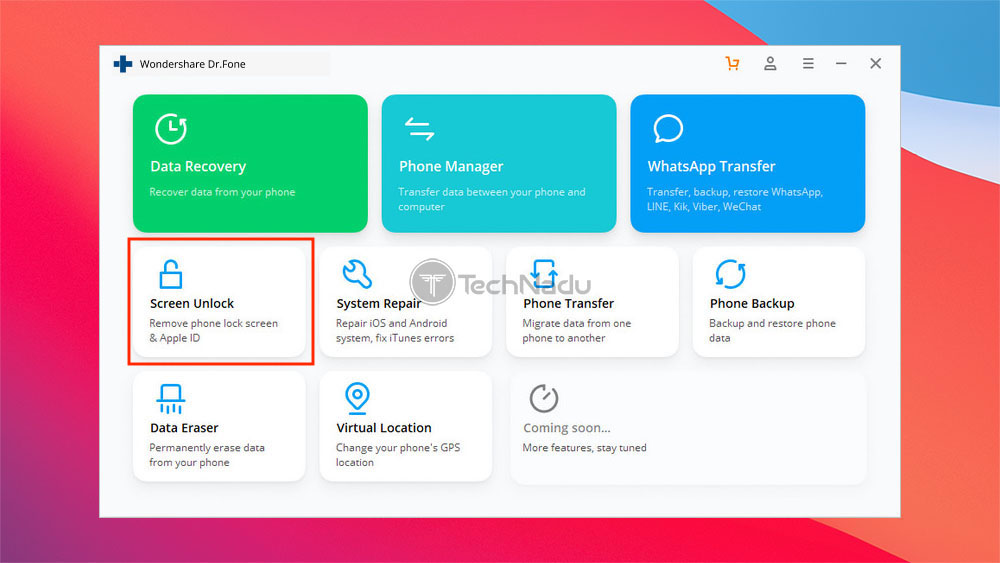
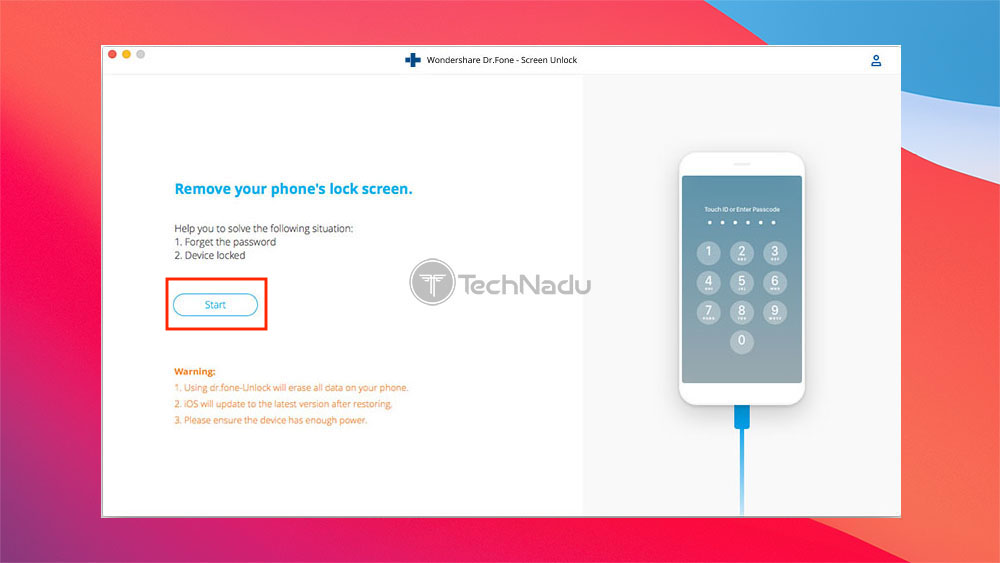
- Launch Dr. Fone by Wondershare, and then connect your iPhone to your computer (using a cable). Then, click on 'Screen Unlock' using Dr. Fone’s home screen. After a couple of seconds, you will be asked whether you want to unlock an iOS device or unlock an Apple ID. Pick any of these options (based on your specific case) by clicking on either of those.
- You will now be asked to put your iPhone into a so-called Recovery Mode. This is done using a combination of buttons on your phone, which results in seeing a message to connect to iTunes. Keep in mind that not all iPhones can reach the Recovery Mode in the same way. So, pick your model using Dr. Fone’s interface and follow the on-screen instructions.
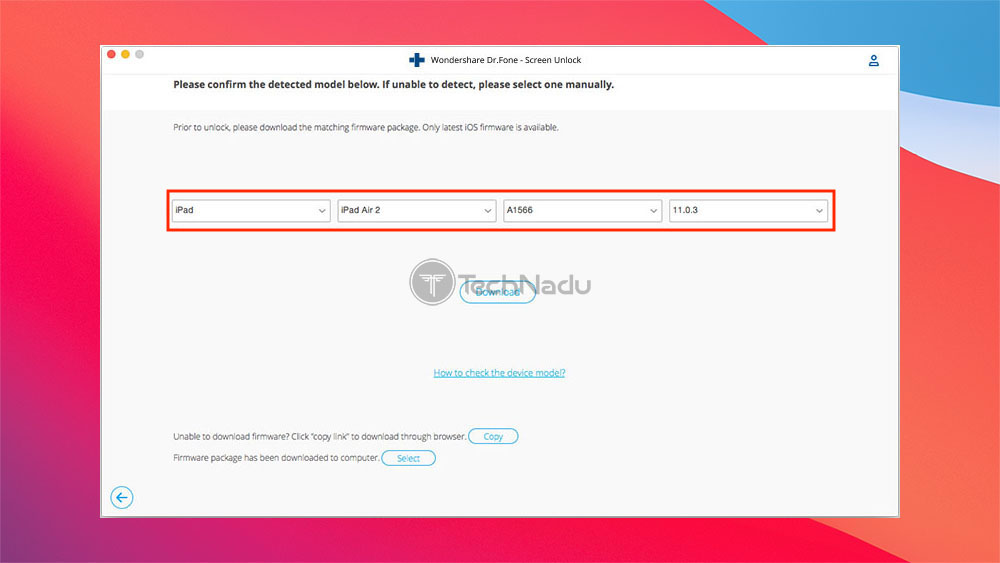
- Then, you will be asked to confirm your device’s model. In general, the application will successfully read the required information off of your iPhone, but make sure to pay close attention and re-check if everything is correct. Then, click on Download.
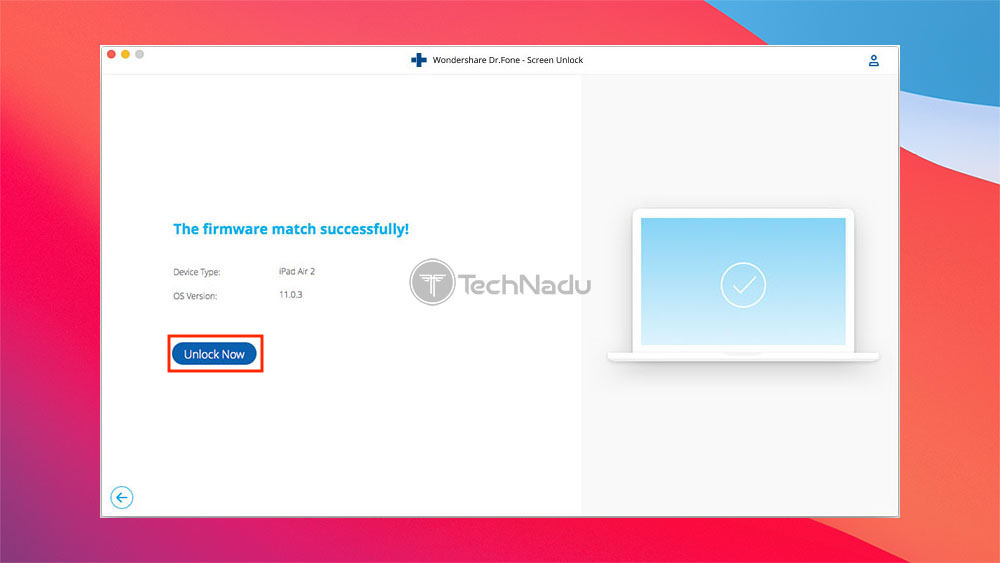
- Once the application downloads the latest available firmware, you should see a notification within Dr. Fone’s interface. Finally, to unlock your iPhone, click on Unlock Now. The application will now enter a process that might take some time, as it needs to reinstall your phone’s software. Sit back and wait until everything is done.
- Finally, your iPhone will restart once Dr. Fone finishes its job. You should see a welcome message on your phone’s screen, asking you to set up your device (just like when you bought it, brand new). So, follow the instructions you’ll see on your phone’s screen. That’s it!
Method 2: Unlock Your iPhone Using iTunes (Windows & Mac)
Next, we will show you how to use iTunes to restore your iPhone (once you put it in the recovery mode). This will prompt iTunes to erase your phone’s contents, so you will need to set up your iPhone from scratch. This method also requires some time and effort on your part – but it’s also highly safe and without unwanted consequences.
- The first step requires you to put your iPhone in the Recovery Mode. This is by using a combination of physical buttons on your phone, pressing them in a specific sequence (without a noticeable pause). Each iPhone generation has a different method of entering the Recovery Mode, so we highly recommend turning to Apple’s official support page.
- You can proceed once your iPhone has entered the Recovery Mode. That means that your phone’s screen should be mostly black, with an icon indicating that you need to connect it to your PC or Mac. So, make sure to do just that. Use a cable to connect your iPhone to your computer, and then launch iTunes.
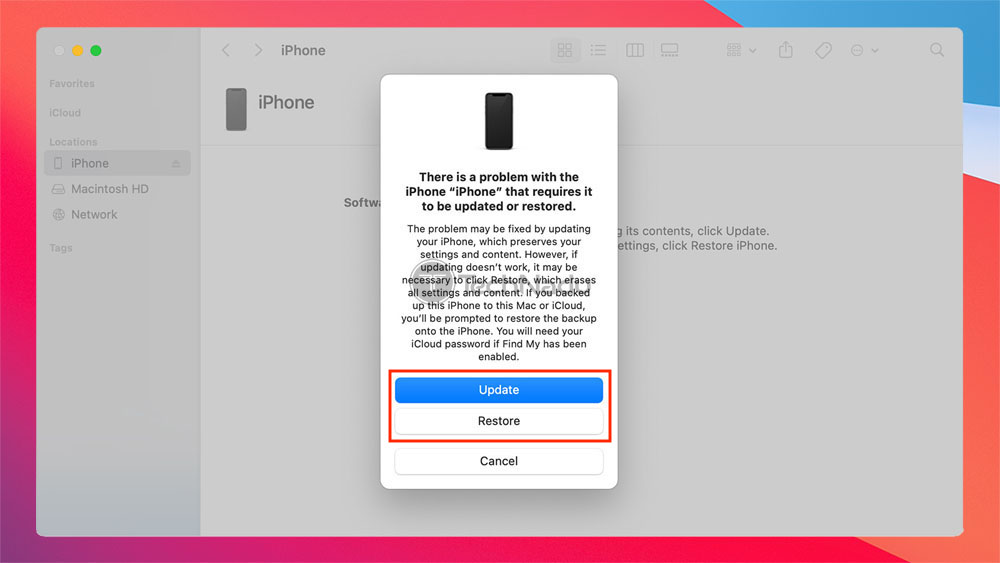
- On Windows, you need to launch iTunes just like you would launch any other application. On macOS, you need to open Finder and then locate your iPhone using the left-positioned sidebar. As soon as you open iTunes, you will be asked whether you’d like to restore or update your device. Make sure to click on Restore.
- The application will now check your device, and then contact Apple’s servers to download the latest version of iOS. Once it erases your phone’s contents, it will install the latest software update, which is a process that can take a while. Once done, your iPhone will restart, and you will need to set it up (using any Apple ID, as you won’t see a lock screen anymore).
Method 3: Unlock Your iPhone (Without Passcode) Using iCloud on the Web
There’s one more way to unlock an iPhone without a passcode or Face ID. We’ll show you how to use Apple’s iCloud service (the Web version), which means that Find My iPhone must be enabled on your device. So, here are the required steps.
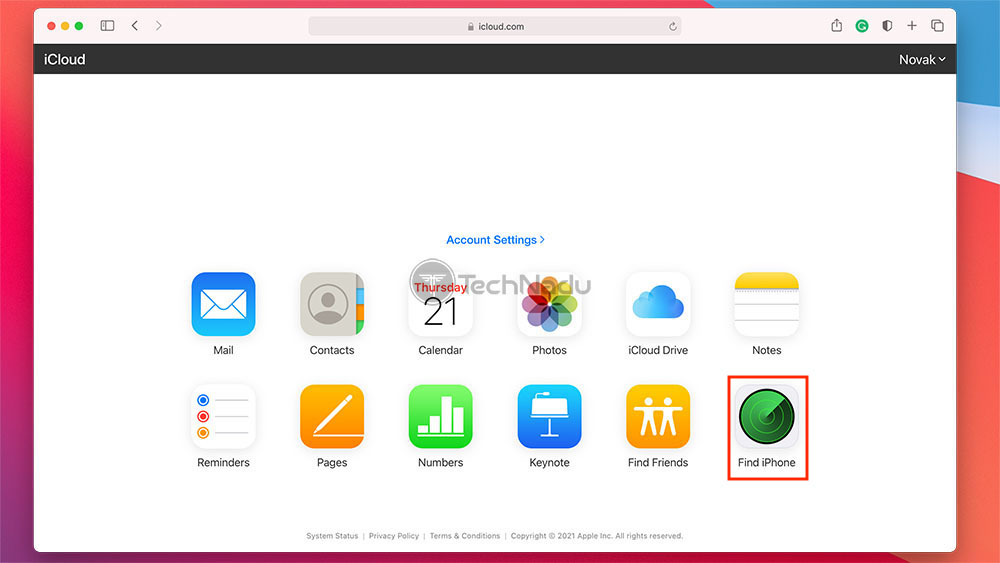
- First, go to Apple’s iCloud on the Web. Then, make sure to log in using your Apple ID (the one you’re using on your iPhone, of course). This is when you should see two rows of icons, so you need to click on Find iPhone.
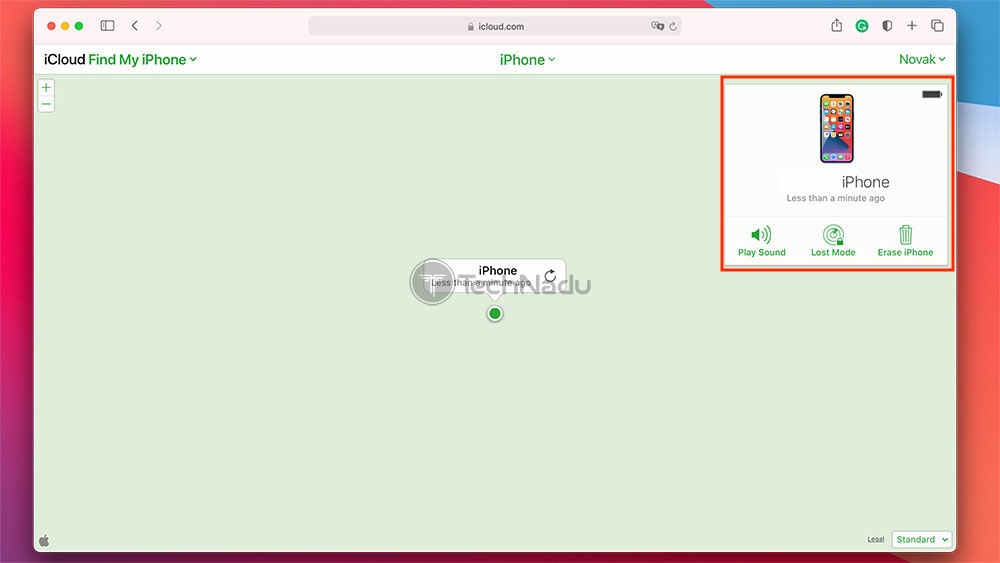
- At this moment, you should see a map indicating the last known location of your iPhone. Since the Web version of iCloud can be slow at times, we recommend waiting until it pulls all of its information from Apple’s servers. Then, click on your iPhone and click on i. Alternatively, you can click on All Devices at the top of the page and select your iPhone from there.
- A pop-up should now appear in the top-left corner. You’ll need to click on Erase iPhone. Confirm your decision and respond to the previously set security questions (related to your Apple ID). Your phone might also ask you to confirm your decision, so make sure to do.
- All there’s left is to wait. Your phone’s contents will now be erased and restarted. That means you’ll need to set it up from scratch. That’s it!
You’ve reached the end of or guide on how to unlock an iPhone without a passcode or Face ID. Make sure to let us know in the comments section which method worked best for you. And of course, thanks for reading!

