When you purchase through links on our site, we may earn an affiliate commission. Here’s how it works.
How to Use ExpressVPN with Kodi
Last updated January 25, 2025


To use Kodi with ExpressVPN, you need to install and run these applications side by side. That means you need to use an operating system that supports both Kodi and ExpressVPN, such as Windows, macOS, Android, iOS (iPhone/iPad), or Chrome OS.
No matter which of the platforms mentioned above you use, you'll need to install ExpressVPN first (available as a native app across the board). Once you log in and connect to a server, you can then launch Kodi to unblock new add-ons and access additional streaming content.
In this guide, we'll provide step-by-step instructions on using Kodi with ExpressVPN on Windows, macOS, Android, iOS, and Chrome OS, with screenshots included.
How to Use ExpressVPN with Kodi
As we'll explain below, you must install both ExpressVPN and Kodi on your device. That way, you can launch ExpressVPN, pick a suitable server, and encrypt your Web connection. That's when you can launch Kodi as well, which will show the VPN's IP address instead of your actual IP, allowing you to unblock geo-restricted add-ons. Here's how that's done on different platforms.
How to Use Kodi with ExpressVPN on Windows
The following steps take you through installing ExpressVPN, installing Kodi, and then combining the two applications. So, do the following:
1. Subscribe to ExpressVPN using your Windows PC and any Web browser.
2. Download and set up ExpressVPN on Windows by installing its native application.
3. With the VPN ready, you can install Kodi on Windows.
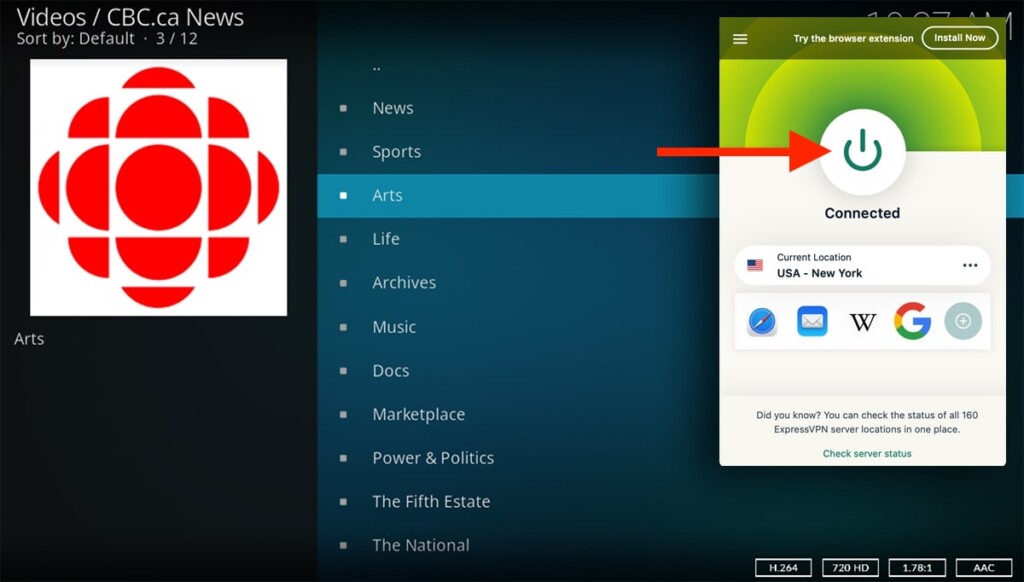
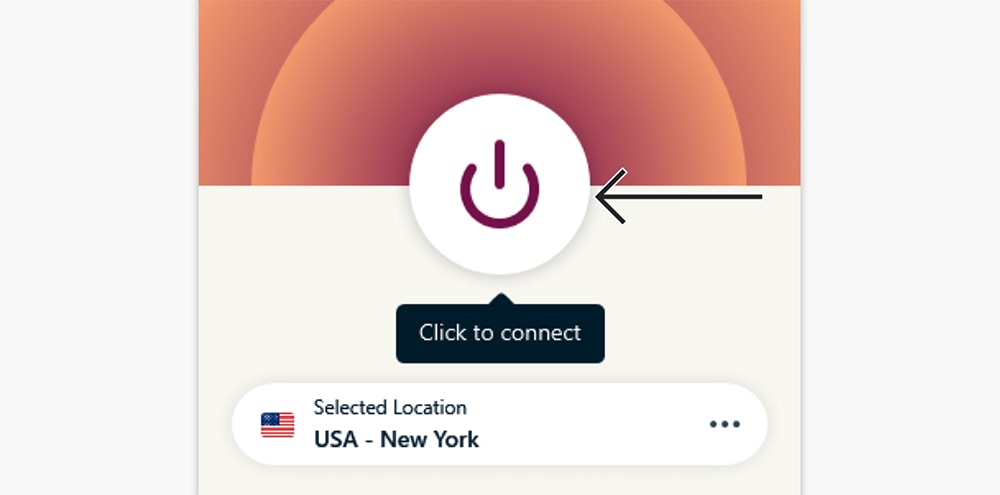
4. Launch ExpressVPN and connect to a server.
5. You can pick a custom server by clicking the button below the ON/OFF switch.
6. Select any country or server name and double-click to connect.

7. If you don’t connect automatically, do that manually (using the ON/OFF switch).
8. The app's UI should turn green.
9. Launch Kodi and select 'Add-ons' > 'Download.'
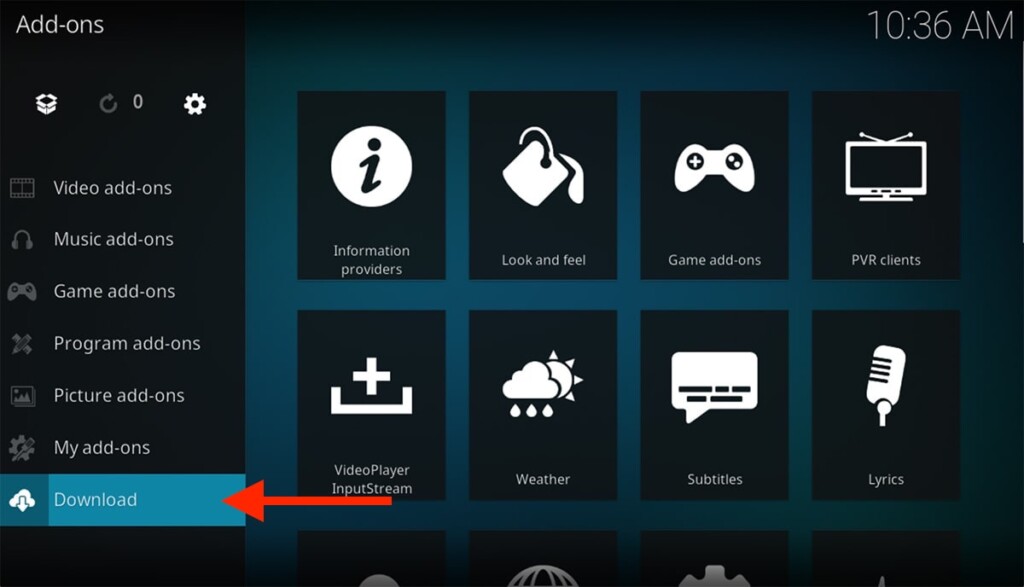

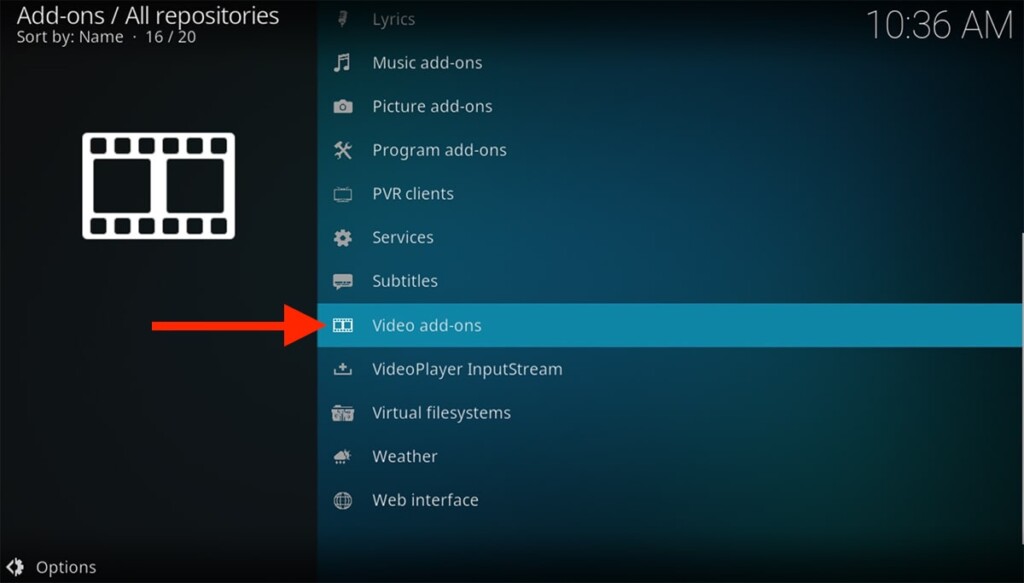
10. Among the offered add-on categories, select 'Video Add-ons.'

11. Now, pick any add-on and click on its name.
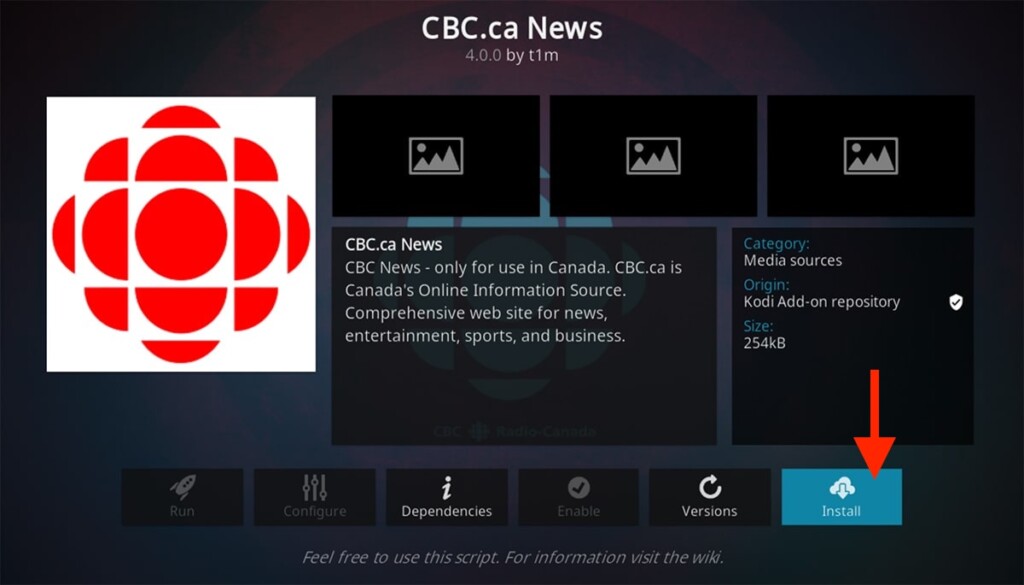

12. To install that add-on, click the 'Install' button in the bottom-right corner.
13. Go ahead and launch that add-on by clicking on 'Open.' That's it!

How to Use Kodi with ExpressVPN on Mac
The following procedure requires downloading, installing, and running ExpressVPN and Kodi side-by-side. So, this is what you need to do:
1. Sign up for ExpressVPN using your Mac and any Web browser.
2. After that, you'll want to set up ExpressVPN on Mac, so use the provided link for our guide.
3. Proceed to install Kodi on your Mac by downloading the app from its website.
4. Feel free to launch ExpressVPN. You should see its home screen.
5. Use this VPN’s interface to connect to a server of your choosing.
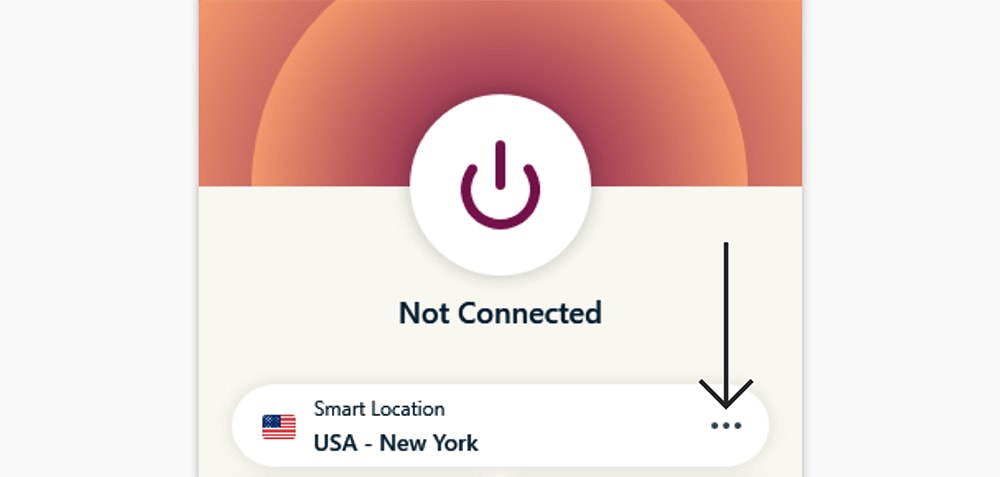
6. If you want to pick a custom server, press the button just below the ON/OFF switch.
7. Ensure your VPN tunnel is active (the connection button should turn green.)
8. Launch Kodi and go to 'Add-ons' > 'Downloads' > 'Video Add-ons.'
9. Select any add-on you’ll see by clicking on its name. Its overview will open.
10. Use the 'Install' button in the bottom-right corner to install the chosen add-on.
11. Launch the newly installed add-on using the 'Open' button. That's it! ExpressVPN will now unblock the chosen add-on and protect your Web traffic.
How to Use Kodi with ExpressVPN on Android
To use Kodi with ExpressVPN on Android, you must first download and install ExpressVPN on your Android device. Then, you have to download Kodi's Android app. Here are the detailed steps:
1. Subscribe to ExpressVPN using your favorite Web browser.
2. You can now install ExpressVPN on Android using the Google Play Store.
3. Set up Kodi on Android using the Google Play Store or by sideloading the app.
4. Launch the ExpressVPN app and connect to a server using the prominent ON/OFF switch on the VPN’s home screen. You can also pick a custom server using the button below the ON/OFF switch.
5. Tap on any country or server name and wait until ExpressVPN connects you.
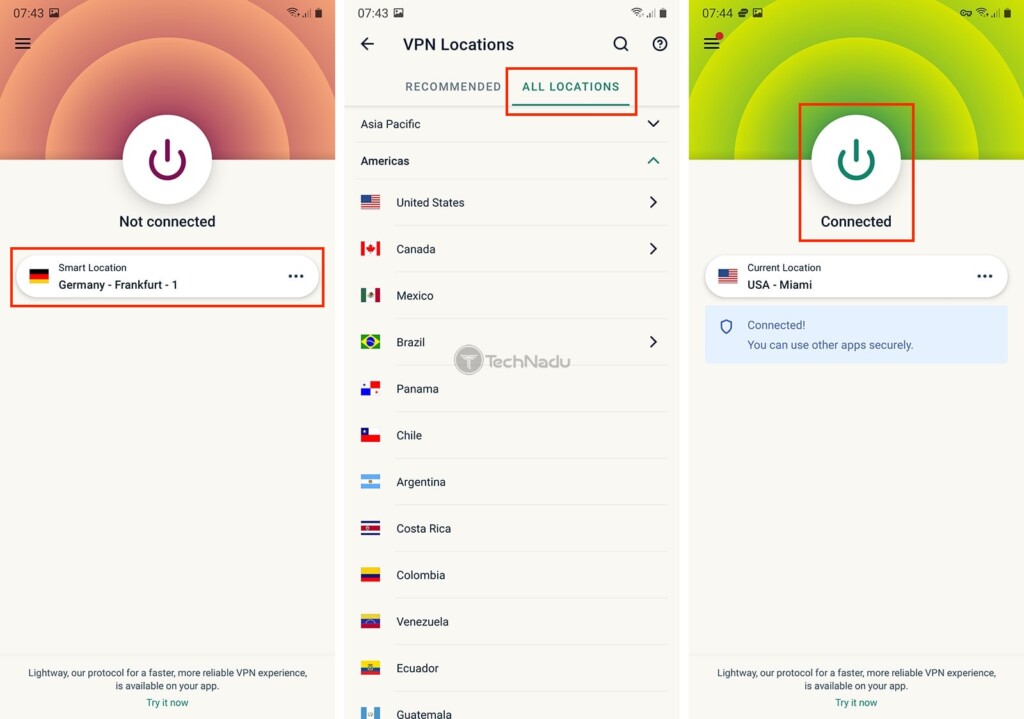

6. Now, you can add Kodi to this equation. Go ahead and launch its Android app.
7. Tap 'Add-ons' > 'Download' in the main menu.
8. Choose 'Video Add-ons' from the list of options on your screen.
9. Select an add-on you'd like to install by tapping on its name.
10. Once the add-on's overview opens, tap the 'Install' button in the bottom-right corner.
11. If asked to install any dependencies, confirm your choice by picking 'OK.'
12. Once the add-on installs, open it using the 'Open' button. That's it!
How to Use Kodi with ExpressVPN on iPhone and iPad
To use Kodi with ExpressVPN on your iPhone or iPad, you first need to install the VPN, which you'll then use to secure your Kodi traffic. Here's a step-by-step guide:
1. Sign up for ExpressVPN using your iPhone or iPad and a Web browser.
2. Use the iOS App Store to install ExpressVPN on your iPhone.
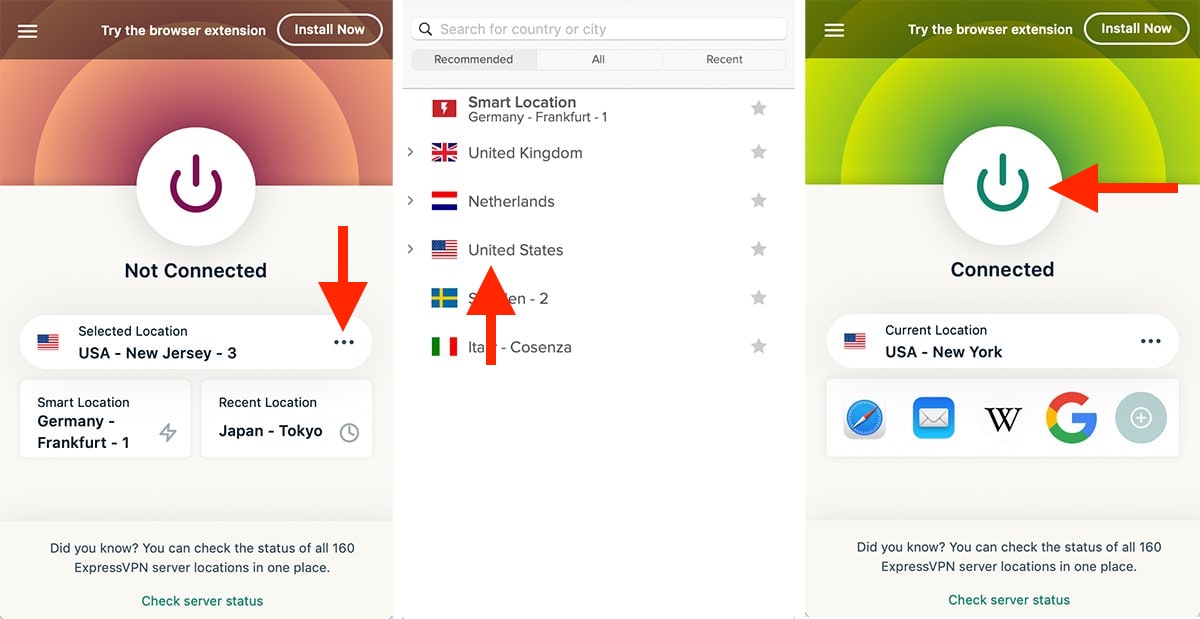
3. Launch the ExpressVPN app and connect to a server using the prominent ON/OFF switch within ExpressVPN’s UI.
4. You can also connect to a specific server by tapping the button below the main switch. Select any country or server name, and ExpressVPN will connect you automatically.
5. Once the app’s interface turns green, your VPN tunnel will become active.
6. Launch Kodi on your iOS or iPadOS device.
7. Let’s install an add-on. Select 'Add-ons' via the main menu. Then, pick 'Download.'
8. Tap on 'Video Add-ons' to access Kodi's repository of ready-for-use add-ons.
9. Select any add-on by tapping its name to see its overview screen.
10. To install the chosen add-on, tap 'Install' (visible in the bottom-right corner).
11. Now, launch that add-on by tapping on 'Open.'
How to Use Kodi with ExpressVPN on Chromebook
If you own a Chromebook made in the last five or so years, you can run Kodi and ExpressVPN via its Android apps. Go through the following steps:
1. Subscribe to ExpressVPN using your Chromebook and your Web browser of choice.
2. Set up ExpressVPN on Chrome OS by downloading it from the Play Store.
3. Install Kodi on your Chromebook and choose from several installation methods.
4. This is when you need to launch ExpressVPN first.
5. Click the button below the ON/OFF switch to select a server to connect to. Then, click the Recommended, All, or Recent tab to browse for a suitable VPN server.
6. Once the app’s interface turns green, your VPN tunnel will become active.
7. Launch Kodi on your Chromebook.
8. To install an add-on for Kodi, start by going to 'Add-ons' > 'Download.'
9. Now, select 'Video Add-ons' and pick any add-on from the list you’ll see there.
10. Once you get to the add-on’s overview, go ahead and click on 'Install.'
11. If asked to install any dependency files, feel free to click on 'OK.
12. After a few moments, the chosen add-on will be installed (you’ll see a notification).
13. Launch the add-on using the 'Open' button (in the bottom-right corner). ExpressVPN will unblock the add-on so that you can access it.
Final Thoughts
As you can see, using ExpressVPN with Kodi is quite simple. Once you set up the VPN, you only need to connect to a server before launching Kodi. Since ExpressVPN has unlimited bandwidth, you can keep it enabled in the background at all times. Also, you're free to switch between servers at any moment based on the supported geo-location(s) of the Kodi add-on you wish to unblock.
ExpressVPN works on even more devices, so why not take full advantage of your VPN subscription? To learn how to do that, check our central guide on how to set up and install ExpressVPN, which covers dozens of different platforms and devices.
Finally, we'll also add that ExpressVPN works quite well with Kodi. It can unblock add-ons, extend the library of the add-ons you already use, and it's among the fastest VPNs. However, as noted in our guide to the best VPNs for Kodi, many excellent alternatives exist. So, if your mind isn't set on using this VPN, feel free to check what other providers have in store.
That's all that our team has prepared for this guide. If you have any questions or doubts, feel free to comment below. Thank you for reading!
Related