When you purchase through links on our site, we may earn an affiliate commission. Here’s how it works.
How to Set Up and Use NordVPN Proxy on qBittorrent
If you're torrenting with qBittorrent without sending your P2P traffic through a proxy server, your IP address and location will be visible to other users on your P2P network. This means that government agencies and hackers will easily be able to identify you.
Fortunately, NordVPN offers several proxy servers in different countries that allow you to use a secure connection with qBittorrent. That said, NordVPN is quick to set up within qBittorrent and makes you anonymous on the Web by hiding your IP address and physical location.
In this article, we'll teach you how to set up and use NordVPN proxy on qBittorrent.
How to Set up NordVPN Proxy on qBittorrent
Setting up a NordVPN proxy on qBittorrent requires you to visit your torrent client's settings, where you can input NordVPN's proxy host address, port, and service credentials. All that information can be found on the VPN provider's website, so the setup takes only a few minutes. Here's a step-by-step guide:
1. Subscribe to NordVPN from your computer using any Web browser.
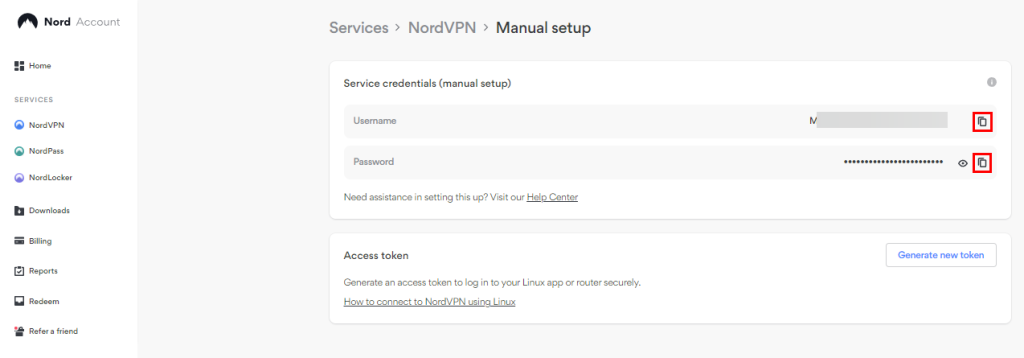
2. Open the NordVPN account dashboard and click 'NordVPN' > 'Set up NordVPN manually.'
3. Enter the verification code from your email inbox.
4. Copy your username and password from the 'Service credentials (manual setup)' section.

5. Open qBittorrent and click 'Tools' > 'Options' (or use the Alt+O keyboard shortcut on Windows).
6. Select the Connection category from the sidebar menu.
7. Under the Proxy Server section, enter the details mentioned below:
- Type: Socks5
- Host: Enter any address from the list below to connect to that location:
amsterdam.nl.socks.nordhold.net
atlanta.us.socks.nordhold.net
dallas.us.socks.nordhold.net
los-angeles.us.socks.nordhold.net
nl.socks.nordhold.net
se.socks.nordhold.net
stockholm.se.socks.nordhold.net
us.socks.nordhold.net
new-york.us.socks.nordhold.net
san-francisco.us.socks.nordhold.net
detroit.us.socks.nordhold.net- Port: 1080
- Use proxy for peer connections: Check this box
- Authentication: Check this box
- Username: Paste your NordVPN service username copied earlier
- Password: Paste your NordVPN service password copied earlier
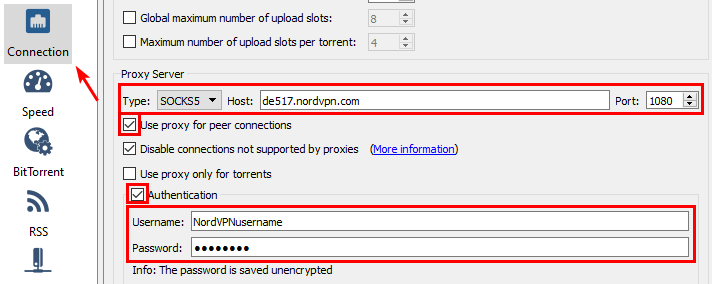
8. Once done, click OK to save the settings.
9. To check whether the proxy is working, visit this website.
10. Scroll down to 'Torrent Address detection' and choose 'Activate.'
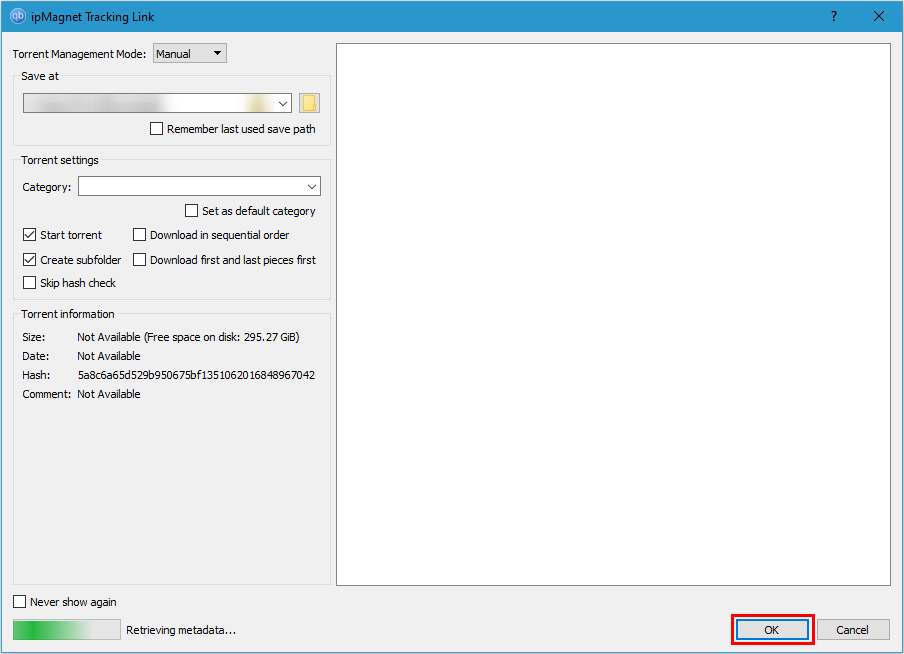
11. Click 'this Magnet Link' > 'Open qBittorrent' using the pop-up window.

12. Now, qBittorrent will launch automatically, and the magnet link will synchronize.
13. When you see it connecting to the P2P network, return to the ipleak.net website.
14. The virtual IP address you picked to use with qBittorrent should appear on this website. That's it!

Final Thoughts
Overall, setting up a NordVPN proxy with qBittorrent is very easy and takes less than 5 minutes. While setting up a proxy within your torrent client has its benefits, remember that it's not the same as a full-fledged VPN. At most, a proxy will change your virtual location, but it won't encrypt your traffic.
We'll also add that it's possible to set up NordVPN on uTorrent, Deluge, BitTorrent, and Vuze. However, for complete protection, it is recommended that you install the NordVPN app natively on your device. Even better, you can configure it on your router and protect all the devices in your household simultaneously, including those that don't support VPN apps natively.
That's all we've prepared for this guide. If you have further queries, reach out to us using the comment button below. Thanks for reading!
Related