
When you purchase through links on our site, we may earn an affiliate commission. Here’s how it works.
How to Set Up NordVPN on Asus Router in 2026
Last updated May 17, 2024

While NordVPN’s app lets you connect up to 10 devices simultaneously, you can get unlimited device connections if you install NordVPN on your ASUS router. Another significant benefit is that it secures all devices connected to the Web, including those that don’t have a native NordVPN app, such as gaming consoles and certain smart TVs.
However, inexperienced users are often not sure how to set up NordVPN on a router. Similarly, some users may find setting up NordVPN on an ASUS router complicated, even though it is pretty simple. That said, you can install NordVPN on most ASUS routers, including the ones with newer ASUS-WRT firmware, such as RT-AX88U, RT-AX88U, ZenWiFi XT9, and more.
This article will teach you how to add NordVPN to your ASUS router with a step-by-step guide. You will also find answers to some common questions.
How to Set Up NordVPN on ASUS Router
You can set up NordVPN on ASUS routers by accessing the router’s control panel and importing NordVPN’s server configuration file. Here’s a complete step-by-step guide on how to install NordVPN on an ASUS router:
- Sign up for NordVPN using your favorite Web browser.
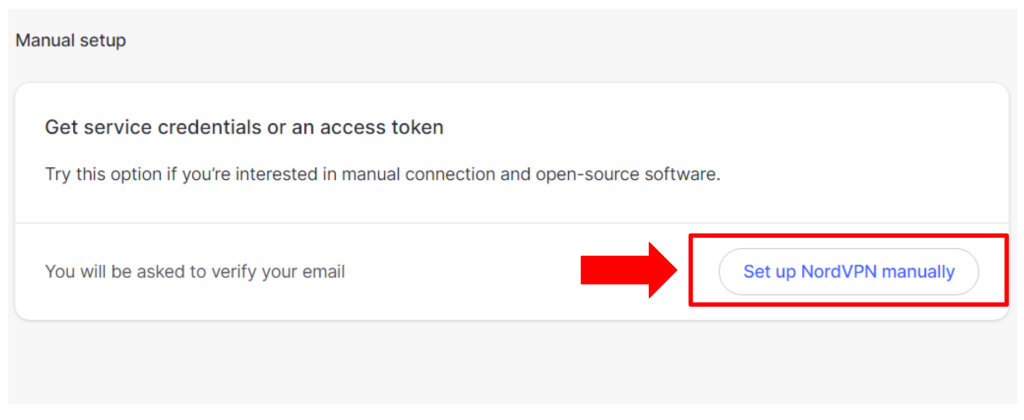
- Open your Nord Account dashboard to find your service credentials.
- Scroll down and click on ‘Set up NordVPN manually.’
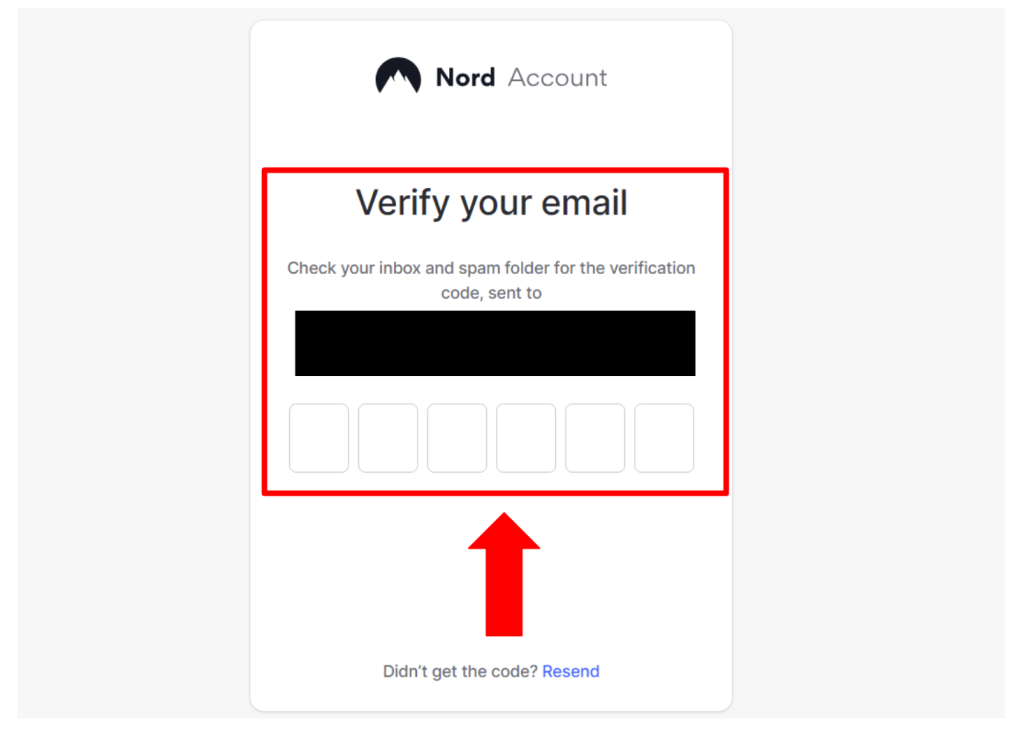
- Enter the verification code received to your email associated with NordVPN.
- Copy your credentials using the ‘Copy’ buttons next to ‘Username’ and ‘Password.’
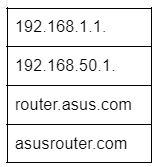
- Access your ASUS control panel using one of these addresses:
- Enter your router’s credentials (the default username and password is ‘admin’).
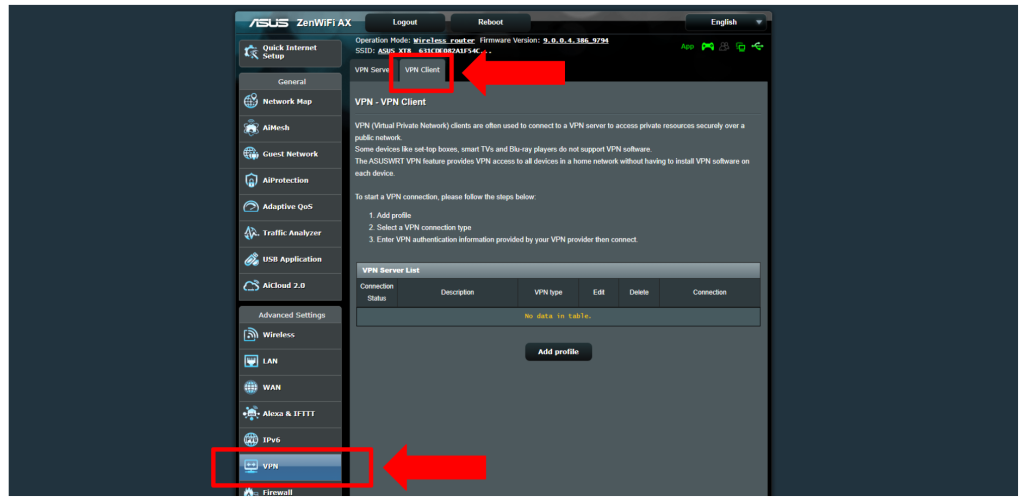
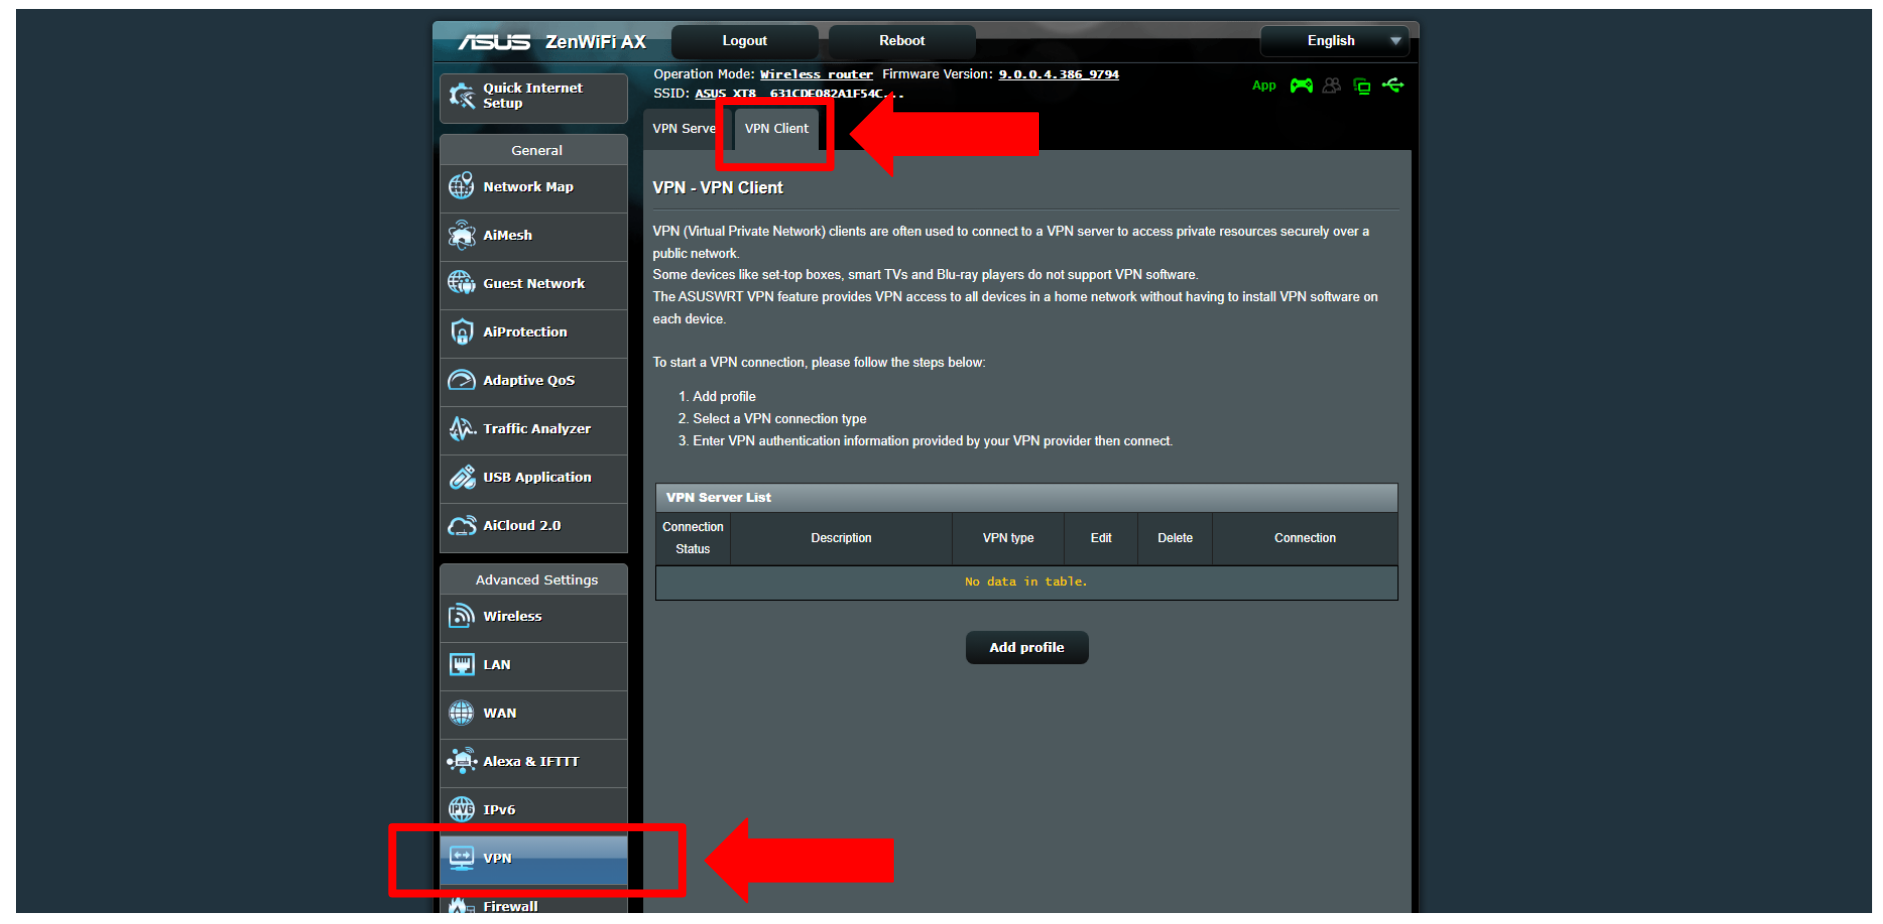
- Select ‘VPN’ from the left bar under Advanced Settings.
- Open the ‘VPN Client’ tab from the top.
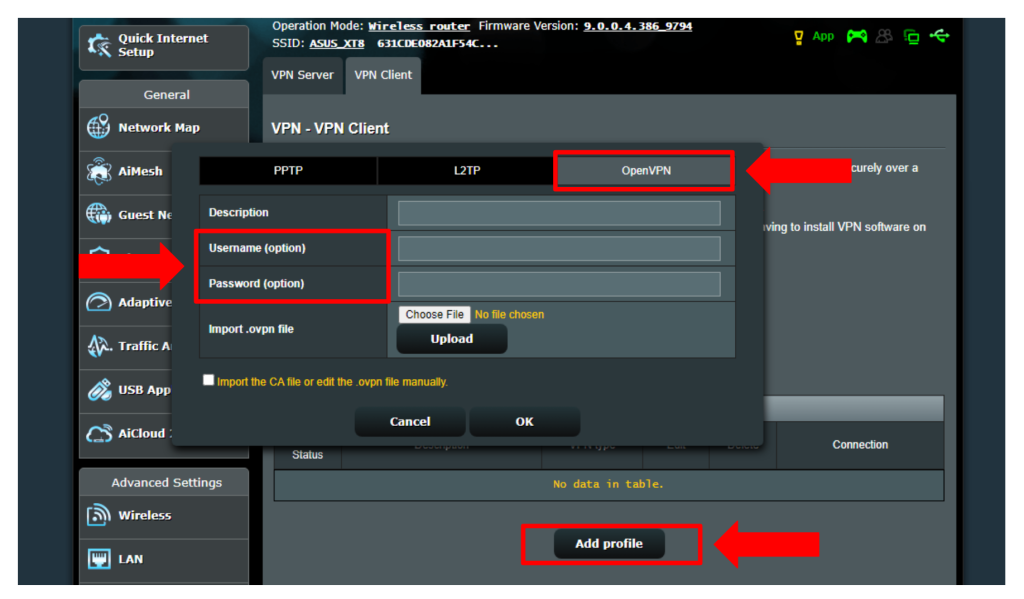
- Click the ‘Add profile’ button below ‘VPN Server List.’
- Choose the ‘OpenVPN’ tab in the pop-up window.
- Paste NordVPN credentials copied earlier in the ‘Username’ and ‘Password’ fields.
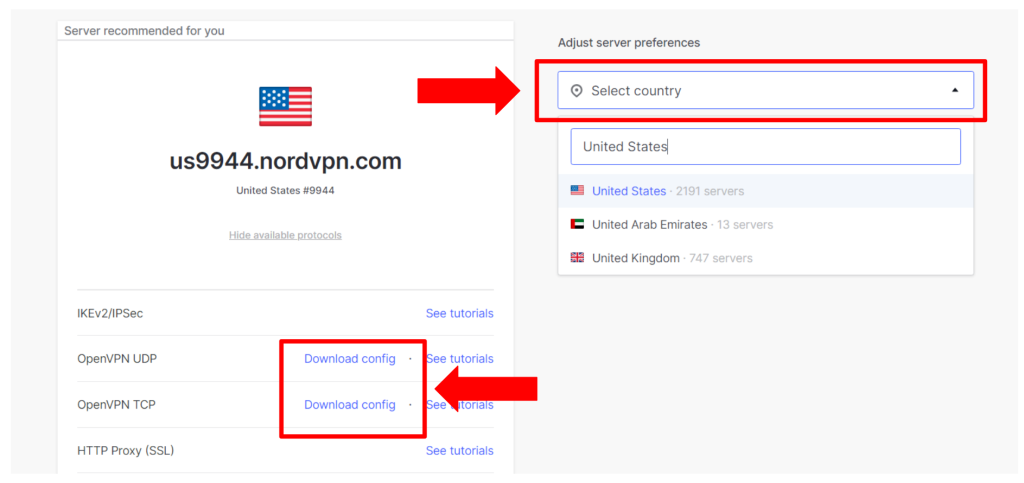
- Open NordVPN’s server tool and pick a server.
- Click ‘Download config’ to download the config file for OpenVPN (TCP or UDP).
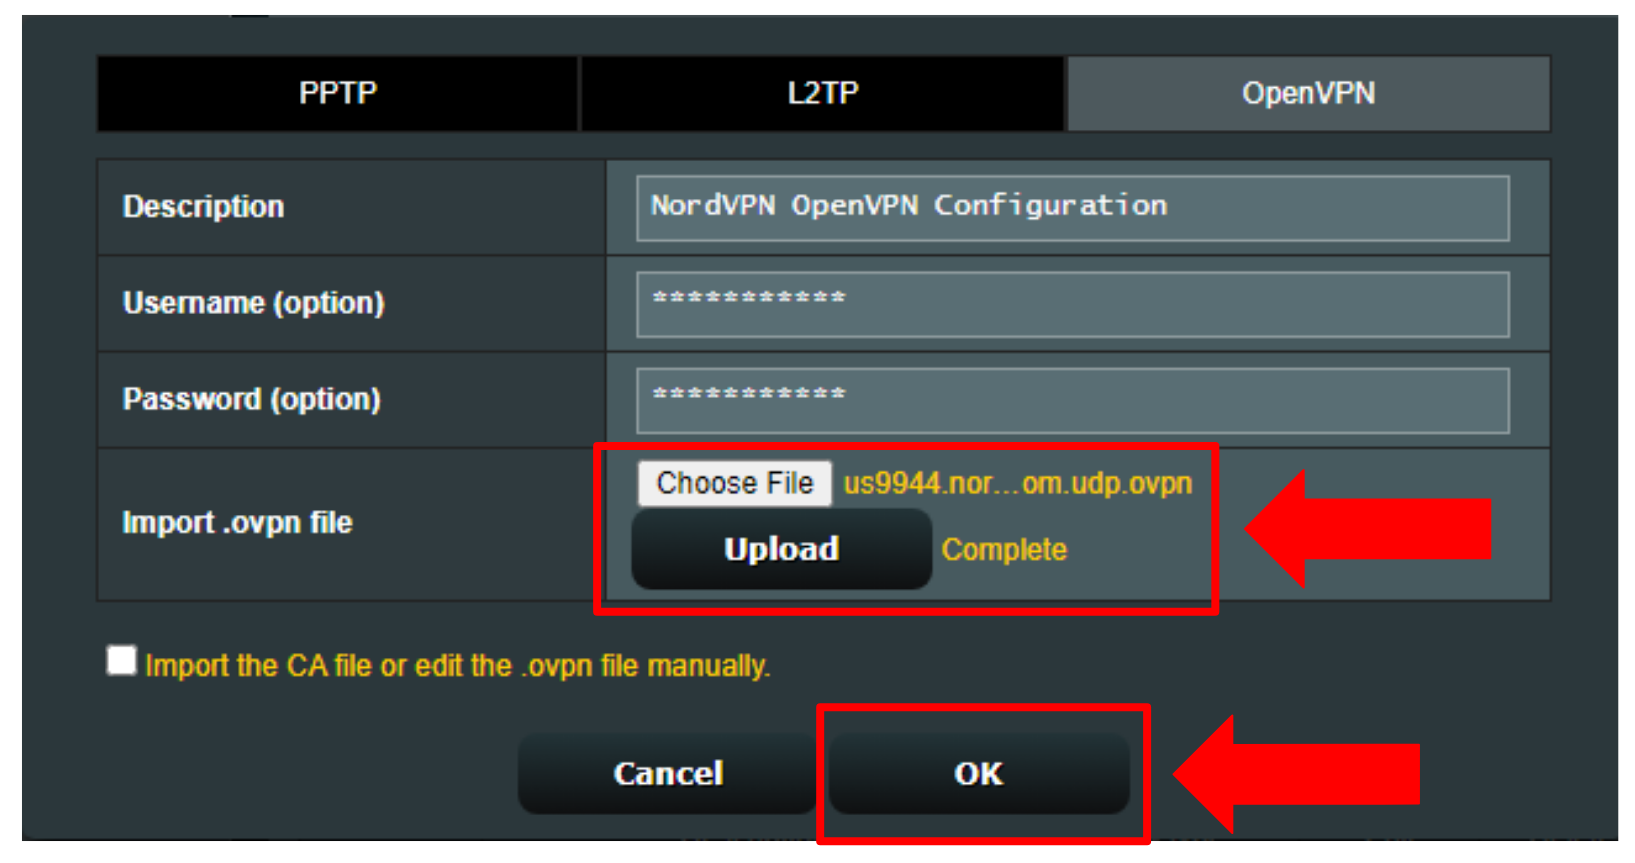
- Return to the ASUS router’s control panel and click ‘Choose File.’
- Import the configuration file you downloaded (it will have a .ovpn extension).
- Click the ‘Upload’ > ‘OK’ buttons.
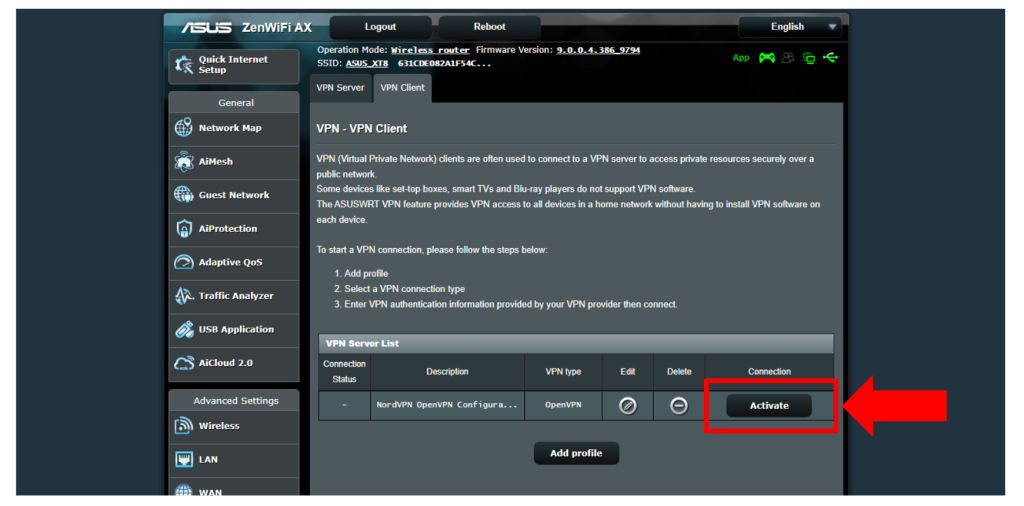
- Now click the ‘Activate’ button to connect the router to NordVPN.
- Verify if a blue check is visible under ‘Connection Status.’
- To disconnect the VPN, click VPN > Client > Deactivate.


Final Thoughts
Overall, it is quite easy to set up NordVPN on ASUS routers. Simply access the router’s admin panel and import the OpenVPN config file of your chosen VPN server, which you can download from your NordVPN account’s dashboard.
ASUS routers usually come with a built-in OpenVPN client. Hence, in most cases, you can configure and use NordVPN on your ASUS router without much effort. If your router does not support OpenVPN, you’ll have to flash it with a supported firmware, which is tricky. In that case, it is recommended that you get a router that works with OpenVPN.
We hope this article helped you set up NordVPN on your ASUS router. Do share your experience with us in the comments below.
Related