How to Install Kodi on Windows in 2025
Kodi is now a 64-bit application, which means that you can install Kodi on Windows manually, and you can also rely on Microsoft's App Store (available on Windows 10). Both of those installation methods are incredibly simple, and they take only a few moments of your time.
You'll get to learn all of the possible ways to install Kodi on Windows right now. And, of course, we'll guide you one step at a time.
Requirements for Installing Kodi on a Windows
The good news is that Kodi is compatible with a wide range of systems, and almost anyone can install and use this application. Here are the official requirements for Windows PCs.
- Windows Version: You need to run Windows 7 or higher. Kodi isn’t available on Windows XP/Vista.
- CPU: Almost any x86 or x64 processor will do the job. This includes Intel's Pentium 4, AMD's Athlon 64, or any newer CPU. In other words, you won’t have any issues running Kodi if your computer was made during the last 10 years.
- RAM: You need to have at least 1GB of RAM. It’s recommended to have at least 2GB to make sure you can run Kodi alongside other applications on your PC, without performance issues.
- GPU (Graphics): Any GPU that supports DirectX version 9.0c will do that job. Just like with the previous requirements, any GPU made in the last 10 years or so will be able to run Kodi.
- Available Space: On its own, Kodi requires between 100 and 200MB of space. However, make sure to have enough free space if you’re going to use Kodi to play locally stored movies and TV shows.
How to Install Kodi on Your Windows PC
At the moment, there are 3 methods to get started with Kodi on Windows computers, as you can see just below.
- Method #1: Install Kodi on Windows Manually (Using Its EXE File)
- Method #2: Install Kodi on Windows using Microsoft's App Store
- Method #3: Install Kodi on Windows using 'Portable Mode'
Method #1: Manual Installation (Using EXE File)
This first method of installing Kodi on Windows will instruct you to install the application manually - done using its EXE (executable) file. Go through the following steps.
- First, download Kodi’s installation file from its official website.
- Depending on the capabilities of your system, you can either go for the 64-bit or 32-bit version of Kodi. Most of today's Windows PCs run 64-bit applications, so feel free to go with that.
- Once you download the EXE file, you need to find it. The majority of users will find the file on their desktop. However, it can be also placed in the 'Downloads' folder.
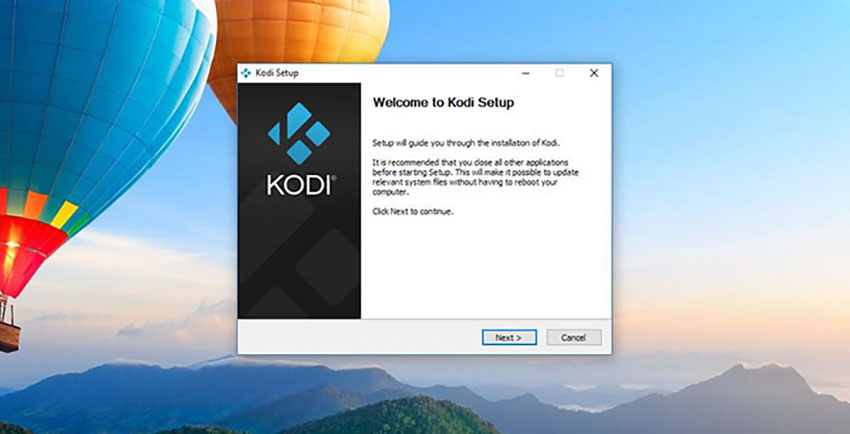
- Double-click on the downloaded EXE file. An installation wizard should appear. You’ll need to go through several steps until you see Kodi being installed. Once the installation is done, you’ll see an option to run Kodi. Check this option and finalize the installation.
- That's it! Feel free to launch Kodi (it should be available as a shortcut on your desktop), and then add your media library, install add-ons or anything else. Enjoy!
Method #2: Use the Microsoft App Store
Computers powered by Windows 10 have access to the Microsoft App Store. And yes, this is yet another way to install Kodi on Windows, as you can see just below.
- Open the Microsoft Store.
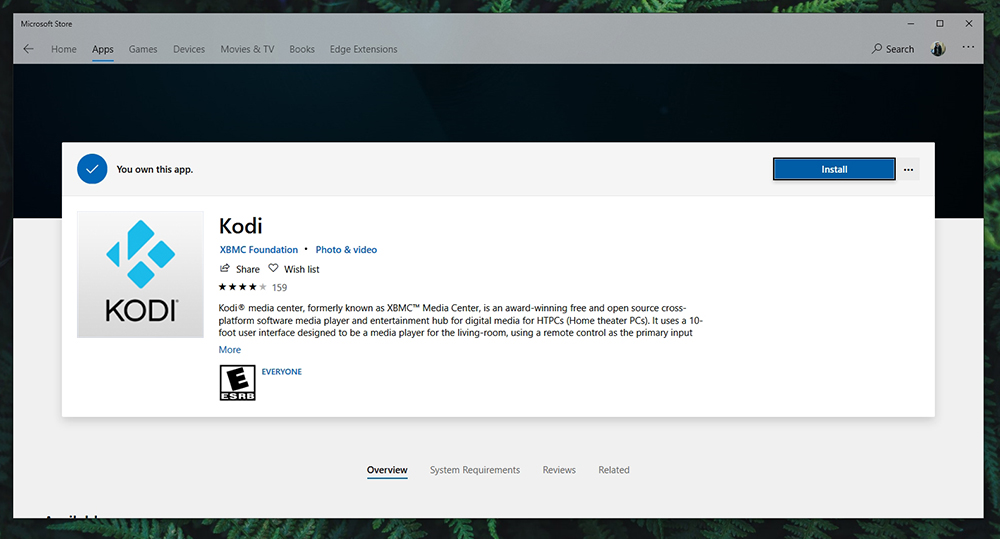
- Once the Microsoft Store launches, use the 'Search' field. Type in 'Kodi' and hit Enter. After a couple of seconds, Kodi will be displayed among the search results. There will be different options present, so make sure to install the app created by 'XBMC Foundation.'
- When you click on Kodi’s icon, you will be taken to its overview. Since this app is free of charge, all you need to do is click on the 'Get' button. Windows might ask you to confirm your decision or authenticate your Microsoft account credentials.
- Kodi will be downloaded and installed in the background. Once done, feel free to launch Kodi from Microsoft's Store or open the Start Menu and launch the application from there.
Method #3: Install/Use Kodi in 'Portable' Mode
Finally, here's how to install Kodi on Windows by using the 'portable' mode. Please note that you need a USB drive for this method to work.
- First, you need to download Kodi’s EXE (executable) file. Use the provided link and then click on the 'Installer (64bit)' button to download the file.
- Launch the EXE file and the 'Installation Wizard' will appear. Instead of hitting the 'Next' button, be careful this time. You’ll be asked where you’d like to install Kodi. Click on 'Browse' and navigate to your USB drive. Finalize the installation and make sure to STOP before exiting the process.
- The final step of the Installation Wizard will allow you to 'Run Kodi.' Make sure not to use this option since you MUST NOT run Kodi at this point. Instead, leave this option blank and exit the installation.
- Now, navigate to your Kodi files. Since you chose to install it on a USB, go to this directory. Inside, you’ll find a file named 'Kodi.exe.' Create a shortcut of that file. This can be done by right-clicking on this file and selecting 'Send to Desktop (Create Shortcut).'
- Find the newly created shortcut. Right-click on it and select 'Properties.' This is where you’ll see a field named 'Target.' You need to add '-p' after any other characters found in this field. For example: 'F:Kodikodi.exe -p’. Make sure you’ve made this correction and save the change.
- Finally, launch Kodi. Now, every file and addon you install will be saved within the Kodi folder itself. This can include scripts, addons, a local library of content, skins, and user data. You can find these files in the 'portable_data' folder. What that also means is that all those changes will be saved to your USB drive. You can use it on different computers without any issues.
Want to Learn More About Using Kodi?
We sincerely hope that by now you're running Kodi on your Windows PC. Next, it's time to expand your knowledge by using the resources found below.
- How to Enable Unknown Sources on Kodi
- Get the Best Kodi Addons
- Get the Best Kodi Skins
- How to Change Skins on Kodi
- How to Create a Library in Kodi
- How to Import Videos to Kodi
- How to Add Music to Kodi
- How to Add Photos to Kodi
- How to Set Up Kodi Profiles
- How to Add Subtitles to Kodi
Dear Kodi fans, that would be all on how to install Kodi on Windows. If you have any questions regarding this process, feel free to let us know using the comments section below. And lastly - thank you for reading!

