How to Install Kodi on Apple TV in 2025
Apple TV is such a great platform, and it's a real shame that you can't download Kodi from the tvOS' App Store. However, that doesn't mean you can't use this app - you just need a trustworthy guide to teach you how to install Kodi on Apple TV without jailbreaking the device.
First of all - know that running Kodi on an Apple TV is possible (and yes, Kodi v19 comes as a native tvOS app). However, be prepared to spend some time tinkering with both Kodi's installation file and your Apple TV. So, let's dive right in, shall we?
Check These Official Requirements First!
Before you go any deeper into this process, it's wise to check Kodi's official requirements, ensuring that you have the right hardware and software. Take a look just below.
- Apple TV (HD - released in 2015) or Apple TV 4K (released in 2017).
- The latest tvOS version available (tvOS 14).
- The latest version of Kodi for tvOS - DEB File (ARM64);
- Cydia Impactor - for the method that includes this tool.
- Xcode and iOS App Signer - for the method that includes Xcode.
How to Install Kodi on Apple TV
We've prepared 3 installation methods, as you can see just below. These give you plenty of options in terms of choosing an installation path that you're comfortable with. Check below.
- Method #1: Install Kodi on Apple TV via Cydia Impactor
- Method #2: Install Kodi on Apple TV via Xcode
- Method #3: Install Kodi on Apple TV 4K (Wirelessly)
Method #1: Install Kodi on Apple TV via Cydia Impactor
Kodi's tvOS installation file is a DEB file. Cydia Impactor works with IPA files, so we'll first covert the installation file and then send it to your Apple TV. Go through the following steps.
- First, make sure that you have Kodi's tvOS DEB file. So, if you haven't done that already, proceed to download Kodi from its official website.
- Make sure that you have an application that unzips files. For Mac, one of the best options would be The Unarchiver. For Windows, we recommend 7-Zip. Use one of these to unzip Kodi’s DEB file.
- Among the unzipped files, find the file named 'data.tar.' Once again, unzip this file.
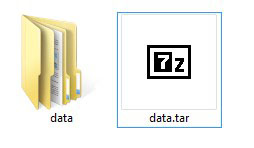
- You should have a folder named 'data.' Open it and navigate to the Applications folder.
- Inside, you’ll find another folder named 'Kodi.app.' Don’t enter this folder! Instead, create a new folder next to the existing 'Kodi.app' folder. Name it 'Payload.'
- Drag and drop the 'Kodi.app' folder into the Payload folder;
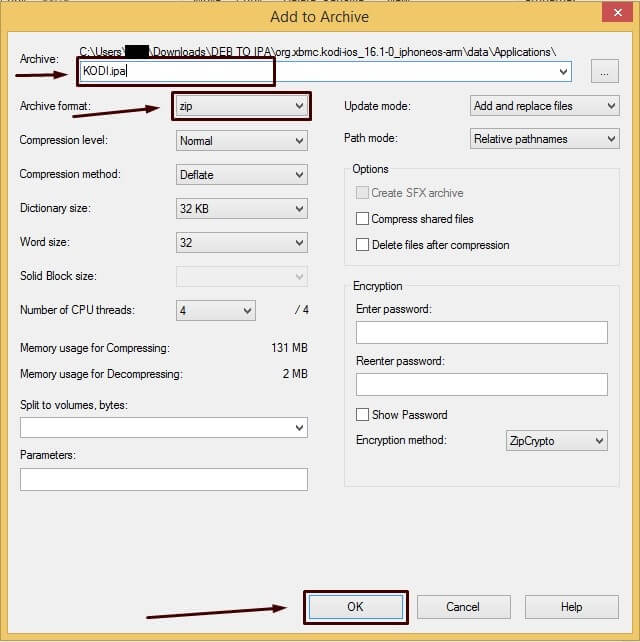
- Now we need to create a new ZIP file. On Windows, right-click on the Payload folder and choose 7-Zip > Add to Archive. If you’re using a Mac, here’s a handy guide on how to unzip and zip folders.
- Those who use 7-Zip will see a new dialog box. It's crucial to choose 'ZIP' as the archive format, as well as name your file 'Kodi.ipa.' Mac users will automatically end up with a ZIP file. They only need to rename the file to 'Kodi.ipa' as the last step.
By now, we've talked about creating Kodi's IPA file. We’ll use it to install Kodi on Apple TV via Cydia Impactor, so keep on reading.
- Connect your Apple TV to your computer (via a USB cable) and make sure it’s powered on.
- In case iTunes automatically opens, make sure to close it.
- Open Cydia Impactor. You’ll need to unzip it in case you haven’t done that already.
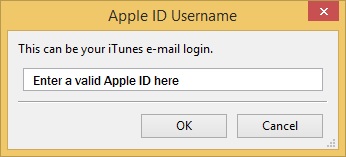
- You need to drag and drop the Kodi.ipa file to Cydia Impactor's interface. You’ll also be asked to enter your Apple ID. Fill out the required fields and click on 'OK.'
- After a few minutes, Cydia Impactor will push the Kodi application to your Apple TV. Disconnect the device from your computer. That's it - you have installed Kodi on your Apple TV!
Method #2: Install Kodi on Apple TV via Xcode
Here's how to install Kodi on Apple TV by using Xcode, which is available only for macOS. Keep in mind that the following procedure can be somewhat complex, so make sure to pay close attention to each of the following steps.
- Connect your Apple TV to your Mac - if you have the fourth-generation model (Apple TV HD).
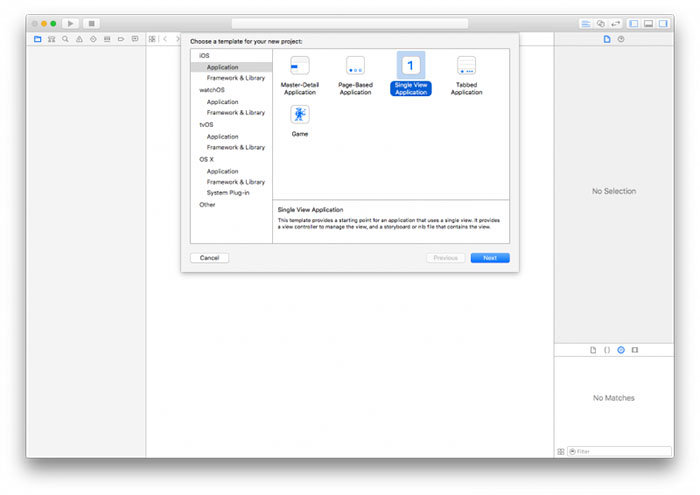
- Launch Xcode. Click on tvOS > Application using the left-placed sidebar. Then, choose 'Single View Application' on the right, and proceed.
- Provide a name for the app. You can go with 'Kodi.' Create a unique identifier as well.
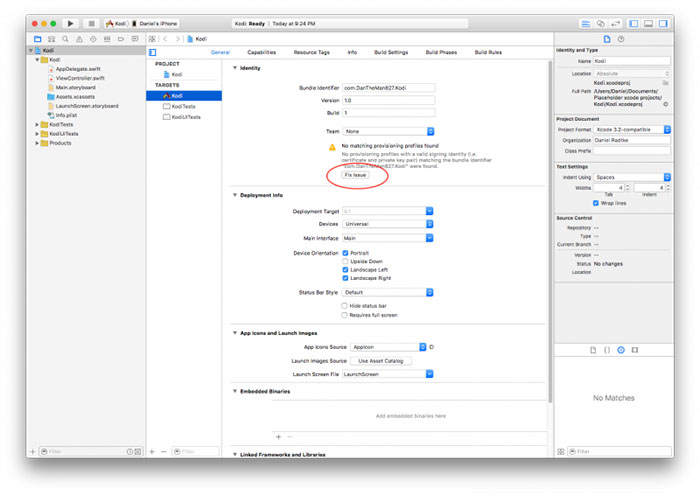
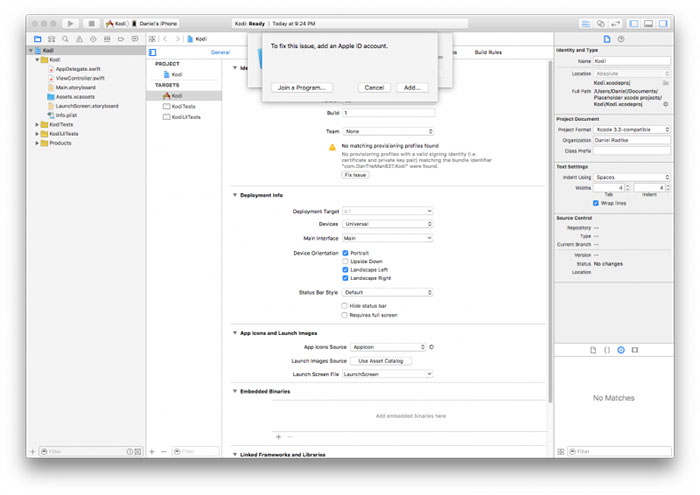
- Once Xcode loads, you might see a warning about not having a provisioning file. Click on the button that says 'Fix Issue.'
- You will see that you need to enter your Apple ID to fix this issue. So, go with your standard Apple ID. It’s even better if you have a Developer ID. Keep in mind that if you have a standard Apple ID, you will need to reinstall Kodi every seven days. Developers can use the app for up to a whole year.
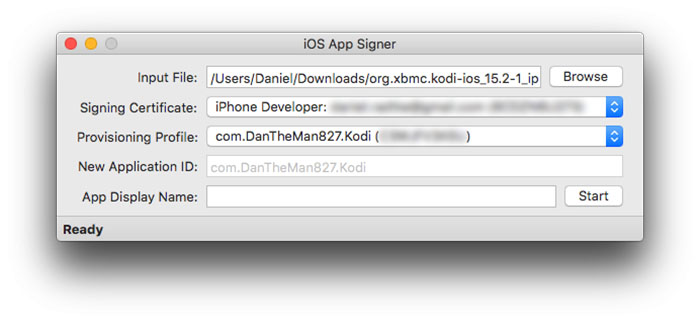
- Now you need to open the iOS App Signer. This is a simple application that comes with several fields that you need to fill out. In the first one, named 'Input File,' navigate to your Kodi's installation file. You don’t have to worry about fields like 'Signing Certificate' or 'Provisioning Profile.' At the bottom, you can find the 'App Display Name' field. Type in 'Kodi' and click on 'Start.'
- After some time, the iOS App Signer will unpack Kodi's installation data and save a new file.
- Go back to Xcode. From the top-placed menu bar, go to 'Window' > 'Devices.'
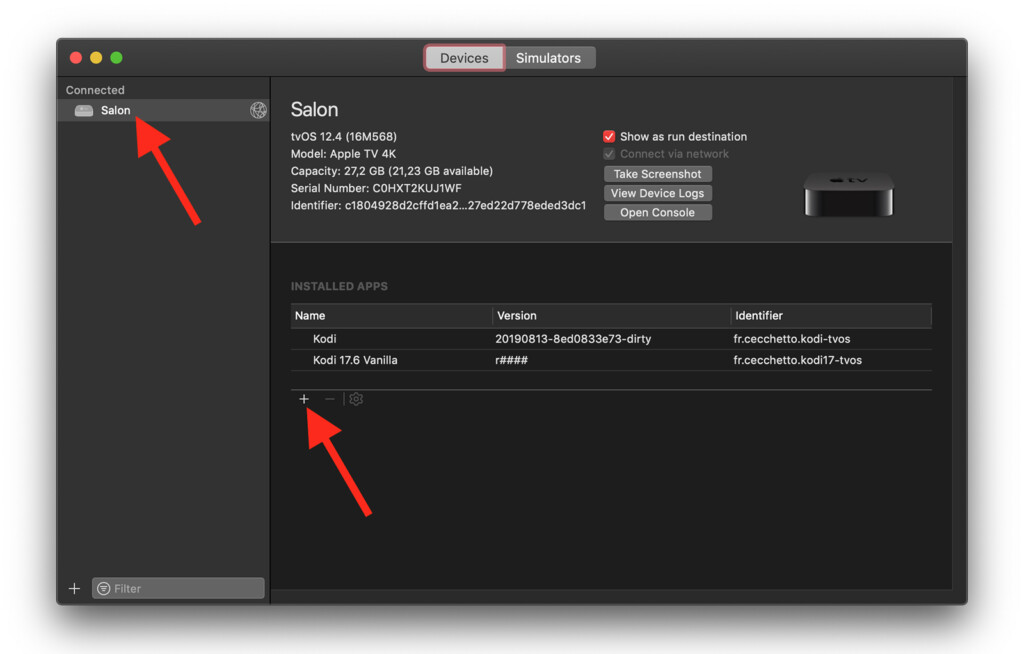
- Find your Apple TV in the sidebar (which should be connected to your Mac and powered on). On the right-hand side, click on the '+' button. Now, find the newly created Kodi file.
- Xcode will do the rest. Once the process is completed, you can safely disconnect your Apple TV. Connect it to your TV, power it one, and you should see the application installed.
Method #3: Install Kodi on Apple TV 4K Wirelessly
To install Kodi on the Apple TV 4K, you need to use our previously explained method (Xcode). However, instead of using a cable to connect your Apple TV to your Mac, you need to make a wireless connection. So, here's what you need to know.
- On your Apple TV 4K, go to Settings > Remotes and Devices > Remote App and Devices.
- On your Mac, open Xcode and go to Windows > Devices and Simulators using the menu bar.
- In case your Mac and your Apple TV 4K are physically close, you'll see a button to pair your Mac with your streaming device. The button will say 'Pair With (Your Name) Apple TV.' Click on it.
- Even if you don't see the pairing button, select your Apple TV from the left-placed sidebar.
- Then, click on '+' on the right side of the interface.
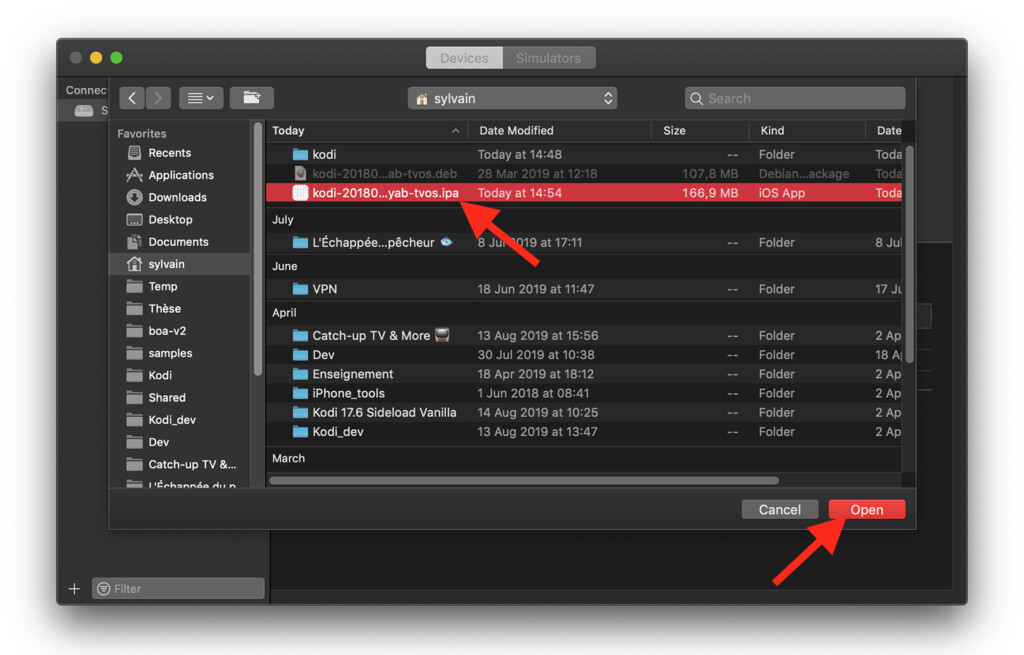
- Select Kodi's IPA installation file and click on 'Open.'
- The application will now transfer to your Apple TV. That's it!
Want to Learn More About Using Kodi?
While you're here, we want to take this opportunity to present a few additional articles that we are sure you'll find useful. So, take a quick look.
- How to Enable Unknown Sources on Kodi
- Get the Best Kodi Addons
- Get the Best Kodi Skins
- How to Change Skins on Kodi
- How to Create a Library in Kodi
- How to Import Videos to Kodi
- How to Add Music to Kodi
- How to Add Photos to Kodi
- How to Set Up Kodi Profiles
- How to Add Subtitles to Kodi
We hope that you've managed to install Kodi on Apple TV using this guide. Even though this method isn't as simple as we hoped it to be, this is the only way to successfully install Kodi on Apple TV. Thanks for reading!


