How to Install Kodi on a Mac in 2025
We all know that Kodi's development team is hard at work when it comes to supporting a vast number of platforms. As you can already guess, you can install Kodi on your Mac as a native application, taking full advantage of advanced macOS' gestures and controls. And yes - we're here to teach you how to get started with this home theater software.
This entire procedure won't take more than a few moments of your time. However, we want you to go into it prepared, so make sure to read this guide carefully, starting with the special segment just below.
Official Requirements for Running Kodi on macOS (OS X)
In general, Kodi is a lightweight application. It doesn’t need the latest processor or a powerful graphics card. Here’s an overview of the official requirements regarding running Kodi on a Mac.
- CPU: Kodi runs on both x86 and x64 processors. Since Macs are powered by 64-bit processors, even some dated Macs will run Kodi just fine. The same applies to 'Apple Silicon' Macs.
- GPU: This application requires a GPU (video card) that supports hardware video decoding and OpenGL 2.0. Even very old GPUs support those features. Macs are powered by the latest generation of integrated and dedicated GPUs that have a lot of power. Running Kodi isn’t an issue for them.
- RAM: Your Mac needs to have at least 2GB of RAM. However, it’s recommended to have 4GB of RAM for your operating system's overall stability.
- Available Space: Kodi takes around 200MB of your disk's space, which isn’t much. Still, you need to have a lot of free space if you are planning on importing locally stored movies and files. If you already have that library on your computer, Kodi will simply use those files without copying them.
- Operating System: Your Mac needs to run OS X 10.9 or higher. However, to ensure there are no software conflicts, we recommend updating your Mac to the latest available macOS version.
How to Install Kodi on a Mac
As said earlier, there's only one way to install Kodi on a Mac, and that is by downloading its DMG file (from the official website). Here are the required steps.
- The first step includes downloading Kodi’s DMG file. So, go to the official Kodi website.
- In the top-right corner, click on the blue-colored 'Download' button.
- Scroll down until you see a section called 'Select Your Platform.' Select 'MacOS.'
- A new pop-up window will appear. Feel free to click on the button that says 'Installer (64bit).'
- Your Web browser will now download the file. Once this process completes, find the file in your 'Downloads' folder. Double-click to open it.
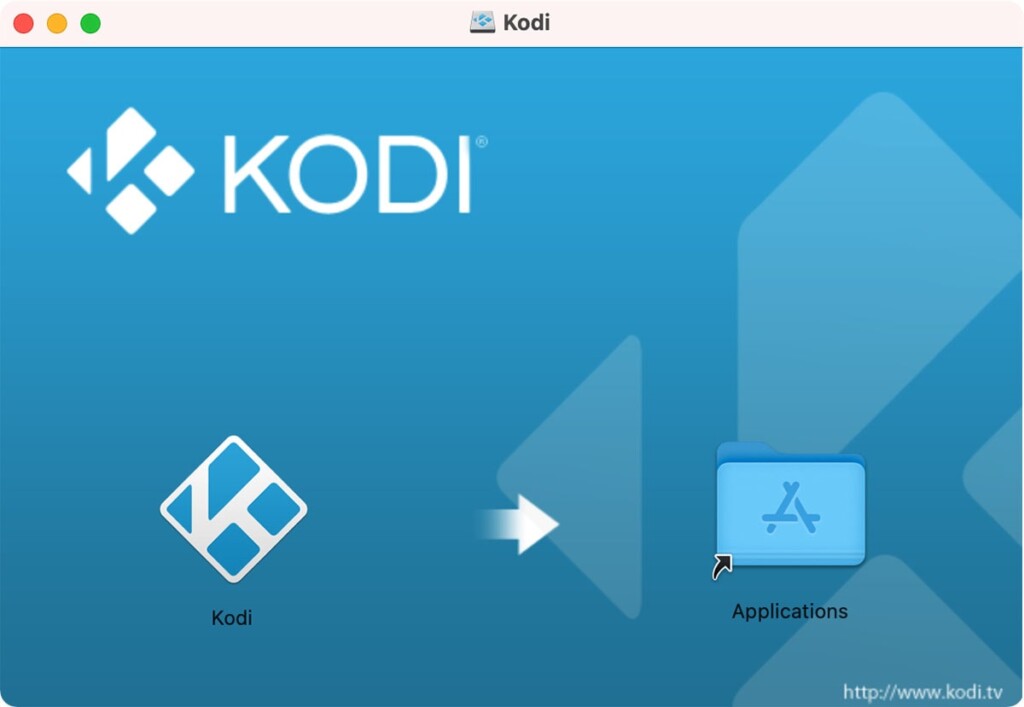
- What you should see now is a blue-colored window that says 'Kodi.' Drag-and-drop Kodi’s icon onto the 'Applications' folder – both of which should be visible on your screen. After a couple of seconds, you’ll successfully install Kodi on your Mac.
- Kodi can be found in the 'Applications' folder. You can navigate to this folder by opening Finder and picking 'Applications' from the left-positioned sidebar.
- To open Kodi, double-click on it. You might be asked to confirm your decision (since Kodi is installed from an online source), so feel free to proceed and open Kodi. That's it!
Want to Learn More About Kodi's Features?
Aside from teaching you how to install Kodi on your Mac, we also want to give you a few pointers on how to use it. With this said, we think you'll find the following resources to be helpful, so check them out.
- Enable 'Unknown Sources' on Kodi
- Get the Best Kodi Addons
- Get the Best Kodi Skins
- Change Skins on Kodi
- Create a Library in Kodi
- Import Videos to Kodi
- Add Music to Kodi
- Add Photos to Kodi
- Set Up Kodi Profiles
- Add Subtitles to Kodi
This is where we conclude our guide on getting started with Kodi on a Mac. In case you have any questions, don't hesitate to post a comment below. And lastly, thank you for reading!


