How to Update Apps on Your iPhone 13, Mini, Pro, and Pro Max
Keeping your iOS apps up-to-date is more important than you might think. Aside from bringing you the latest bug fixes and security improvements, app updates also bring new features. With that said, know that there are two ways to approach updating iOS apps. So, here's everything you'll want to know on how to update apps on your iPhone 13.
How to Update Apps Manually on iPhone 13
If you like to check what's new in your favorite apps, you'll want to update them manually, using the iOS App Store. Here's how that is done.
1. Using your iPhone 13, launch the 'App Store' app.
2. Then, click on your profile image. You'll find it in the top-right corner.
3. To check for updates, swipe from the top portion of the screen.
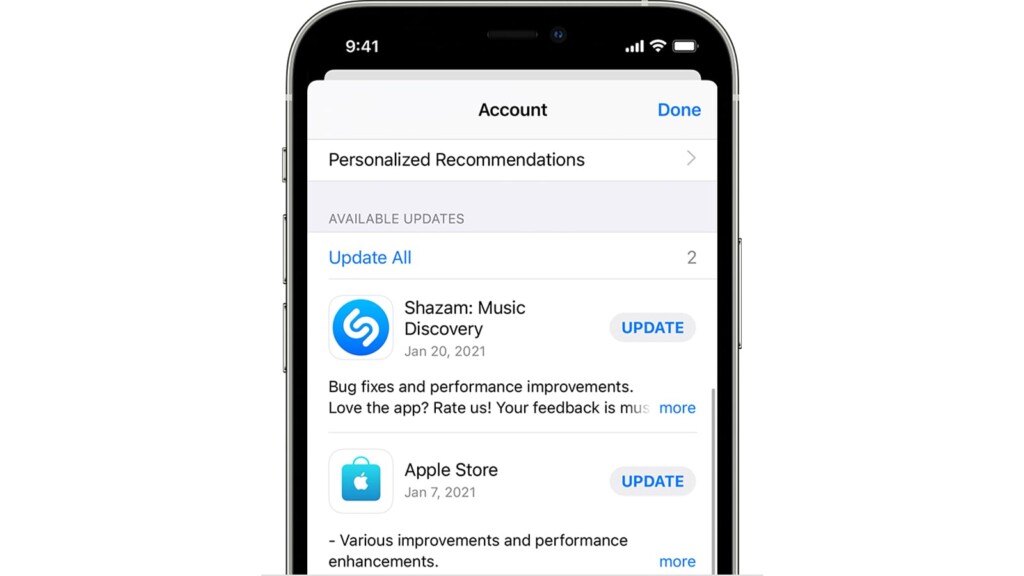
4. If any updates are available, you should see them on your screen right now.
5. You can update individual apps by tapping on 'Update' next to their names.
6. You can also update all apps by tapping on 'Update All.'
Once you update apps, iOS will place a small blue circle next to their title (just below each apps' icon on your home screen). That is an indicator that the app has been recently updated. Once you open the app, the indicator will disappear.
How to Update Apps Automatically on iPhone 13
If you wish to automate the process of updating your iOS apps, you can set the App Store to handle that for you. So, you'll want to do the following.
1. Using your iPhone 13, launch the 'Settings' app.
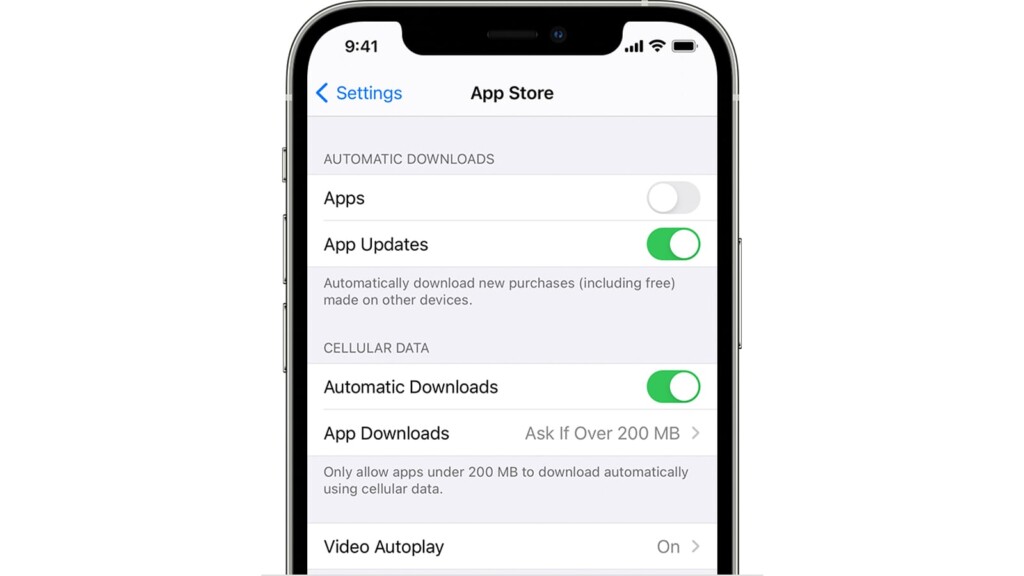
2. Scroll down and tap on 'App Store.'
3. Now, look for the 'Automatic Downloads' section.
4. Make sure to flip the switch next to 'App Updates.'
5. That's it! Feel free to exit the Settings app and return to the home screen.
Once you set the App Store to update your apps automatically, that process will run in the background. Also, it will rely on your Wi-Fi connection, so keep in mind that your iPhone will download data without asking for your permission.
That would be all on how to update apps on your iPhone 13. If you have any questions, let us know via the comments section below. And lastly, thanks for reading!

