When you purchase through links on our site, we may earn an affiliate commission. Here’s how it works.
How to Share a VPN Connection From Android to PC
The Internet went down on your PC, and now you can't finish that episode of your favorite series on Netflix? Do not worry. Once you learn how to share your VPN connection from your Android device to your PC, these temporary network drops will no longer interrupt your relaxation time.
Here's what you need to get started:
- A Windows or Mac laptop or PC
- An Android smartphone (Android 5.1+)
- A USB cable
- A fast and capable VPN for Android (we recommend ExpressVPN if you're new to VPNs)
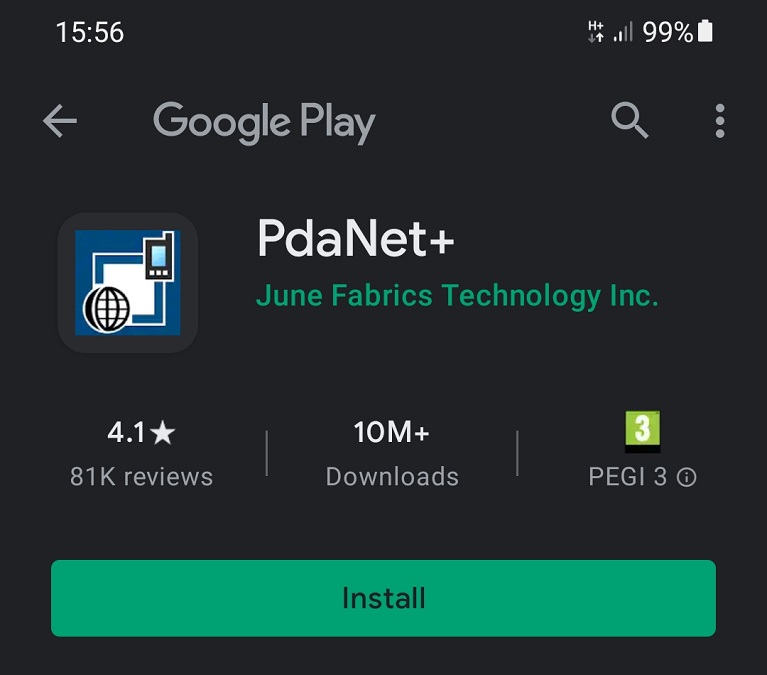
Note that you don't need to root your Android device or anything of the sort. All you have to do is download and install a free app called PdaNet+ on both your PC and Android. Here are the download links for Android (Google Play Store + Direct apk download), Windows, and Mac.
How to Share VPN Connection From Android to Windows PC
Connect your Android phone to your PC using a USB cable, turn off your default Wi-Fi or Ethernet connection on your PC, then follow the steps below.
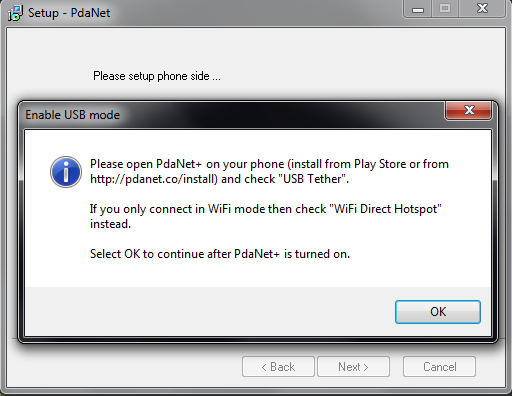
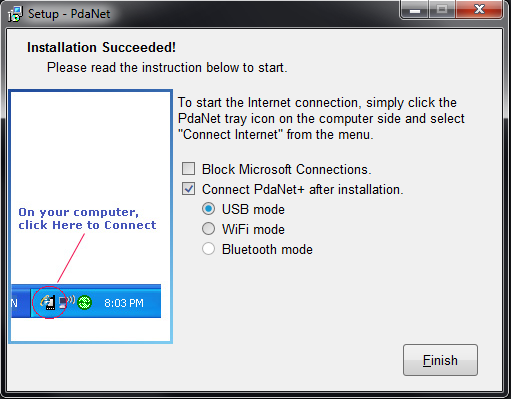
1. After you've downloaded and installed PdaNet+ on your Android device, proceed to install it on your Windows PC as well. You'll receive the following prompt (don't click OK yet):
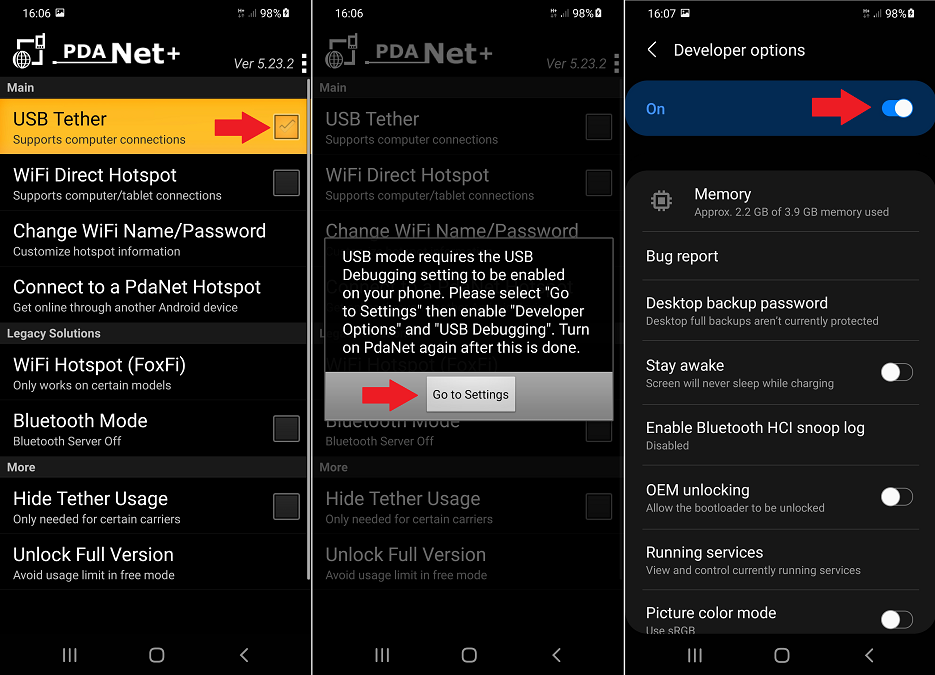
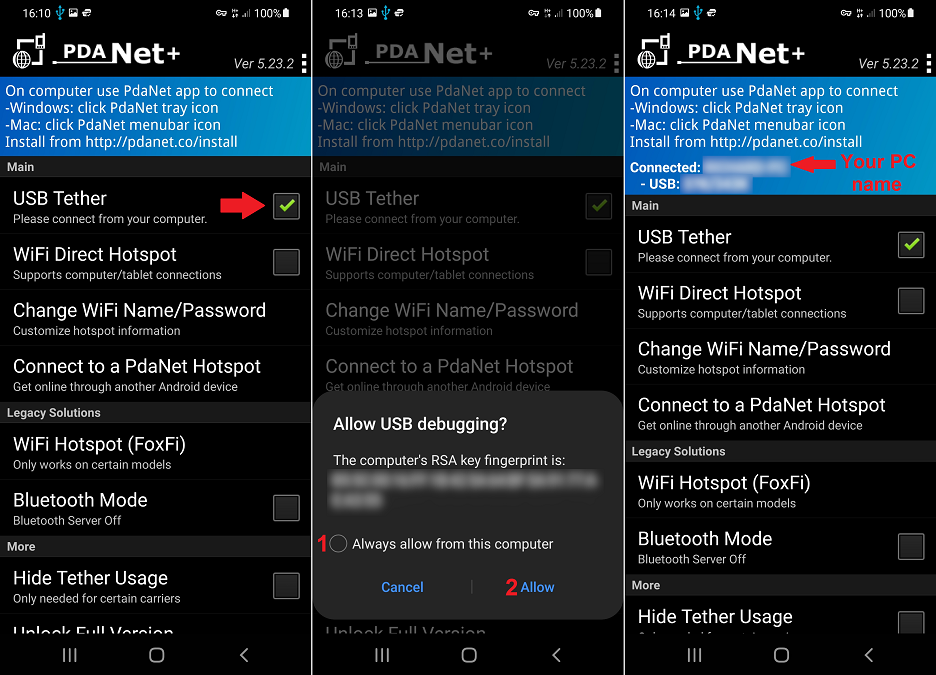
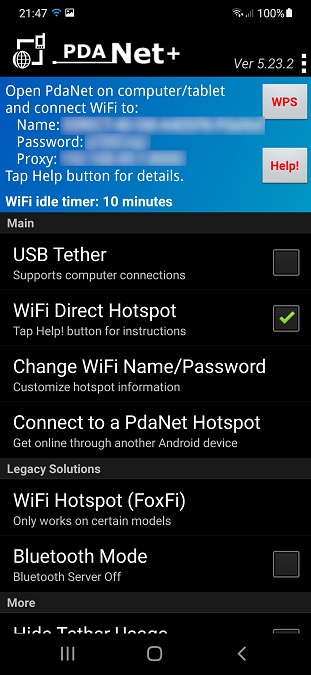
2. Open PdaNet+ on your phone and select USB Tether. You'll be prompted to enable Developer options on your Phone. Tap on Go to Settings, and you'll be taken to the exact menu you need - toggle Developer options On.
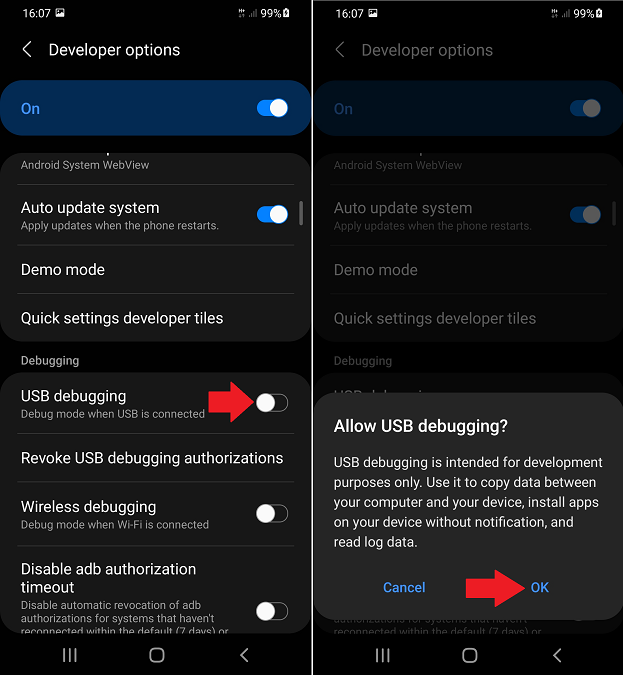
3. While still in the Developer options menu, scroll down until you find the USB debugging option. Toggle it on and press OK to allow it.
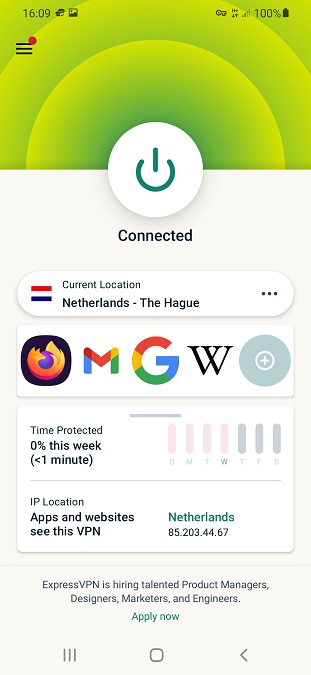
4. Turn on your Android VPN app and connect to the country of your choice.
5. Now, you can finally enable USB Tethering in PdaNet+. Launch the app and tap the checkmark to enable the option. Check the option that says "Always allow from this computer", then press Allow.
If you've followed the steps correctly up to this point, you should see the name of your Windows PC in PdaNet+ on Android.
6. Now, you can click on OK in the prompt from step 1 on your Windows PC. Allow the installation to continue (press Allow/ Install on any Windows security prompts). When the setup is complete, ensure that Connect to PdaNet+ after installation and USB mode are selected.
How to Share VPN Connection From Android to Mac PC
Before you proceed, do the following on your Android device:
- Enable Wi-Fi.
- Turn on Location settings.
- Connect to your VPN app.
Install the PdaNet+ app on your Mac, and don't click OK (when prompted to enable USB mode) until you've set things up on the Android app.
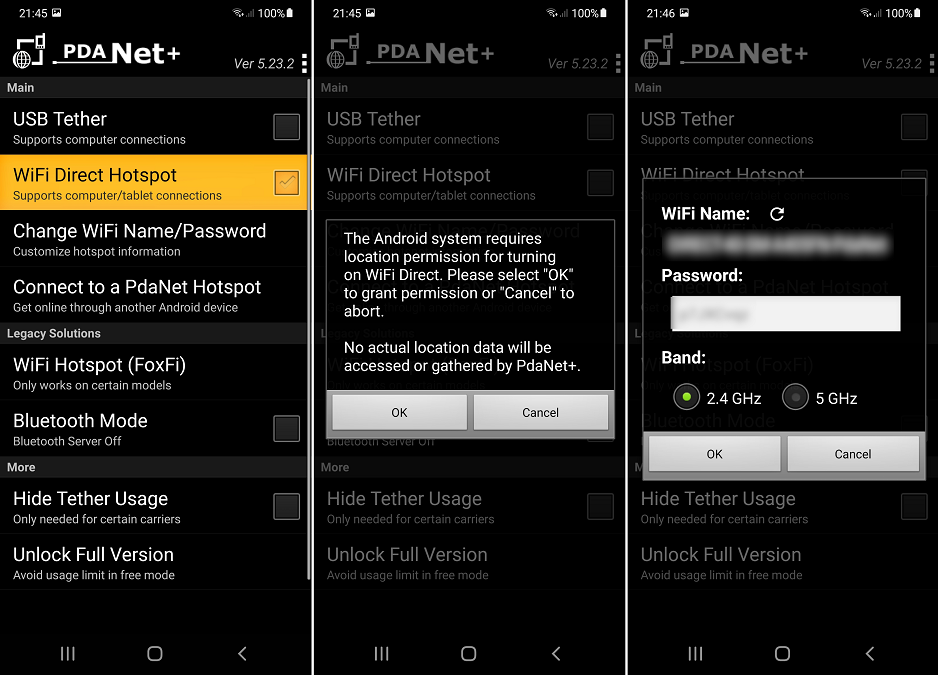
1. Now, instead of using the USB Tether option, Mac users (at least on Catalina and Big Sur) need to select the WiFi Direct Hotspot setting instead. Take note of the Wi-Fi hotspot name and password for later. Feel free to edit the default password.
2. You should see your newly created hotspot in PdaNet+ like this.
3. Back to the Mac side of things. Select OK to continue with the installation. The installer will attempt to discover a USB connection. Select Skip USB to use Wi-Fi mode instead.
4. In the "Installation Succeeded!" prompt, ensure that "Connect PdaNet+ after installation" is checked and select WiFi mode. Then click Finish.
5. In the WiFi Connect prompt, select the PdaNet+ hotspot you've created from the list and input your password. Click Connect Wi-Fi when done.
Alternate methods
- Open the Network settings on your Mac and select the Wi-Fi adapter.
- Click on "Advanced...", then on "Proxies".
- Check the box that says Automatic Proxy Configuration. Copy and paste "http://192.168.49.1:8000" into the URL box.
- Click OK and then "Apply".
Now connect to the PdaNet+ hotspot (starts with DIRECT-).
If you find that this method is unreliable (as other users have pointed out), check out our other guide - how to share a VPN connection on Android without root - which uses Every Proxy instead of PdaNet+.
How to Stop Sharing Your VPN Connection
Want to use your default connection again? Simply right click the PdaNet icon in the tray menu on your PC and click Disconnect.
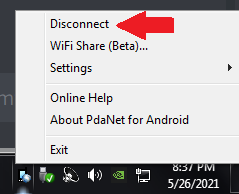
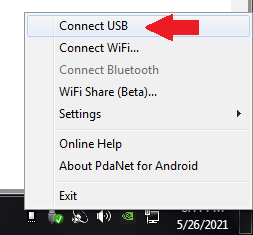
Then simply re-enable your default (Wi-Fi or Ethernet) connection. That's it. If you want to reconnect with PdaNet+, just right-click its icon and click Connect USB (or Connect WiFi... on Mac).
How to Verify If Your Shared VPN Connection Works
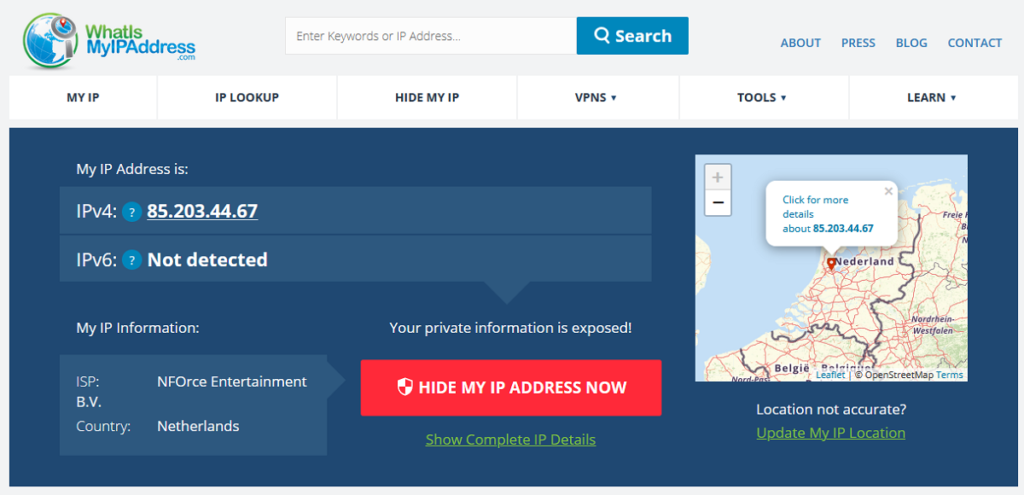
On your Windows or Mac PC, use a service like WhatIsMyIPAdress and see whether the IP address shown on the website is the same as the VPN server IP. Alternatively, just google "what is my IP" for the same result.
Something not working as intended? Let us know in the comments!

