When you purchase through links on our site, we may earn an affiliate commission. Here’s how it works.
How to Run Torrents Strictly Through VPN
Occasionally, you may need to turn off your VPN to log in to certain websites (e.g., home banking services, PayPal, etc.). Of course, that could lead to trouble if you're running any torrenting clients in the background and forget to turn your VPN back on. Don't want to deal with the rising trend of "copyright trolling"? Then you need to run your torrents strictly through a VPN connection.
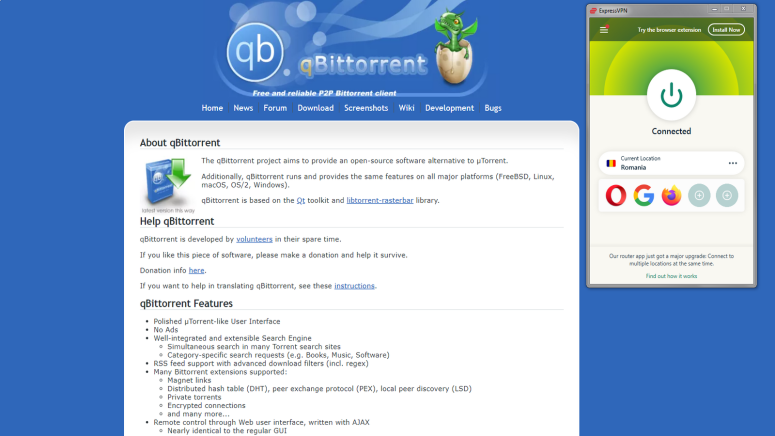
Fortunately, it's quite easy to do so, and we've prepared a guide for the occasion. We'll be using qBittorrent for the job, as it's one of the best free torrent clients out there at the moment. On top of that, it doesn't come bundled with bloatware and has zero ads (unlike uTorrent), so that's a huge plus.
The process is also more streamlined when compared to other major torrenting clients. You can technically do the same thing in Deluge, uTorrent, and others by having all incoming and outgoing connections go through a specific VPN server's IP address.
However, it's not exactly fun to mess around with the IP values every time your VPN provider decides to change their servers' addresses. Considering VPNs constantly need to refresh their IPs because Netflix and other streaming providers block them - well, you get the point.
All in all, this method is much less of a headache, so let's get right to it.
#1 Find Your VPN's Virtual Network Adapter
We'll need this detail for later, so we might as well get it out of the way first. Here's what you need to do to find your VPN's network adapter.
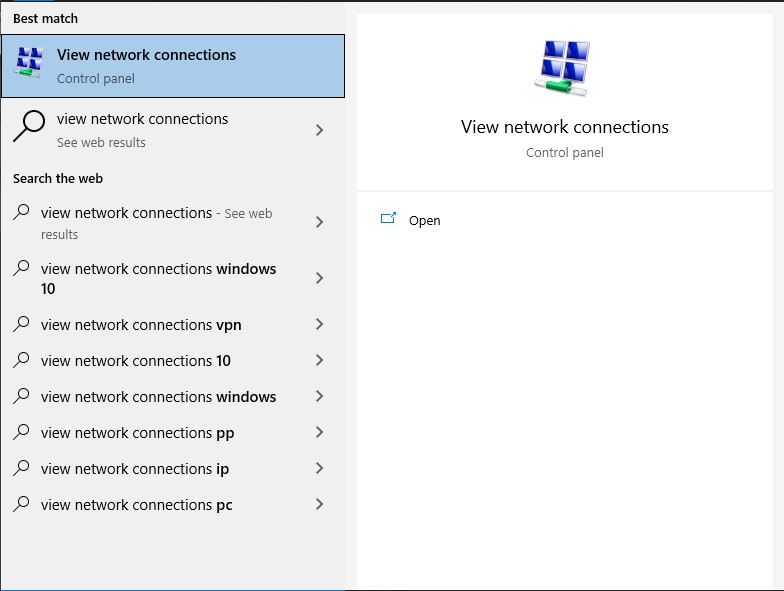
Step 1: Type "View network connections" in the search box and click on the option in the results.
Step 2: Locate your VPN's virtual network adapter. The name of your provider should be displayed in the adapter's description. We prefer to use ExpressVPN, so in our case, it shows up as "ExpressVPN TAP Adapter".
Depending on how many VPNs you have on your system or how many network adapters you have installed, the connection may be titled "Local Area Connection 2" or something similar. It may be worth renaming it to "YourVPN TAP" to distinguish it from the other adapters (virtual or otherwise).
Anyway, proceed to the next section once you're ready.
#2 How to Run Torrents Strictly Through VPN in qBittorrent
The process is pretty painless - here's how to proceed.
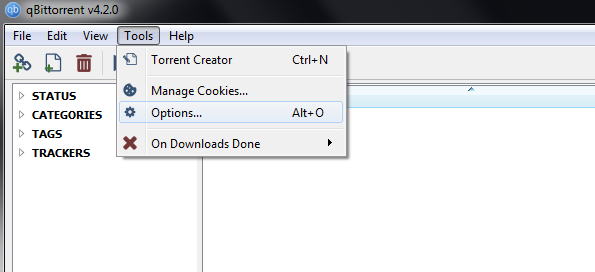
Step 1: Launch your VPN and connect to a server of your choice (or see the five best countries to connect to when using a VPN, especially if you use torrents). Next, open qBittorrent. Click on "Tools", then select "Options..." from the dropdown menu.
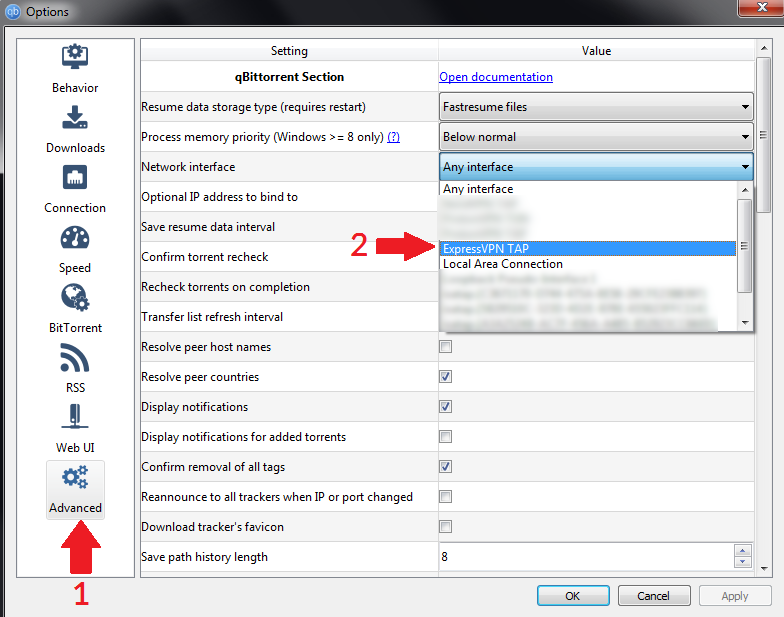
Step 2: In the Options menu, click on "Advanced". Then click on the "Network interface" dropdown menu and select your VPN's virtual adapter (as identified in the previous section).
Step 3: Click Apply, then OK, and restart qBittorrent.
And there you have it. Now your torrents should run strictly through the VPN network you've selected. Choose "Any interface" if you'd like the torrent client to work regardless of which connection you're using.
Don't forget to restart qBittorrent when you change the network interface!
Testing Out Whether the Process Worked
Since the torrenting client has now been set up to use the VPN interface, disconnecting or turning off the VPN client should stop any downloads or uploads currently in progress. That being said, the process is not instantaneous. Instead, peers will gradually disconnect until everything grinds to a halt.
As such, we recommend turning off qBittorrent beforehand, so there's no risk of any data leaks while disconnected from the VPN. Definitely enable your kill switch as well, just in case the VPN disconnects for any reason.
Luckily, you don't need to worry about accidentally launching any torrents while the VPN client is off anymore. Whenever you're ready, just turn the VPN back on and your downloads and seeding should resume on their own.


