How To Clear Cache On Kodi in 2026
Last updated March 12, 2025

Clearing Kodi's cache can resolve numerous technical problems. For example, you can expect faster performance, fixed streaming issues, freed up storage, and resolved corrupted data. That said, this application doesn't have a built-in option to remove its cache entirely, so the best option is to use a third-party add-on designed to optimize Kodi and maintain its database.
In this article, we'll show you how to manually clear Kodi's cache. In addition to using a maintenance add-on, we'll also go over universal ways to remove Kodi's cache on Fire TV and Android TV. Furthermore, if you continue experiencing technical issues, we recommend updating Kodi to the latest version.
4 Ways to Clear Kodi's Cache
The quickest way to remove unnecessary data from Kodi is to use the EZ Maintenance+ add-on, which is available on any platform that Kodi supports. Download the add-on and use its menu to keep the app running at its best. However, you have some extra options if you have a Fire TV Stick or a media streaming player running Android TV.
Method #1: Clearing Kodi's Cache Manually to Improve Performance
Even though this method doesn't remove all of Kodi's cache, it's a handy option to resolve slow performance. Plus, it doesn't require you to install any add-ons. Here's what you need to do:
- Launch Kodi and click the gear-like icon to enter its settings.
- Select 'File Manager.'
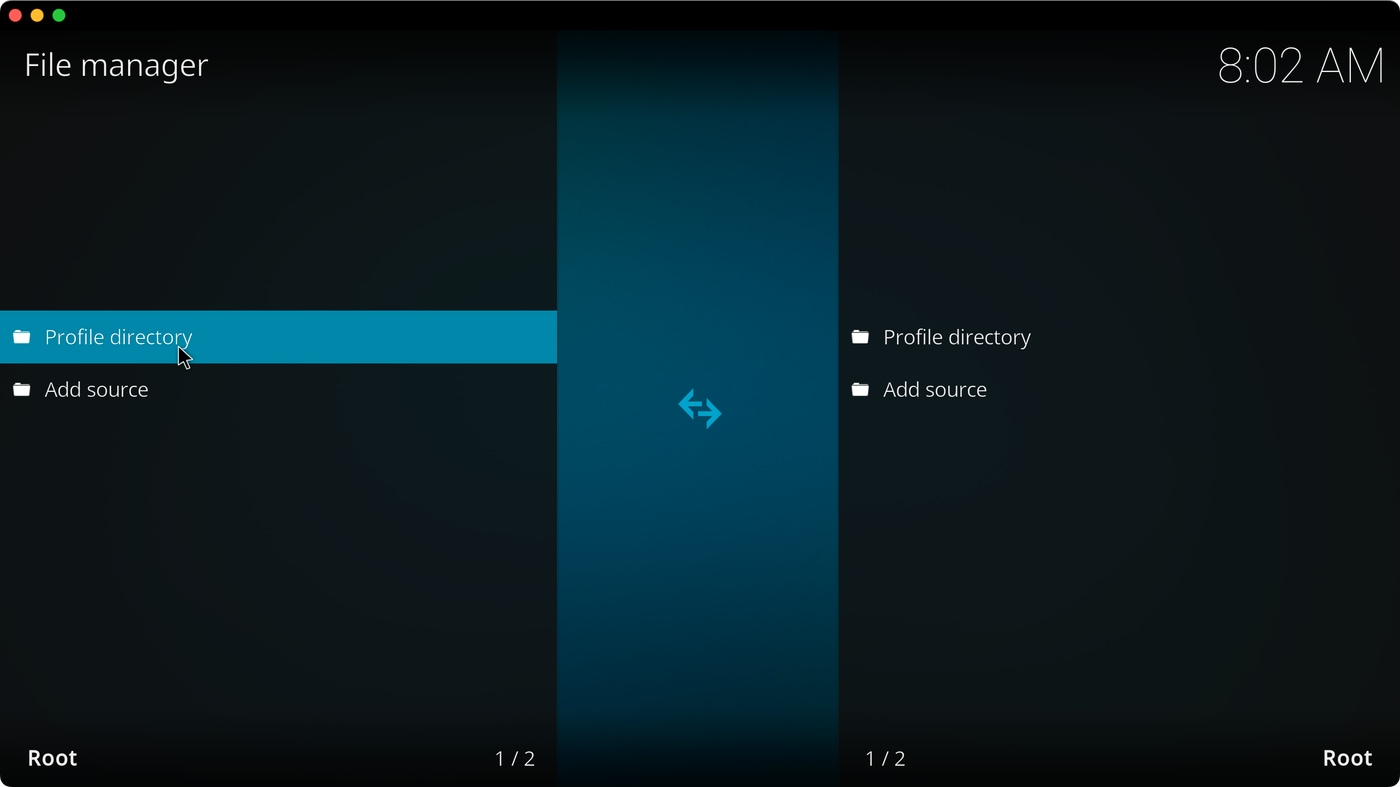

- Navigate to Profile Directory > Database.
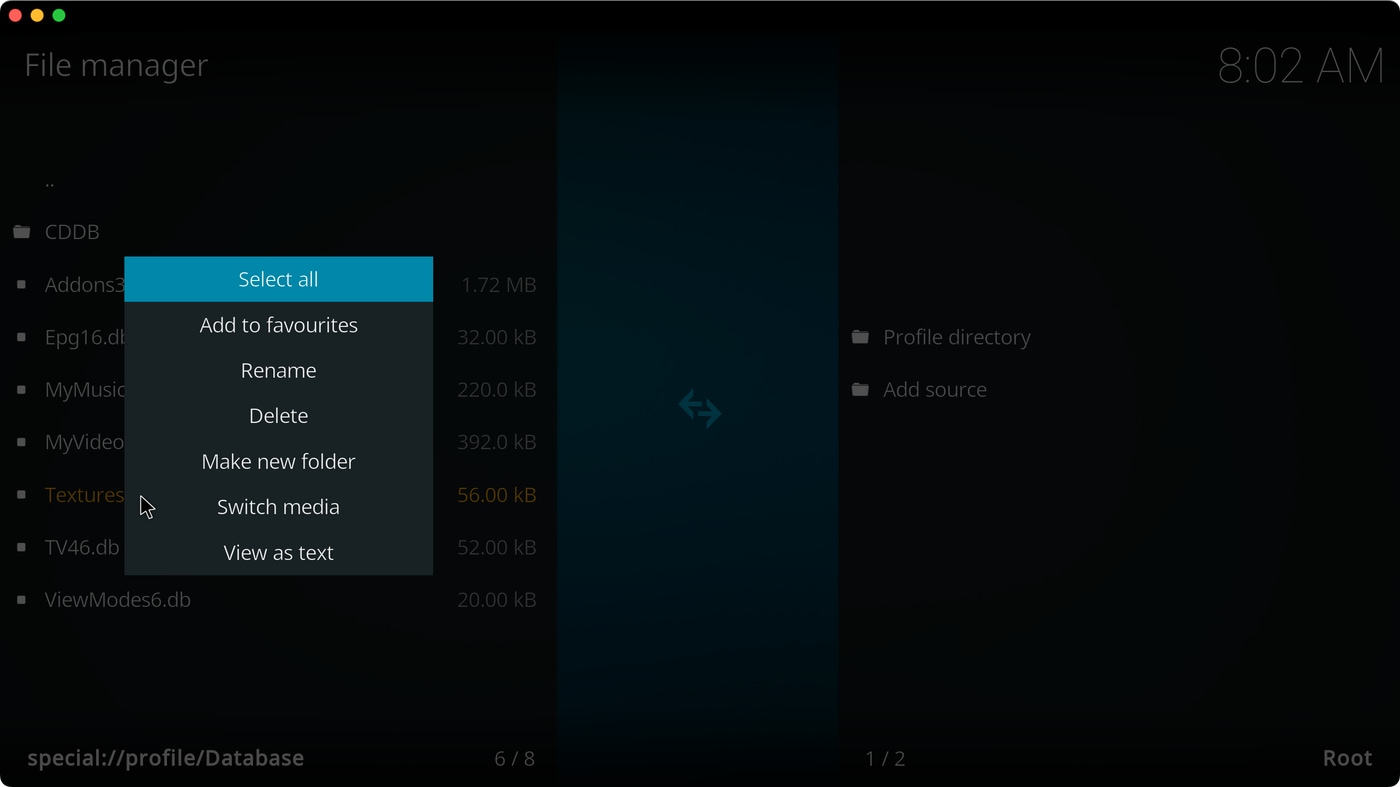
- Select 'Textures13.db' and delete that file.
- Return to Kodi's main menu and resume using the application.
Method #2: Clear Kodi's Cache Using EZ Maintenance+ Add-on
Most of the previously popular maintenance Kodi add-ons, such as Indigo, are no longer available. That said, we have the next best thing: EZ Maintenance+, which can be installed in under a minute. Here's how to use that add-on to remove Kodi's cache:
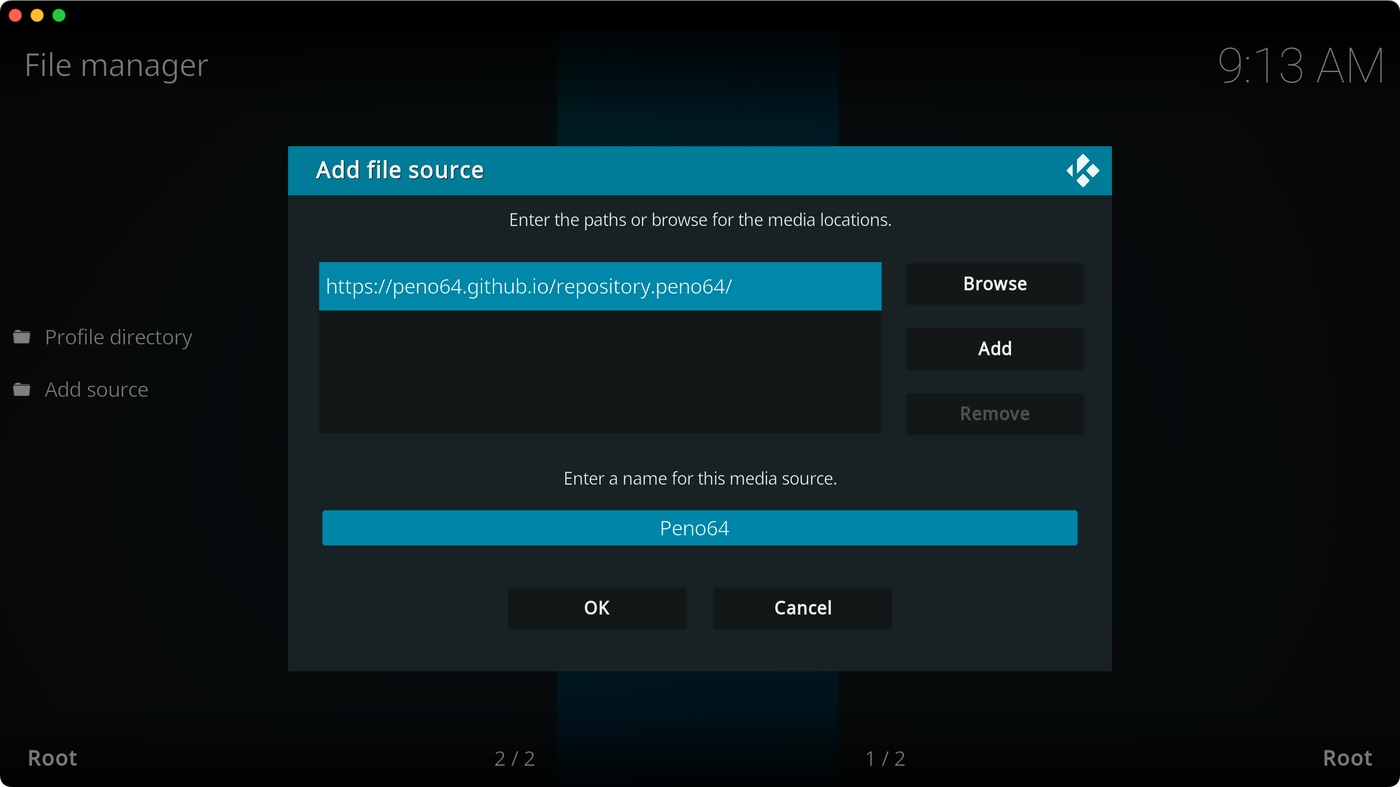
- Open Kodi and go to Settings > File Manager > Add Source > <None>.
- Input the following URL: https://peno64.github.io/repository.peno64/.
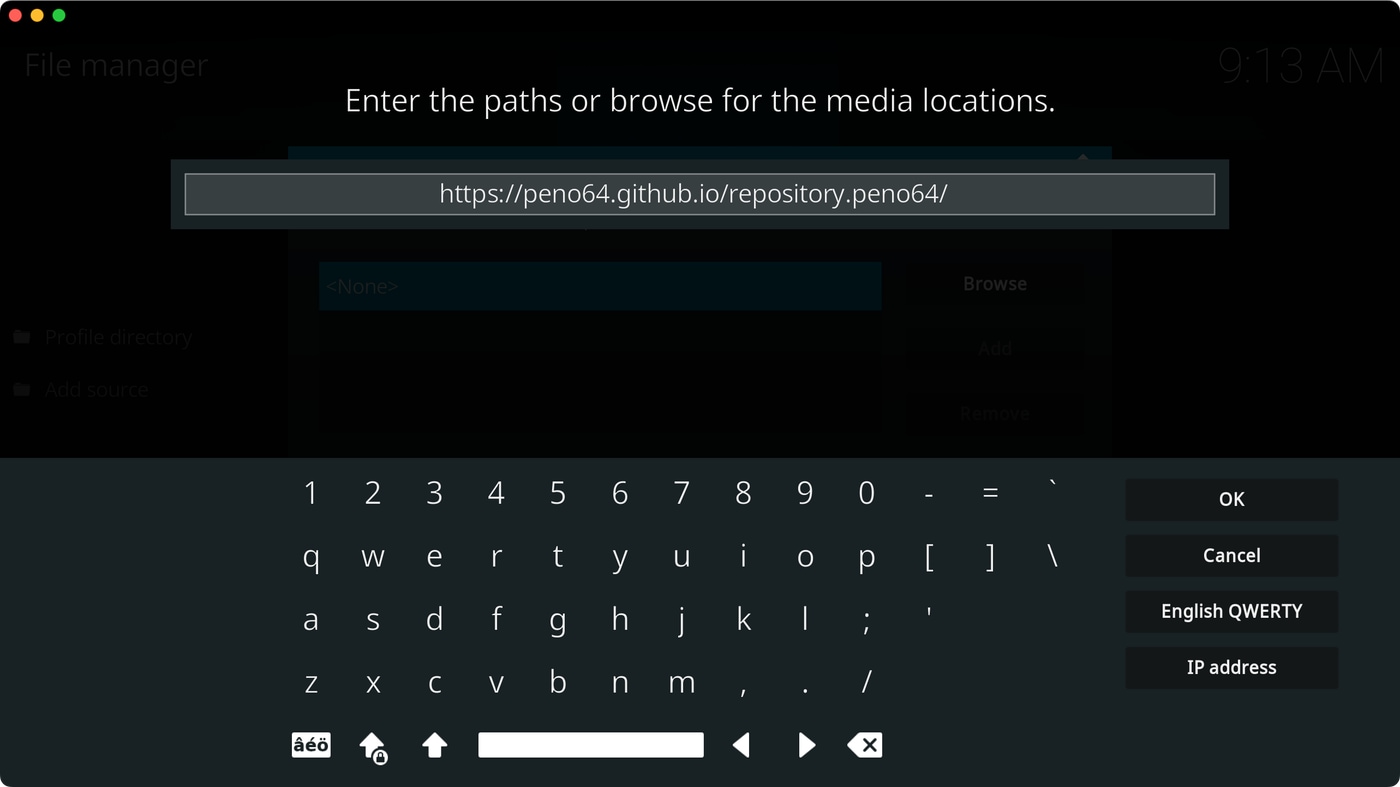
- Name your new source ("Peno64") and hit "OK" to confirm your choice.
- Go back to Kodi's home screen and click "Add-ons."
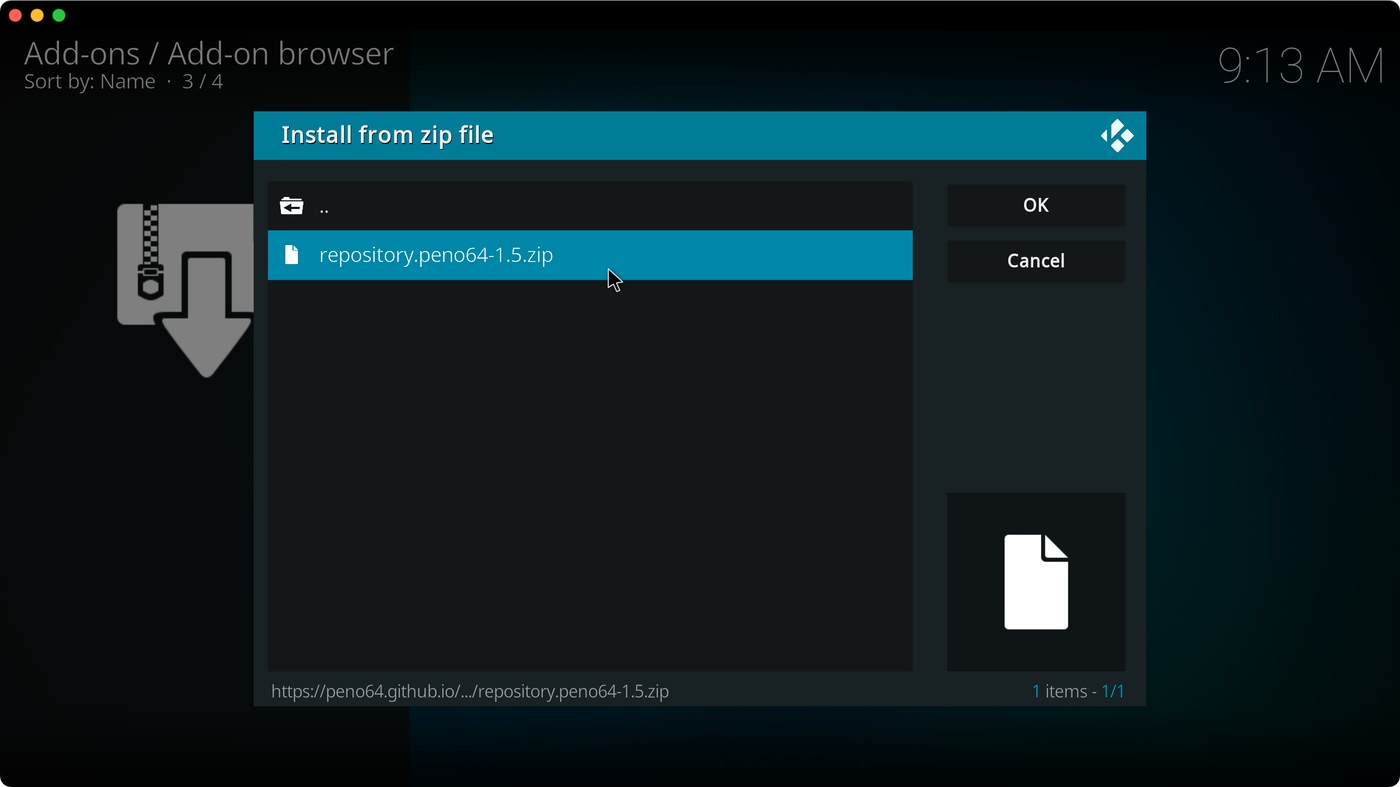
- Use the open box icon and choose "Install from ZIP File."
- Select "Peno64" and click the ZIP file you'll find in that directory.
- Now, go to Install from Repository > Peno64 > Program Add-ons > EZ Maintenance+.
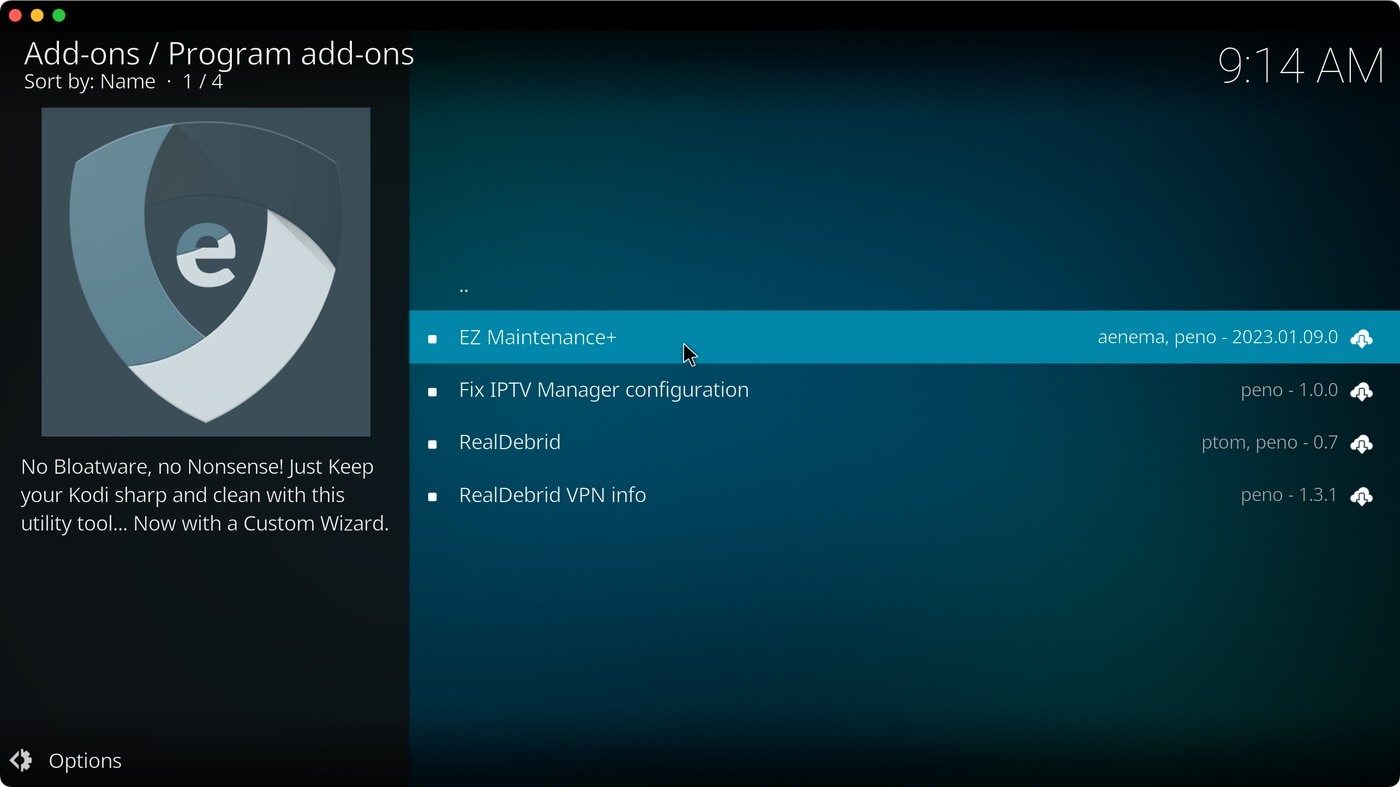
- Install and then run the add-on.
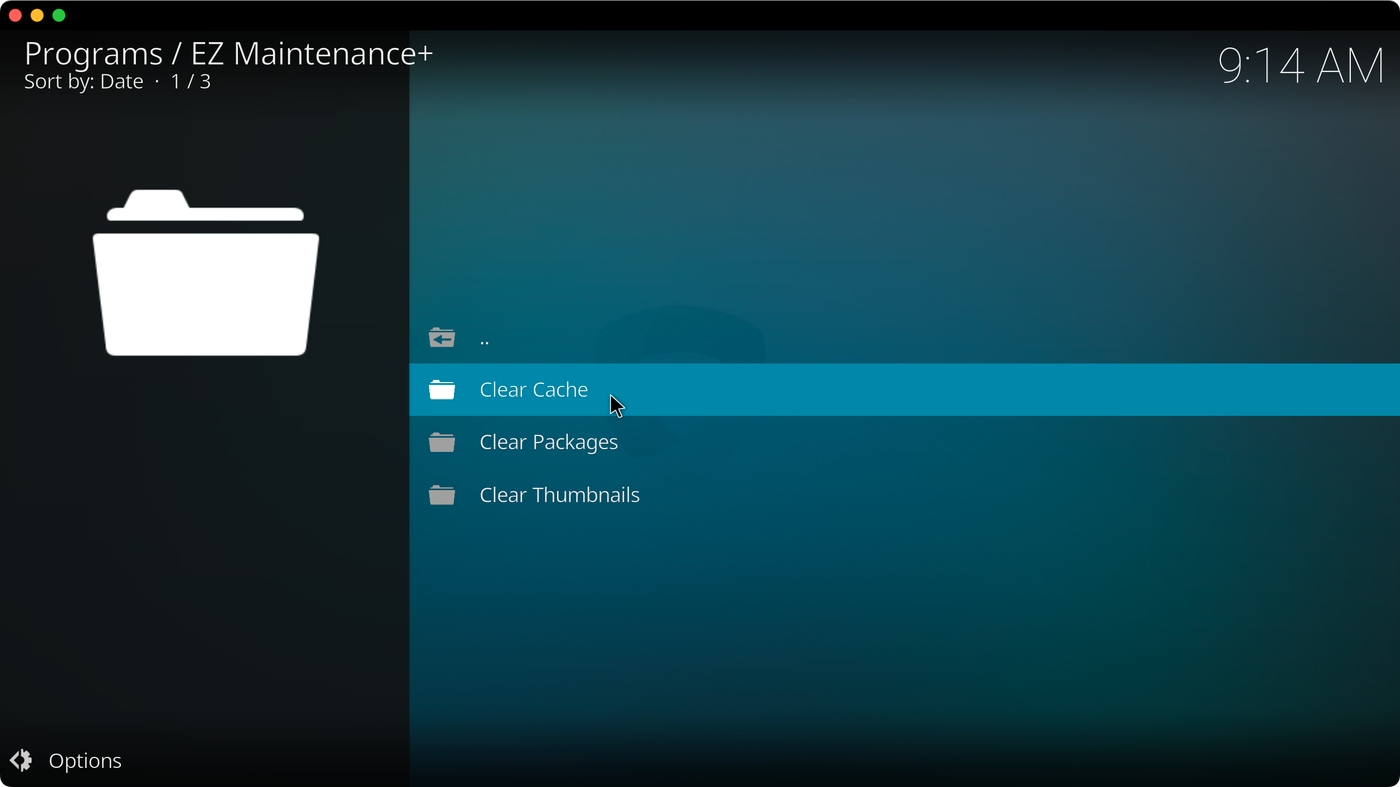
- Open the "Maintenance" item, and you can now remove Kodi's cache, packages, and thumbnails. All of those are junk files that you can remove safely. That's it!
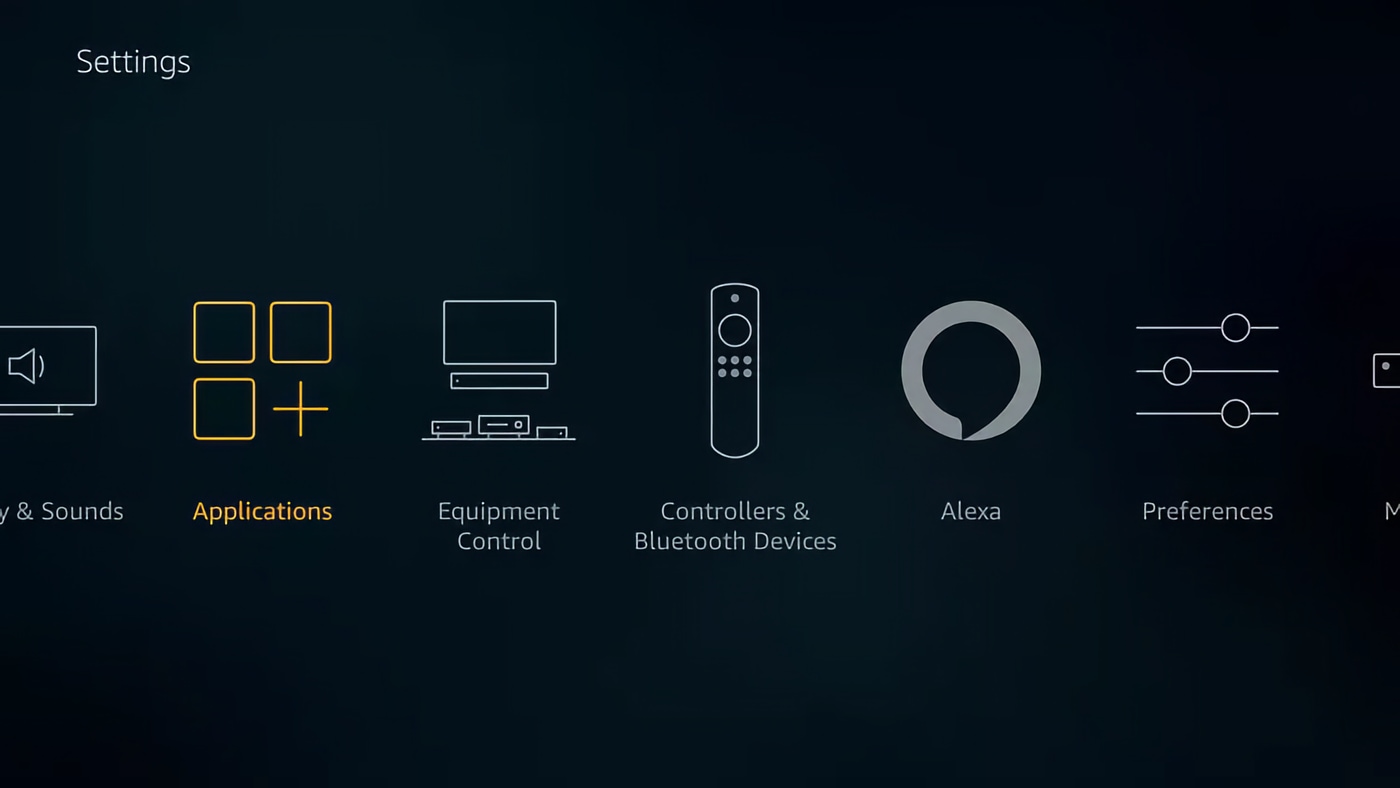
Method #3: Clear Kodi's Cache on Fire TV Devices
For this method, you won't use Kodi itself to clear its cache. Instead, you'll rely on Fire OS' Settings, which means this method works with any version of Kodi.
- Activate your Fire TV Stick. Make sure that you're on its home page.
- Navigate to "Settings." Then, scroll until you see "Applications."

- A new screen will now appear. You need to pick "Manage Installed Applications."
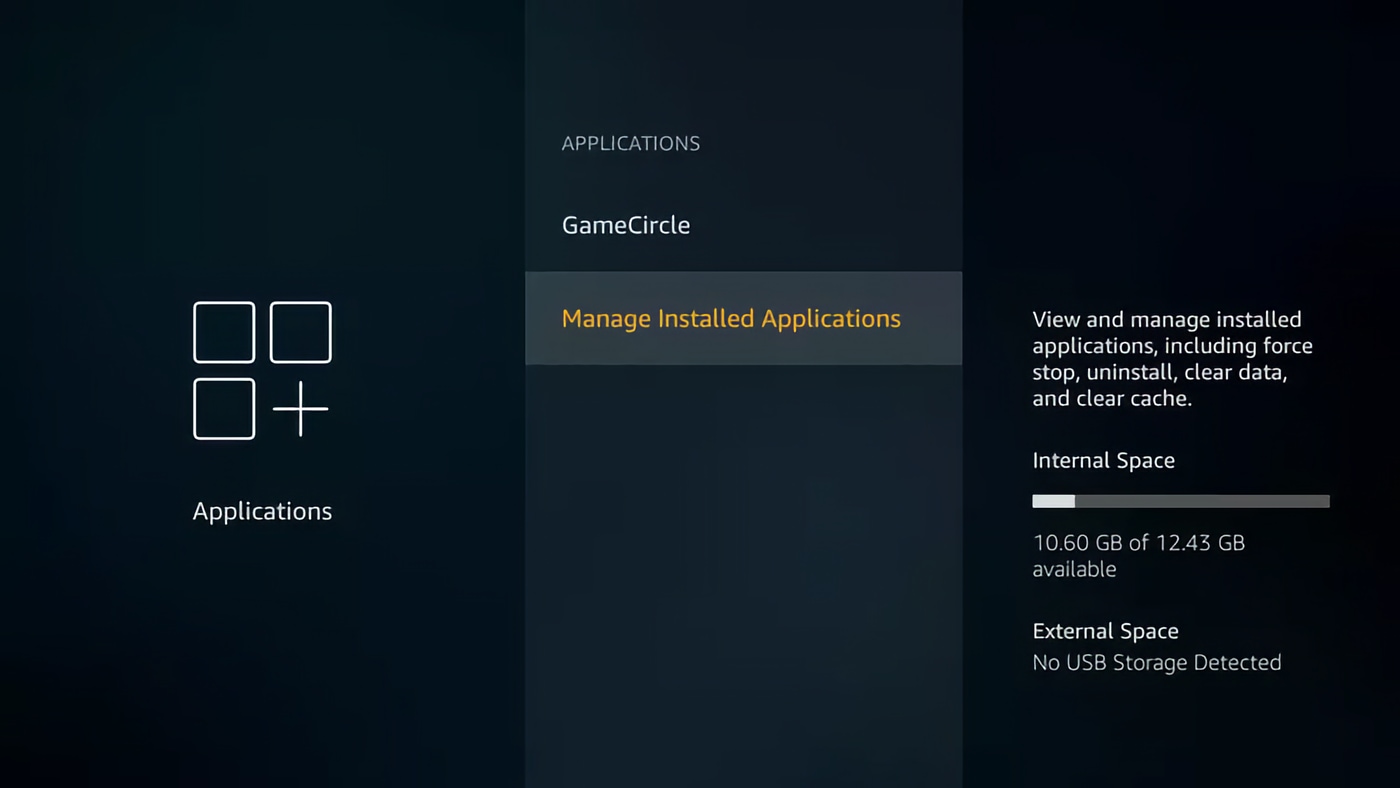
- Your locally installed Fire OS apps will now appear. Find "Kodi" and select its name.
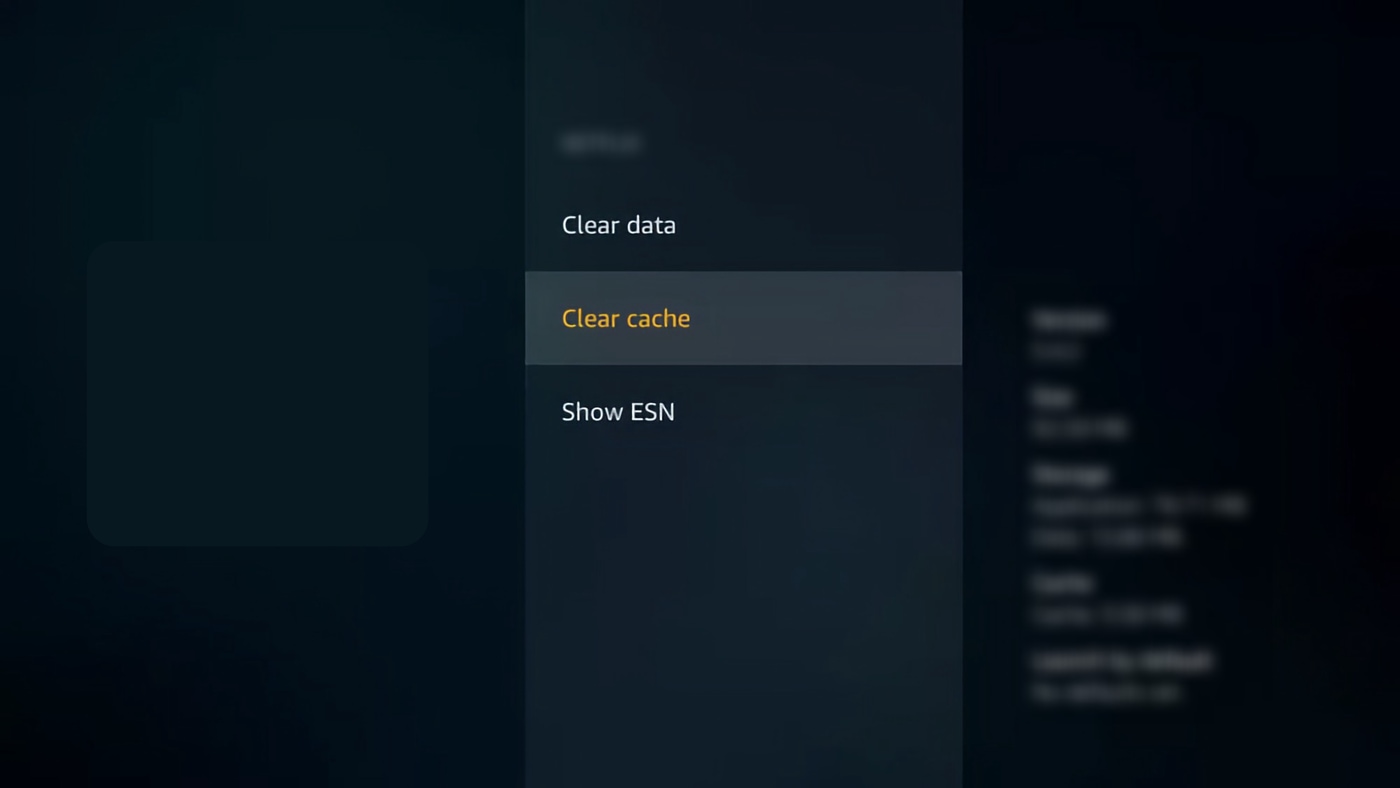
- And lastly, go ahead with "Clear Cache." Confirm your decision. That's it!
Method #4: Clear Kodi's Cache on Android TV Devices
This method of removing Kodi's cache works on any Android TV device, including Nvidia's Shield TV and Mi's Box (among many more). Here's what you need to do.
- Activate your Android TV device. Make sure that you're on its home screen.
- Go to "Settings," which should be visible in the top-right corner.
- A sidebar should now appear. Scroll down to "Apps."
- You'll now see your locally installed Android TV apps. Find and select "Kodi."
- Lastly, pick "Clear Cache" and confirm your decision. That's it!
Final Thoughts
The EZ Maintenance+ add-on is our preferred option among the above options. In addition to removing Kodi's cache, this add-on helps you back up and restore Kodi, perform a speed test to ensure your Internet connection works first, and increase Kodi's buffer size for smoother streaming. And since you install and use it through Kodi, it works on any device imaginable.
In the end, we'll mention that clearing Kodi's cache is essential if you use many add-ons, especially unofficial ones, as they can store plenty of junk files quickly. Sticking with top-working Kodi add-ons from the application's own repository is a better option, as they're more optimized, usually lightweight, and, most importantly, they're malware-free.
This is where we conclude this guide. If there’s anything you’d like to add, don’t hesitate to let us know. Finally, thank you for reading!
Related


Get expert insights on threats, breaches, scams, and security trends — delivered every Monday.
Most Popular

Get expert insights on threats, breaches, scams, and security trends — delivered every Monday.
Most Popular