How to Add Photos to Kodi 18 in 2019
Aside from importing your videos and music, Kodi can be used to store photos as well. As such, this application can be a central place to store your entire media library.
There's only one way to add photos to Kodi, and it applies to all recent versions of this application. As you can imagine, this also applies to Kodi 18.0, which has been recently released. Finally, this method can be used across all available platforms.
So, here's our step-by-step guide on how to add photos to Kodi in 2019.
- Open Kodi and you will see its Home Screen;
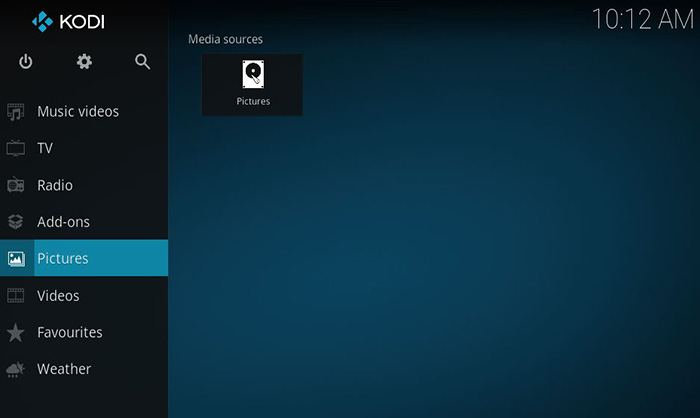
- On the left side, you will see the main menu, consisted of several content categories. We will be importing photos to Kodi, so you need to click on – Pictures;
- Next, select ‘Add Pictures…’;
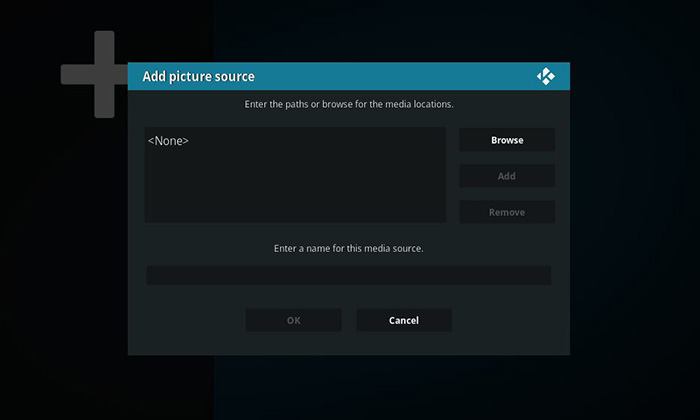
- A new pop-up window will appear. Your goal here is to navigate to the folder that contains your photo library – so, go ahead and do that. If you can’t find your way around, we recommend moving your photo library to one of the hard disk partitions. For example, open your hard drive’s directory and place your photo library there. Then, you can simply click on ‘C:’ on the pop-up and your folder will be waiting. Important Note: If your photos are organized into folders, you need to navigate to the main folder and hit ‘OK’. This way, all of the sub-folders will be automatically detected and registered as photo albums;
- Once you find your photo library, go ahead and click ‘OK’ to dismiss the pop-up;
That’s it! To see your newly created photo library, make sure to restart Kodi. If you’ve imported a large library, it might take some time until Kodi processes it. Once that happens, you should see your photo albums in the ‘Pictures’ section of Kodi.
Read More
While we have you here, we'd like to recommend additional sources. So, check out these quick guides that teach you how to use Kodi in the best possible way.
- How to Enable Unknown Sources on Kodi
- Get the Best Kodi Addons
- Get the Best Kodi Skins
- How to Change Skins on Kodi
- How to Create a Library in Kodi
- How to Import Videos to Kodi
- How to Add Music to Kodi
- How to Set Up Kodi Profiles
- How to Add Subtitles to Kodi
That’s it, guys. We hope you’ve found this article to be useful and that you now know how to add photos to Kodi. If you have any questions or doubts, make sure to post a comment below.
In case you’d like to spread the word, feel free to share this article via social networks. Also, don’t forget to follow TechNadu on Facebook and Twitter. Thanks!


