When you purchase through links on our site, we may earn an affiliate commission. Here’s how it works.
How to Download and Install NordVPN on Windows PC
NordVPN works on the latest release of Windows 11 and previous versions, including Windows 7, 8, and 10. It also offers native applications for both 32-bit and 64-bit Windows. That said, getting started with it is very simple: you just have to download its app, install it, and then log in to your Nord account.
Also, you can use a software called OpenVPN Connect to set up NordVPN on your Windows device. This method is more complex than using its native apps because it requires manual configuration. Also, unlike its Windows client, you'll have to reconfigure it if you want to change the server.
In this guide, we'll teach you how to install NordVPN on Windows using its native app and the OpenVPN manual setup.
How to Download and Install NordVPN on Windows PC
You can install NordVPN on your Windows PC by downloading its native client or manually configuring a connection to one of its servers via OpenVPN. Let's examine each of these processes in detail.
Method #1: Install NordVPN's Native App for Windows
NordVPN's Windows client gives you access to all its features, including a kill switch, the option to choose protocols, and more. Here's a step-by-step process to install it:
1. Subscribe to NordVPN using your Windows PC and any Web browser.
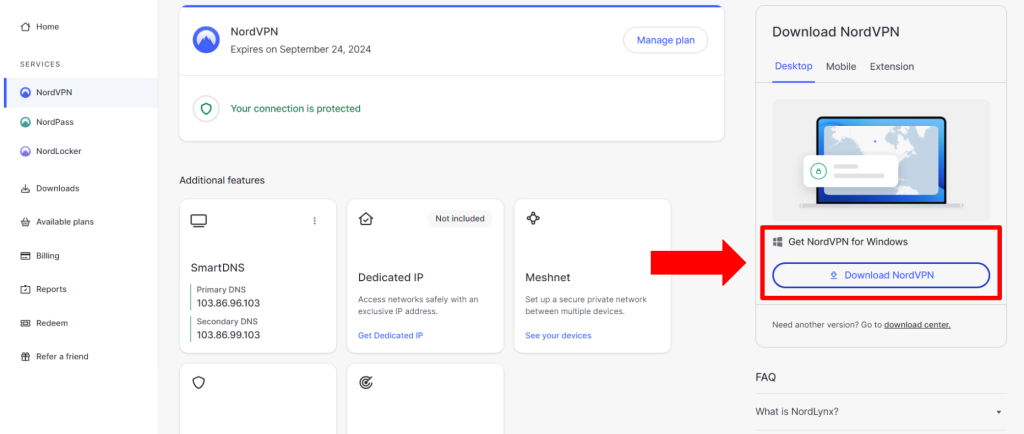
2. Access your Nord Account Dashboard.
3. Click on "Download NordVPN" on the right side of the dashboard to download the installer.
4. Double-click on the downloaded .exe package to start the installation process.
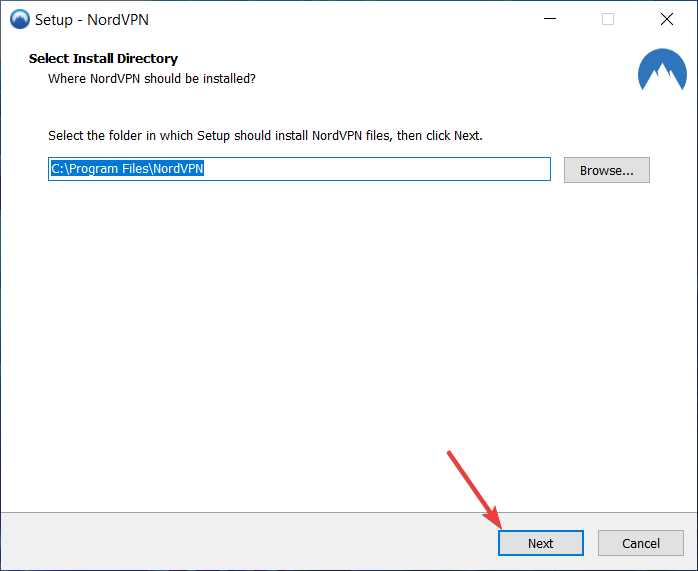
5. Choose the path for the location where you want NordVPN to get installed.
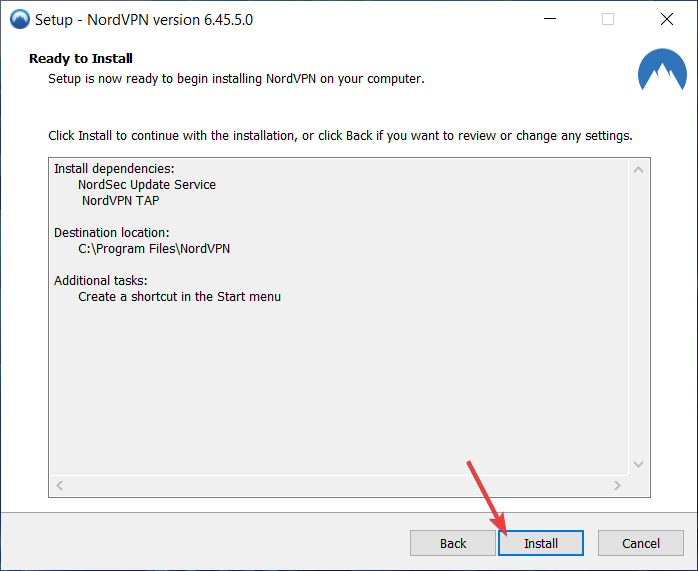
6. On the Ready to Install screen, click the "Install" button to continue with the installation.
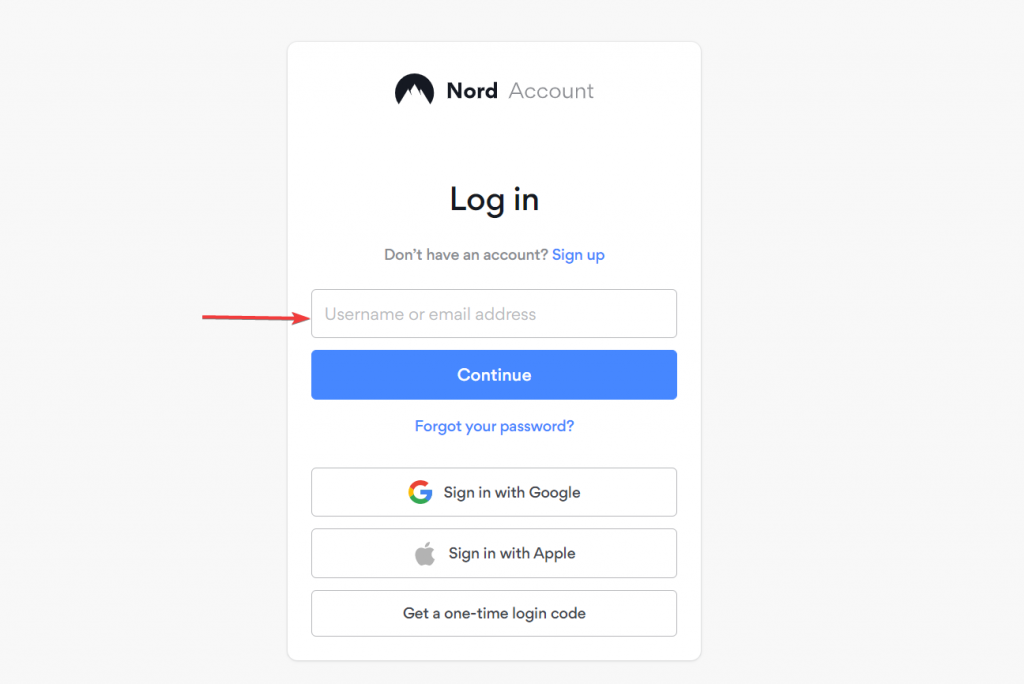
7. Now, launch the NordVPN app and click 'Log In' to input your credentials.
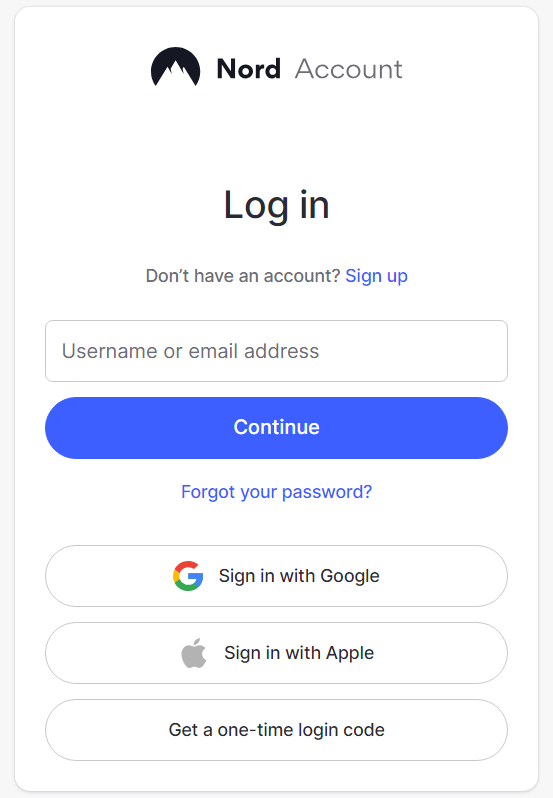
8. Enter your NordVPN email address and password in the browser window.
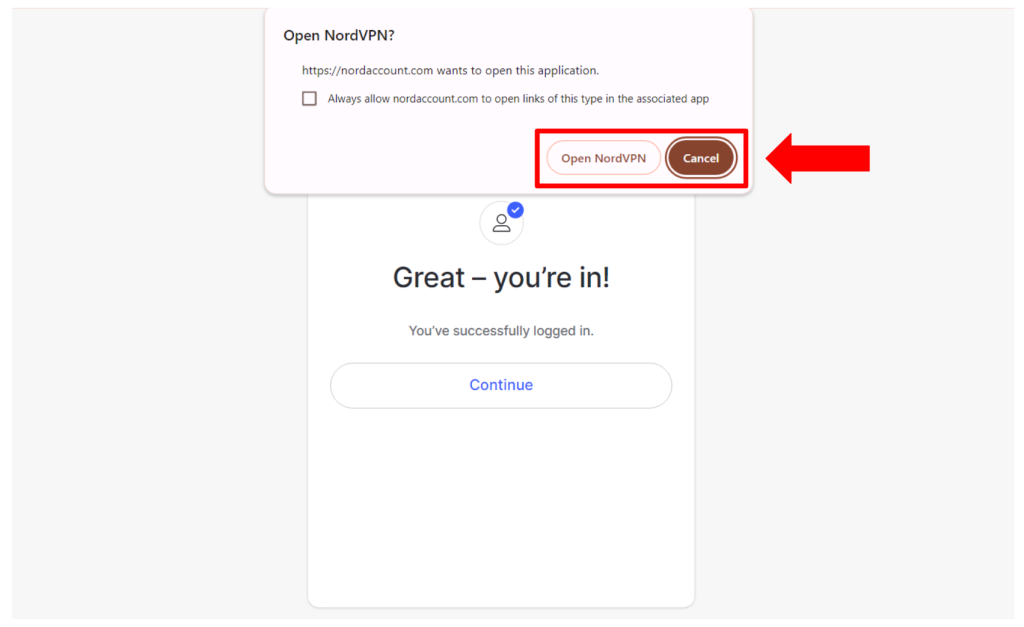
9. Click on 'Open NordVPN' when you see a browser prompt asking permission to open the app.
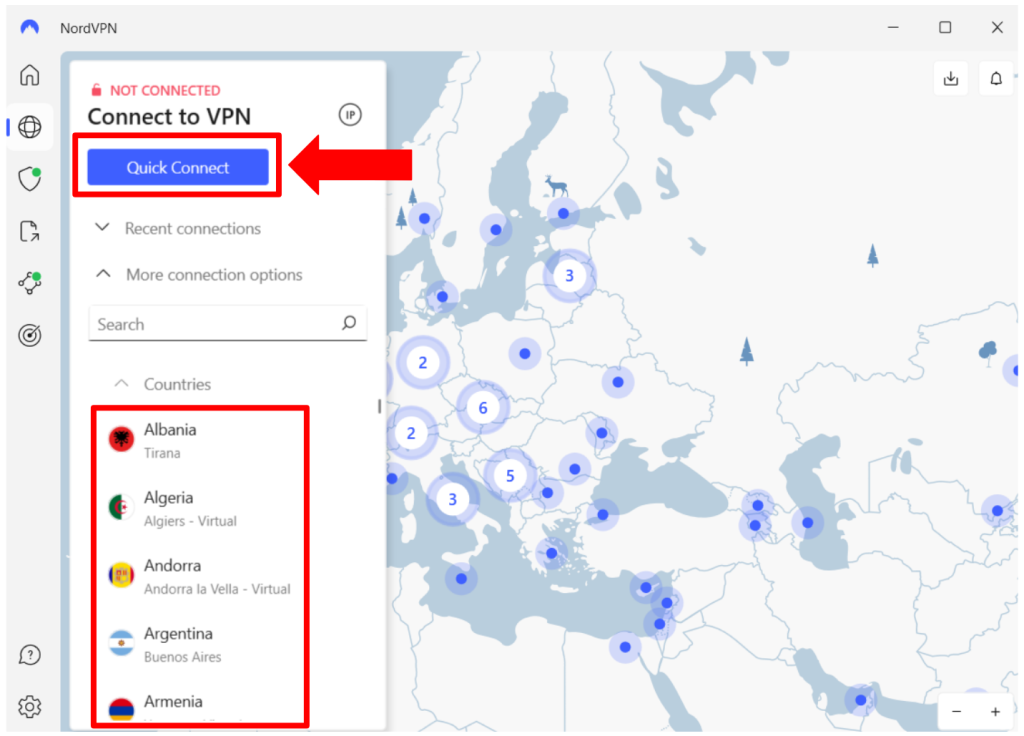
10. Choose 'Quick Connect' to auto-connect, or choose 'More connection options' and scroll down.
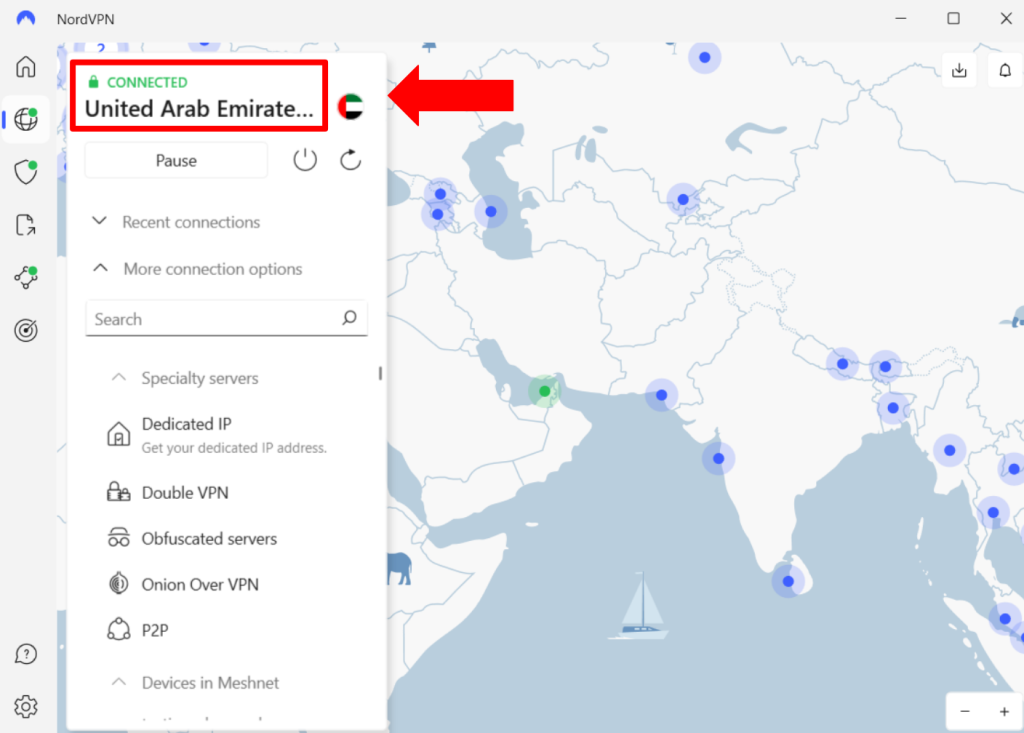
11. Click on your preferred server, and NordVPN's status will turn from 'Not Connected' > 'Connected.'
Method #2: Set Up NordVPN Manually via OpenVPN
If you don't wish to use NordVPN on Windows via its native app, you can set up an OpenVPN connection to a specific server. Here's how that's done:
1. Sign up for NordVPN using any Web browser on your Windows PC.
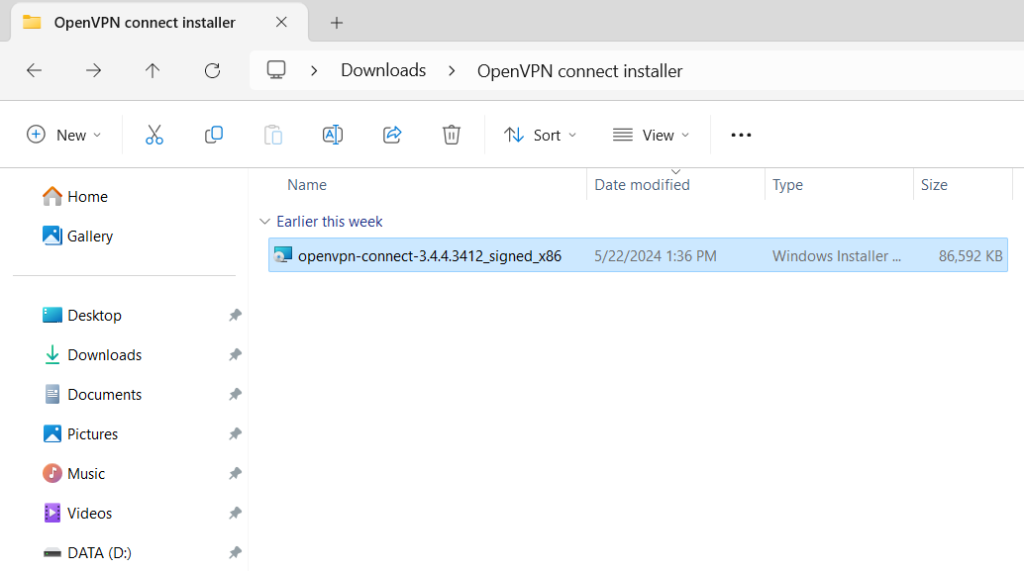
2. Download the OpenVPN Connect for Windows from its official website.
3. Install the client like you would install any other application (double-click on its installer file).
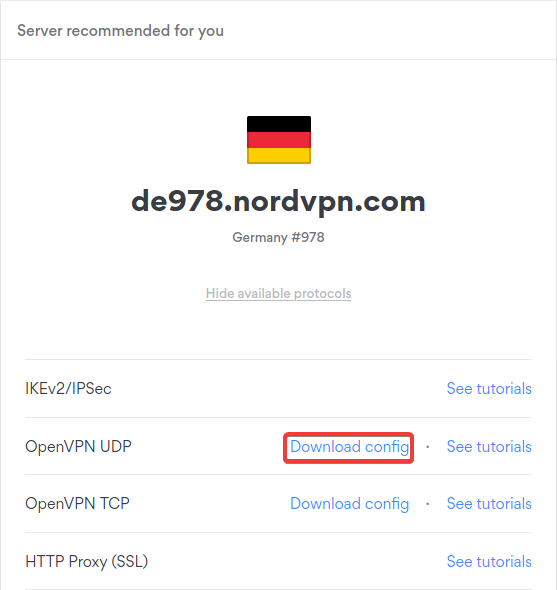
4. Open the NordVPN server tool to select a server in your desired location.
5. Click on the 'Show available protocols' option and choose 'Download config' next to OpenVPN UDP.
6. Launch OpenVPN Connect and choose 'Upload File' > 'Browse.'
7. Choose the .ovpn config file that you just downloaded to upload it to OpenVPN Connect.
8. Open your NordVPN Account Dashboard from a Web browser.
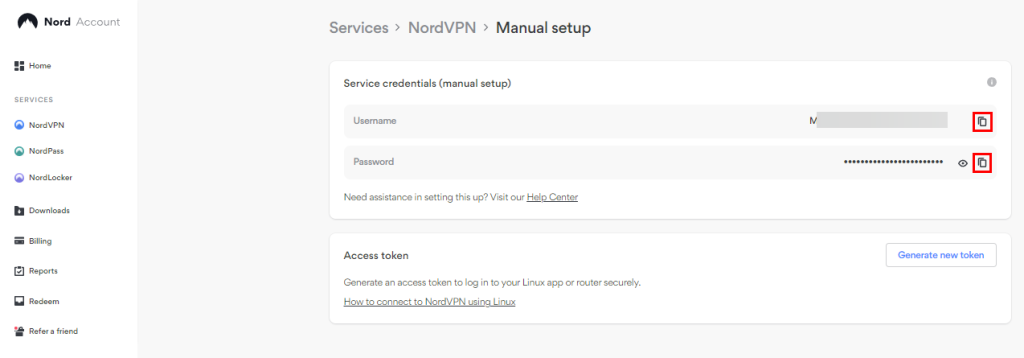
9. Click on 'NordVPN' > 'Set up NordVPN manually.'
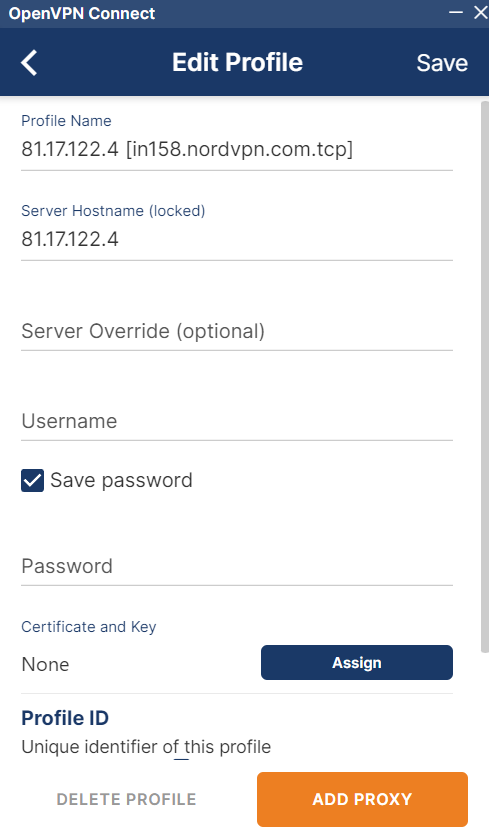
10. Copy your username and password from under 'Service credentials (manual setup).'
11. Paste your credentials in OpenVPN Connect under the Username and Password fields.
12. Type any profile name that you want in the 'Profile ID' section.
13. Click on the 'Add Proxy' button.
14. Click the back arrow button in the top left corner and enable the OpenVPN profile through the switch.
15. Your connection status will turn from 'Disconnected' to 'Connected.'
Final Thoughts
If you want to enjoy all NordVPN features on your Windows PC, we recommend installing its native Windows client. However, if you prefer using OpenVPN instead, the configuration process is quite straightforward, even though it isn't as quick as installing the native app.
That said, you also have the option to install NordVPN's browser extensions (such as Chrome and Edge), but they're not recommended due to limited security features. Alternatively, if you set up and install NordVPN on a router, you'll be able to use it on your Windows PC and other devices that don't support VPN apps.
That’s all! Now you know how to download, install, and use NordVPN on Windows. If you have further queries, use the button below to comment. Thanks for reading!

