When you purchase through links on our site, we may earn an affiliate commission. Here’s how it works.
How to Set Up and Use ExpressVPN on PlayStation
PlayStation consoles don't support VPN apps, so ExpressVPN offers a few workarounds. You can set up ExpressVPN on PlayStation by configuring it on a router. That way, once you connect from your PS to your VPN Wi-Fi network, you'll receive all the benefits of your VPN connection. This method works on a PlayStation 3, PlayStation 4, and, of course, PlayStation 5.
Another option is a feature called 'MediaStreamer,' which comes without data encryption. Since your data won't be encrypted, you won't be protected against DDoS attacks. That said, you can use this VPN's MediaStreamer to route your traffic through a US VPN server, unblocking US-based streaming apps and games.
In this guide, we'll cover all possible ways to set up ExpressVPN on your PlayStation console. You can also expect helpful screenshots to help simplify the setup process.
How to Set Up & Use ExpressVPN on PlayStation
You can set up and use ExpressVPN on a PlayStation by installing it on your router (which then helps protect all your household devices at once) or by configuring your console's DNS settings (suitable for unblocking games and apps). Furthermore, the method of configuring the DNS settings on various PS models is different. Let's look at these methods in detail.
Option #1: Use ExpressVPN on a PlayStation via a Router
The only way to get all the benefits of a VPN connection on your PS3, PS4, or PS5 is by setting up ExpressVPN on a router. However, that's not the most straightforward procedure. So, let's show you what it entails, in general:
1. Subscribe to ExpressVPN using any Web browser.
2. Return to ExpressVPN's website and click 'My Account' using the main menu in the top-right corner.
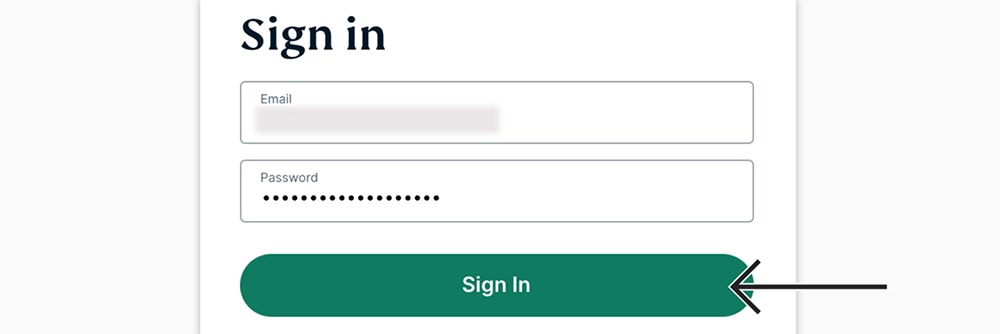
3. Enter your username and password, and access your dashboard.
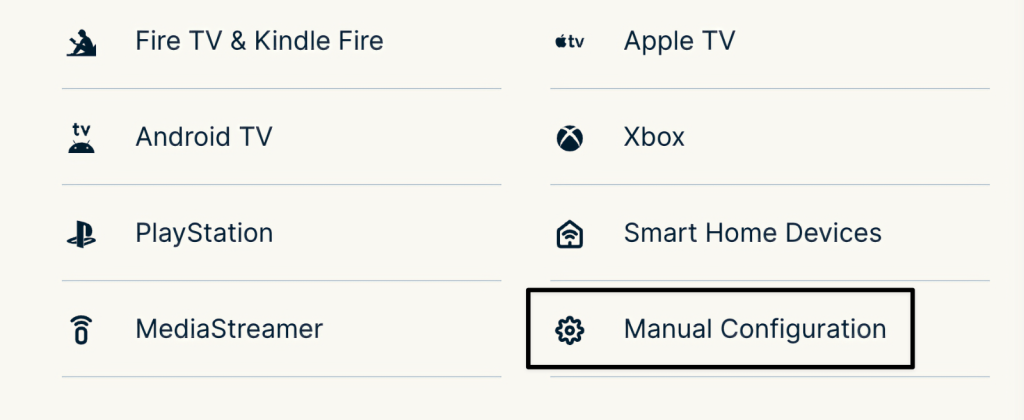
4. Navigate to 'Set Up Other Devices' > 'Manual Configuration.'
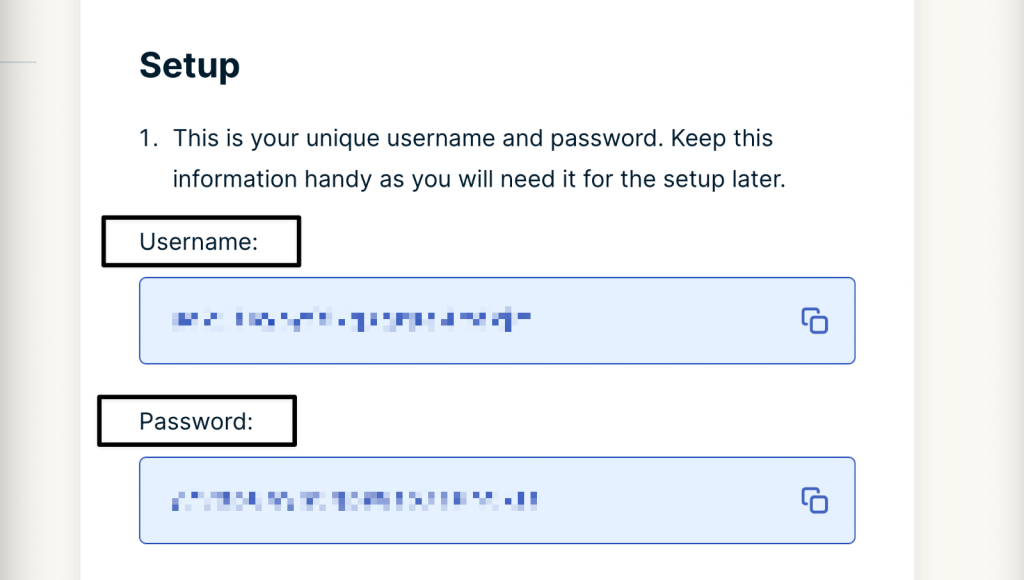
5. On the right, note your OpenVPN username and password.
6. Find a server you'd like to use and download its OpenVPN (OVPN) files to your computer.
7. Scroll down and click 'Select Your Device' and pick your router's model.
8. ExpressVPN will take you to a page with detailed instructions to follow the steps.
9. Return to your PlayStation and connect to your VPN Wi-Fi network. You can also connect using an Ethernet cable if you need a wired connection.
If you need more detailed steps and plenty more screenshots to guide you, check our central article on how to set up ExpressVPN on a router.
There's also one more thing to consider. If installing a VPN on a router seems like an experience not ideal for you, consider buying a ready-to-use router. Aircove by ExpressVPN is a powerful router that comes with everything preinstalled. Here's how to set up ExpressVPN on Aircove.
Option #2: Set Up ExpressVPN on PlayStation 4 and PlayStation 3
Getting started with ExpressVPN on PS4 or PS3 is easy, as you'll need to create a new Web connection with specific DNS settings. So, do the following:
1. Sign up for ExpressVPN using your computer and any Web browser.
2. After subscribing, pick 'My Account' using the top-placed main menu on ExpressVPN's site.
3. Provide your credentials and access your ExpressVPN dashboard.
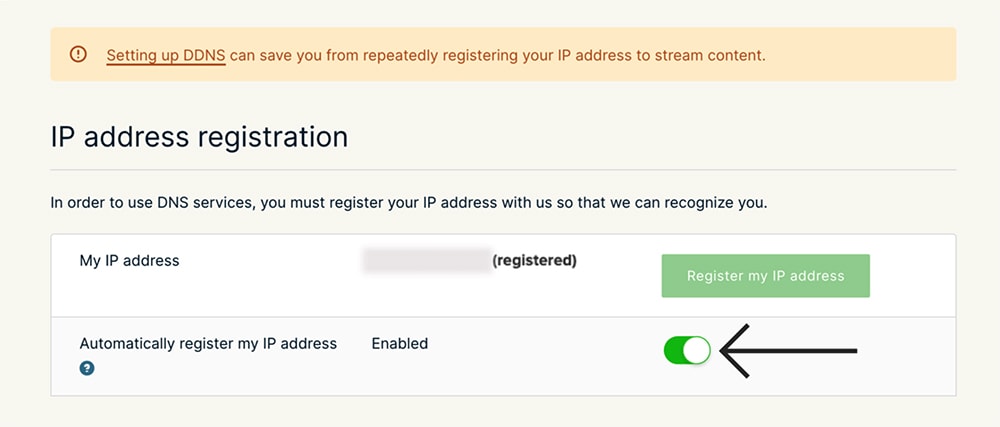
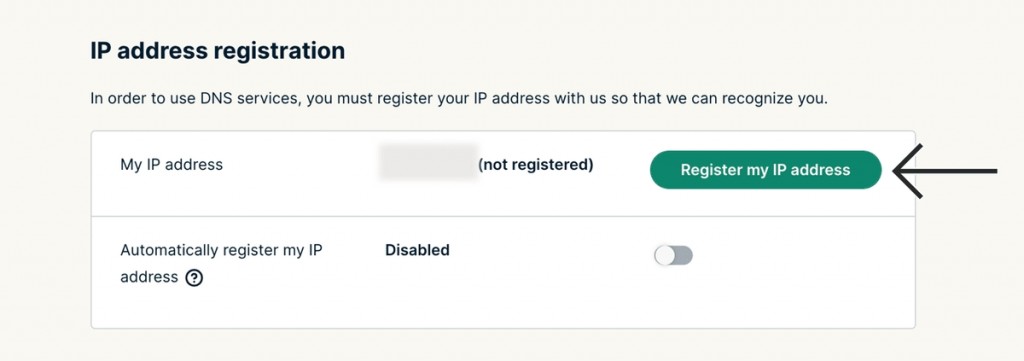
4. Pick 'DNS Settings' on the left and click the 'Register My IP Address' button.
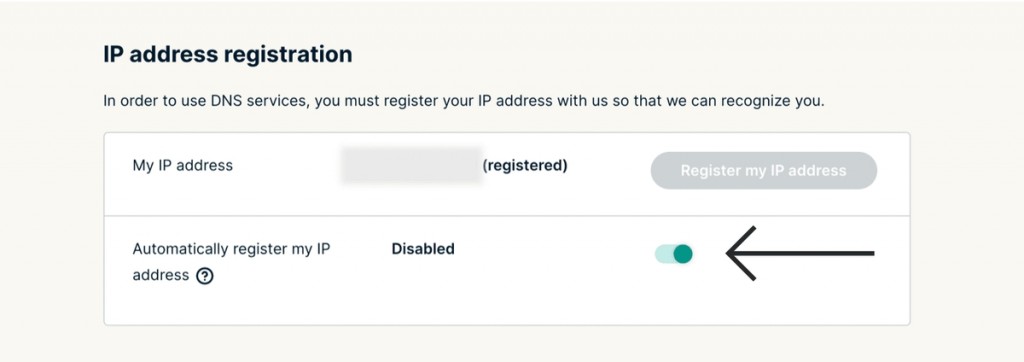
5. Flip the switch next to 'Automatically Register My IP Address.'
6. Return one step to your online dashboard and click 'Set Up Other Devices.'
7. A new page will open where you must select 'PlayStation' from among the supported platforms.
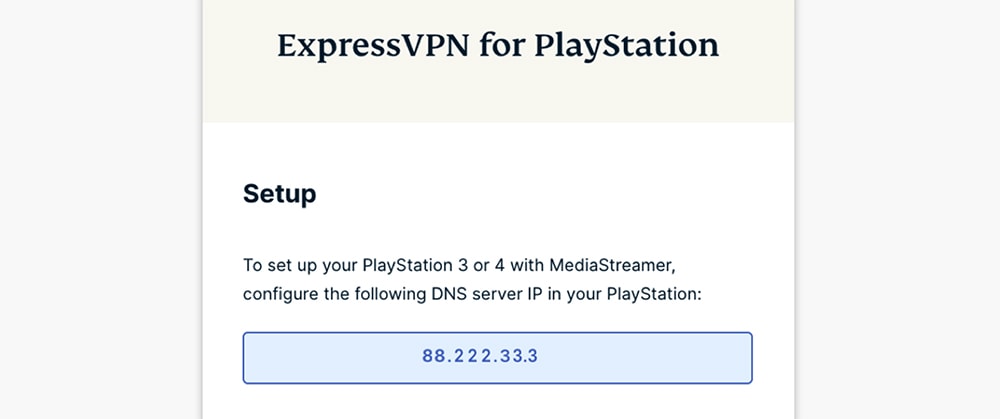
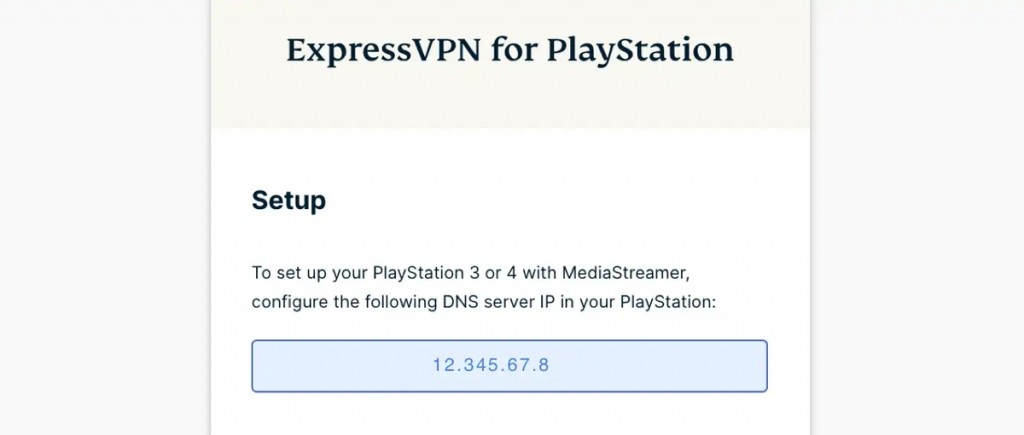
8. On the right, note your DNS server IP and leave this page open.
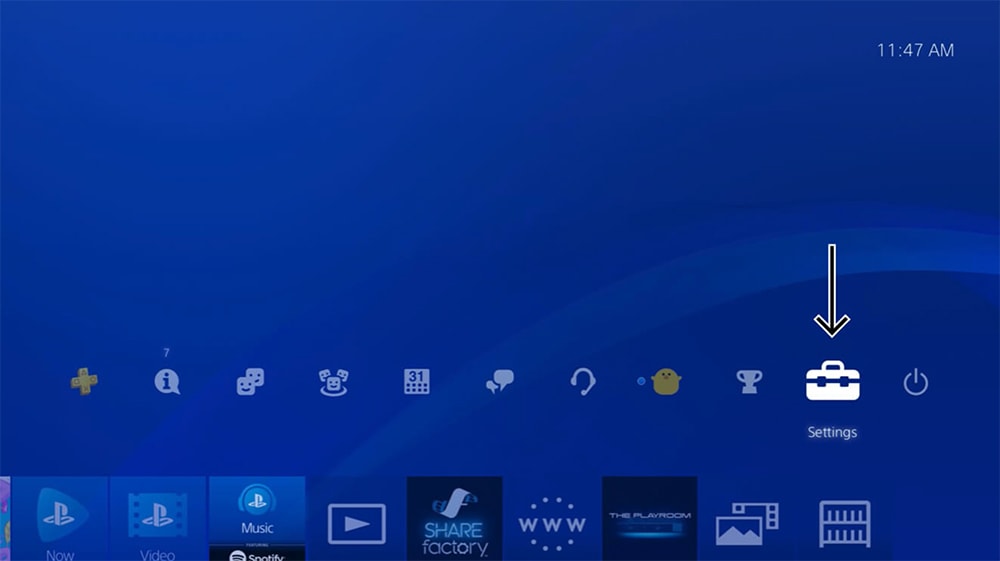
9. Turn to your PlayStation console and go to Settings > Network > Set Up Internet Connection.
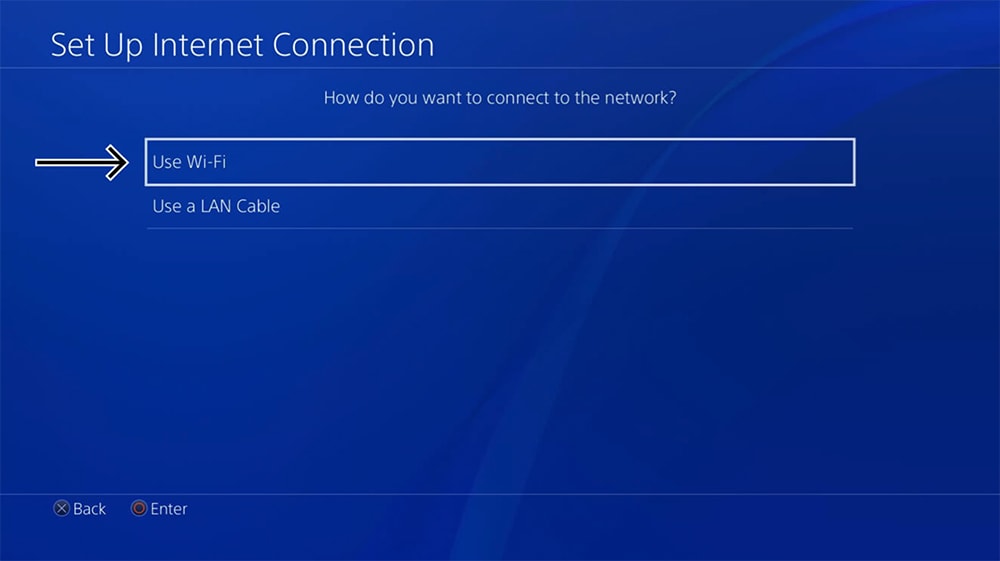
10. When asked about the type of connection, pick 'Use Wi-Fi.'
11. If asked to use your existing Wi-Fi settings, select 'Yes.'
12. You will also be asked how you want to proceed. Here you need to pick 'Custom.'
13. Pick your current Wi-Fi (your home Wi-Fi network) and provide its password.
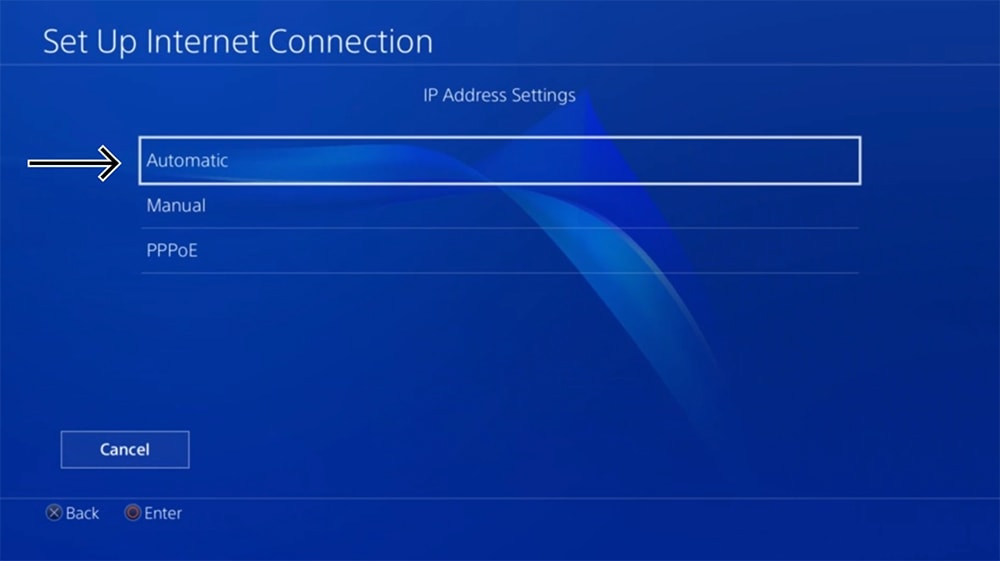
14. Pick the 'Automatic' option in your IP Address Settings.
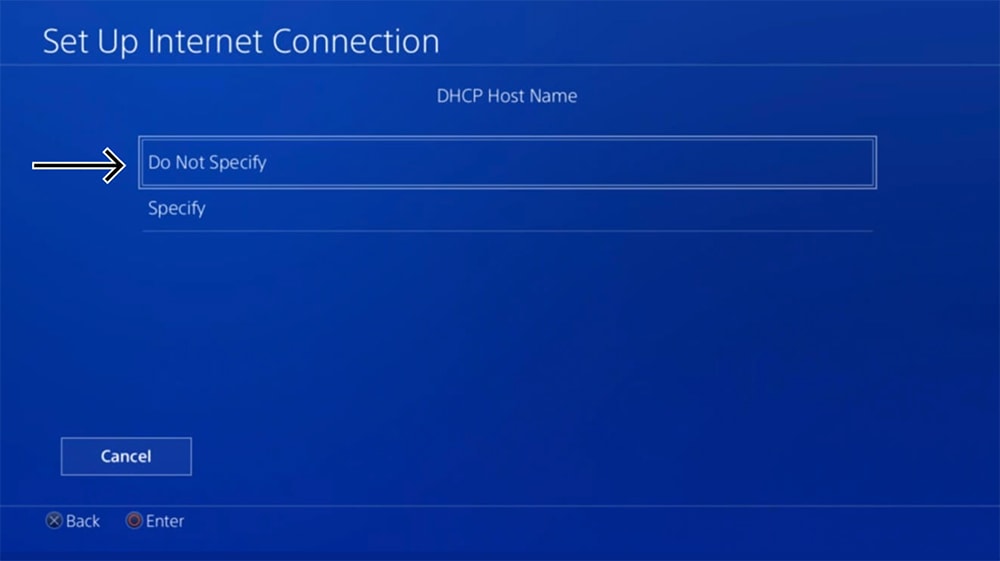
15. When asked about your DHCP hostname, pick 'Do Not Specify.'
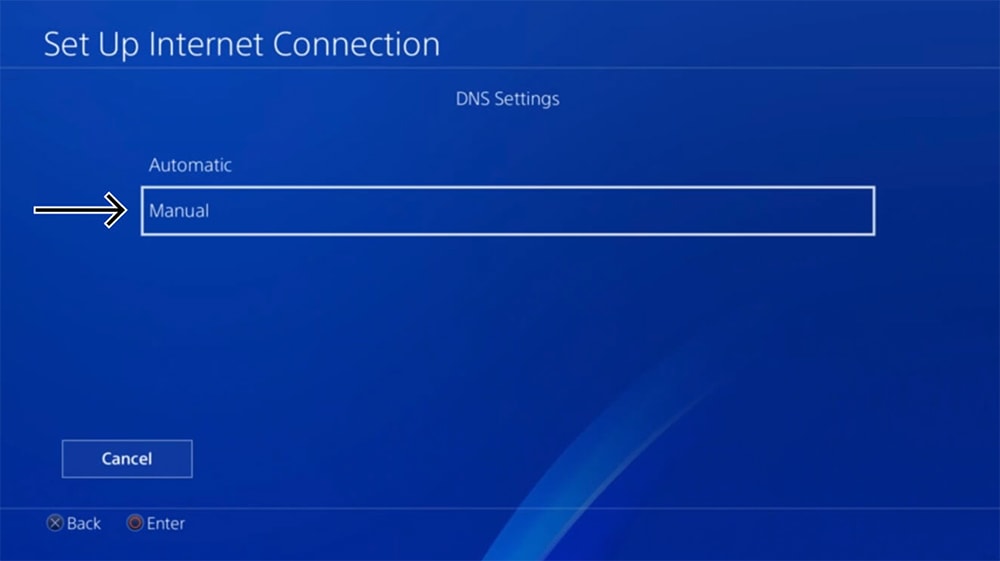
16. When asked about your DNS settings, pick 'Manual.'
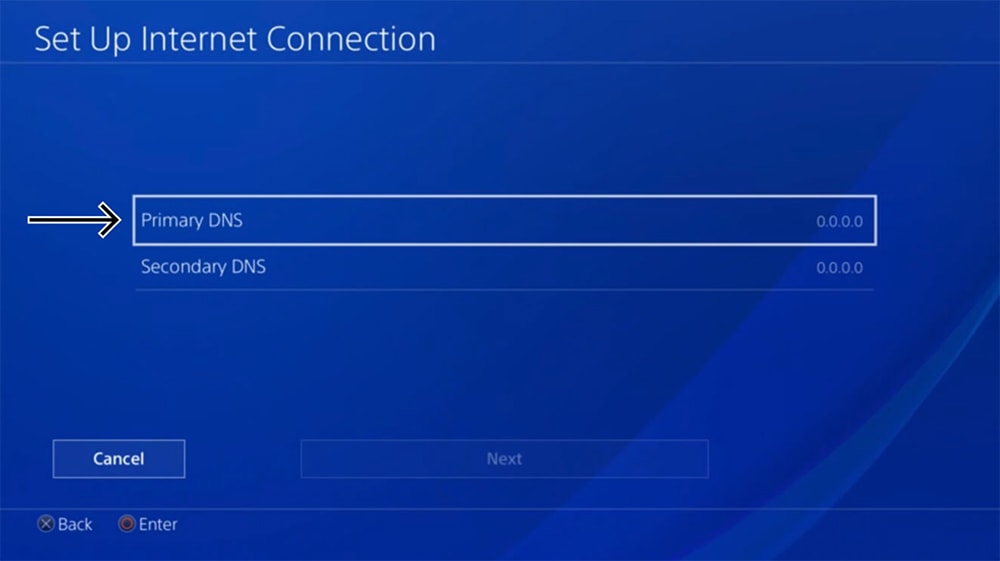
17. Select 'Primary DNS' and copy your DNS Server IP from ExpressVPN’s website.
18. Leave the secondary DNS as is – set to 0.0.0.0.
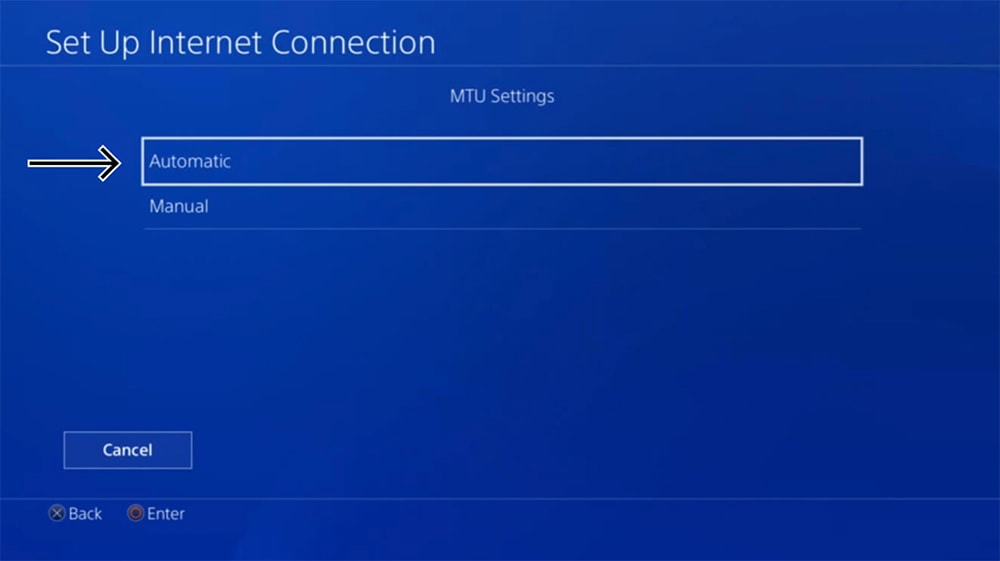
19. When it comes to MTU settings, you can pick 'Automatic.'
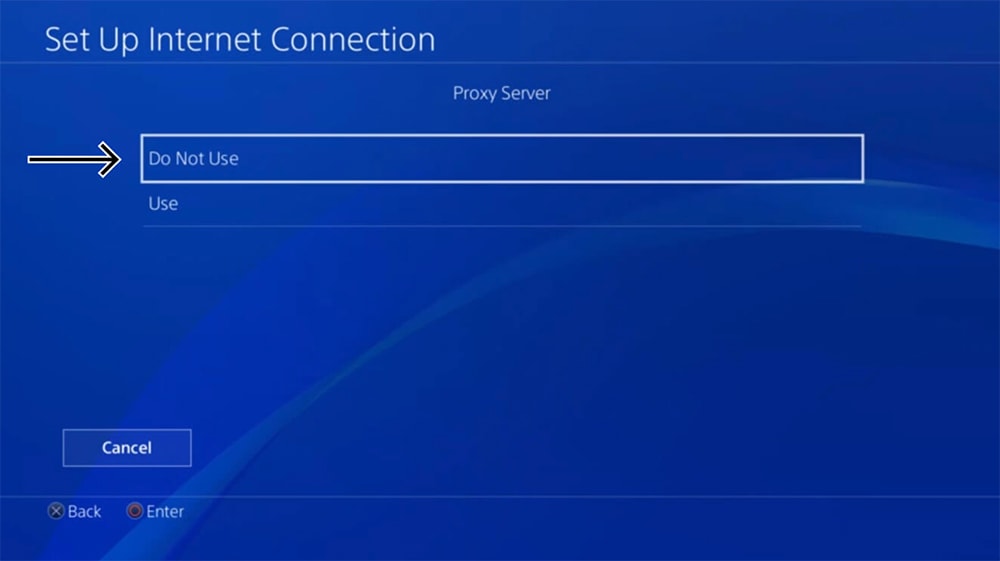
20. When it comes to a proxy server, pick 'Do Not Use.'
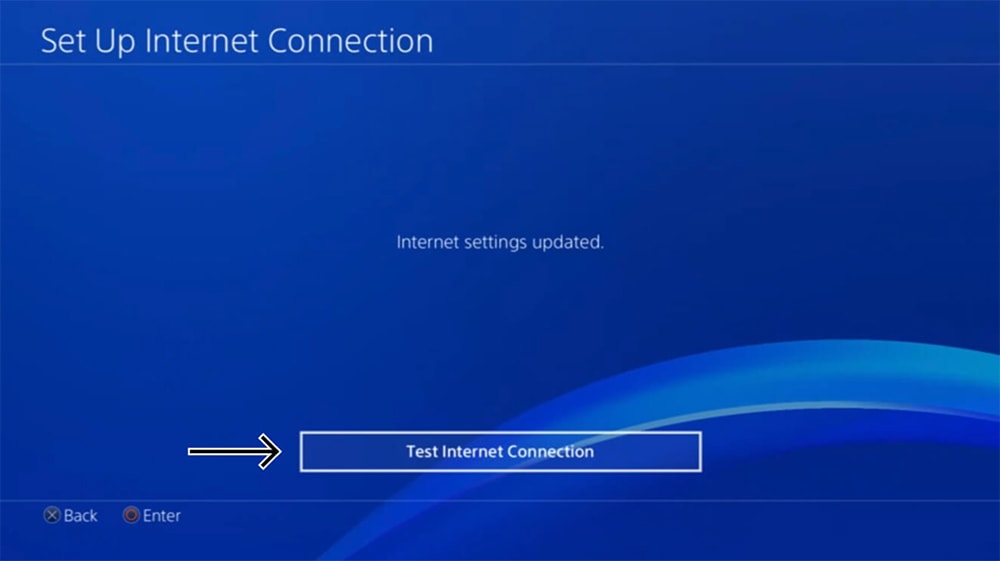
21. Select 'Test Internet Connection' and wait.
22. Hopefully, all will go without errors so that you can finalize this procedure.
23. Restart your PlayStation for the DNS changes to take effect.
Option #3: Set Up ExpressVPN on PlayStation 5
Since PlayStation 5 has a unique interface, you must use a different method to set up ExpressVPN on the PS5 console. Here's the guide you need to follow:
1. Get your ExpressVPN subscription using your computer and any Web browser.
2. Then, pick 'My Account' using the ExpressVPN website main menu (at the top).
3. Enter your email and password to reach your ExpressVPN account dashboard.
4. Click 'DNS Settings' and choose 'Register My IP Address.'
5. Don't forget to flip the switch next to 'Automatically Register My IP Address.'
6. Return to your ExpressVPN dashboard.
7. Go to Set Up Other Devices > PlayStation and note your MediaStreamer IP address.
8. On your PlayStation 5, go to Settings > Network > Settings > Set Up Internet Connection.
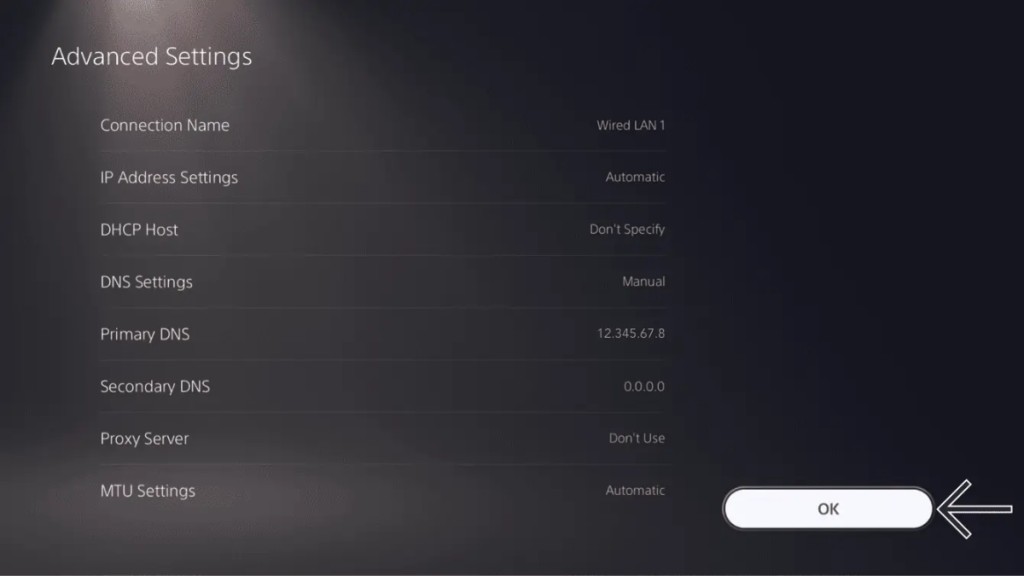
9. Pick your active network and select 'Advanced Settings.'
10. A new screen will appear, where you need to enter the following information:
- IP Address Settings: Pick 'Automatic.'
- DHCP Host: Pick 'Don't Specify.'
- DNS Settings: Pick 'Manual.'
- Primary DNS: Copy your MediaStreamer IP address.
- Secondary DNS: Leave it as it is.
- Proxy Server: Pick 'Don't Use.'
- MTU Settings: Pick 'Automatic.'
11. Save your settings, and you'll be taken to the 'Set Up Internet Connection' screen.
12. Restart your PlayStation 5 to apply the changes.
Final Thoughts
Even though you can't install ExpressVPN natively on a PS console, you get the next best thing. A VPN router can help you extend your VPN connection to your PlayStation and all the other devices in the household connected to that router. Also, ExpressVPN's MediaStreamer can help you unblock new content, giving you additional hours of fun on your PlayStation 5.
Just keep in mind that the MediaStreamer feature doesn't come with data encryption. So, it likely won't be able to keep your ping and latency in check. To get those features, as well as DDoS protection, you need to use the router-based installation method.
Furthermore, don't forget that ExpressVPN also works on many other devices and offers you up to 8 simultaneous connections. So, you may want to install and set up ExpressVPN on all its supported platforms and devices, which includes computers, phones, tablets, streaming devices, and more.
That would be all our team has prepared for you in this guide. If you have any questions for us, make sure to post your comment below. And finally – thank you for reading!


