When you purchase through links on our site, we may earn an affiliate commission. Here’s how it works.
How to Add and Install ExpressVPN Chrome Extension
ExpressVPN offers a highly advanced Google Chrome extension that works in a unique way. Instead of being a proxy, as practically all other VPN extensions are, the ExpressVPN Chrome extension is a gateway to ExpressVPN's native application. You can install it in a matter of seconds and gain access to high-end protocols, solid encryption, and thousands of servers in 105 countries.
The only requirement is to install ExpressVPN on Windows, macOS, or Linux first. Use the provided links to learn how that's done, and don't forget to activate your VPN. That means you must install the app, open it, and log in to your account.
In this article, we'll teach you how to set up ExpressVPN's Chrome Extension with a step-by-step guide.
How to Set Up and Use ExpressVPN Chrome Extension
As mentioned above, installing the ExpressVPN Chrome extension requires you to have its native app installed. These are the steps you need to take:
1. Sign up for ExpressVPN using your computer and any Web browser.
2. After signing up, click 'My Account' using the top-placed main menu on ExpressVPN's website.
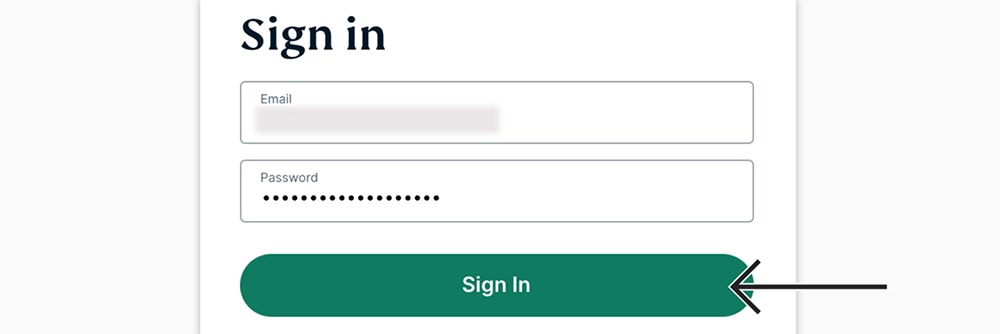
3. Provide your credentials and access your ExpressVPN account dashboard.
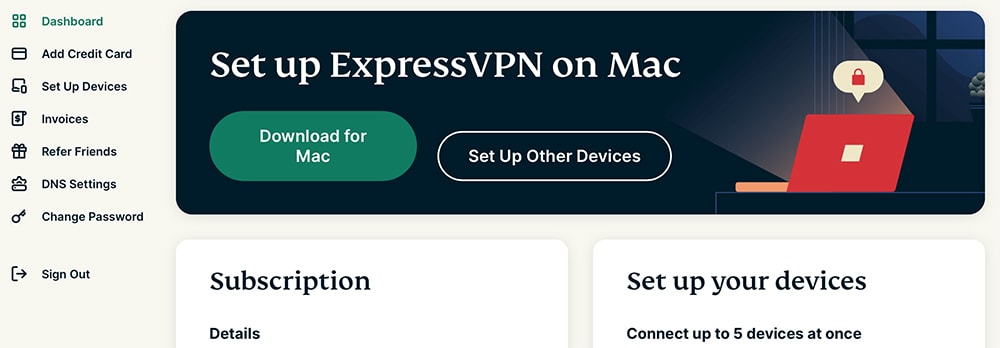
4. Click 'Set Up Other Devices' and pick 'Windows,' 'Mac,' or 'Linux' to download the VPN.
5. Install it like you'd install any other software on your computer.
6. Launch the application and select 'Sign In.'
7. Find your ExpressVPN activation code and copy it to activate the application.
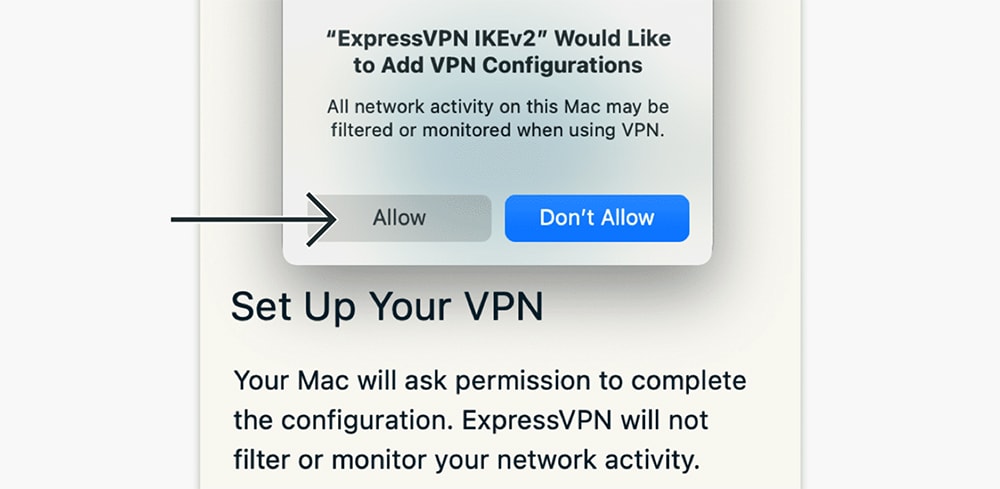
8. If asked to install a VPN profile or configuration, go ahead with 'Yes' or 'Allow.'
9. The VPN will ask you to launch on system startup; for that, you can pick 'OK' or 'No, Thanks.'
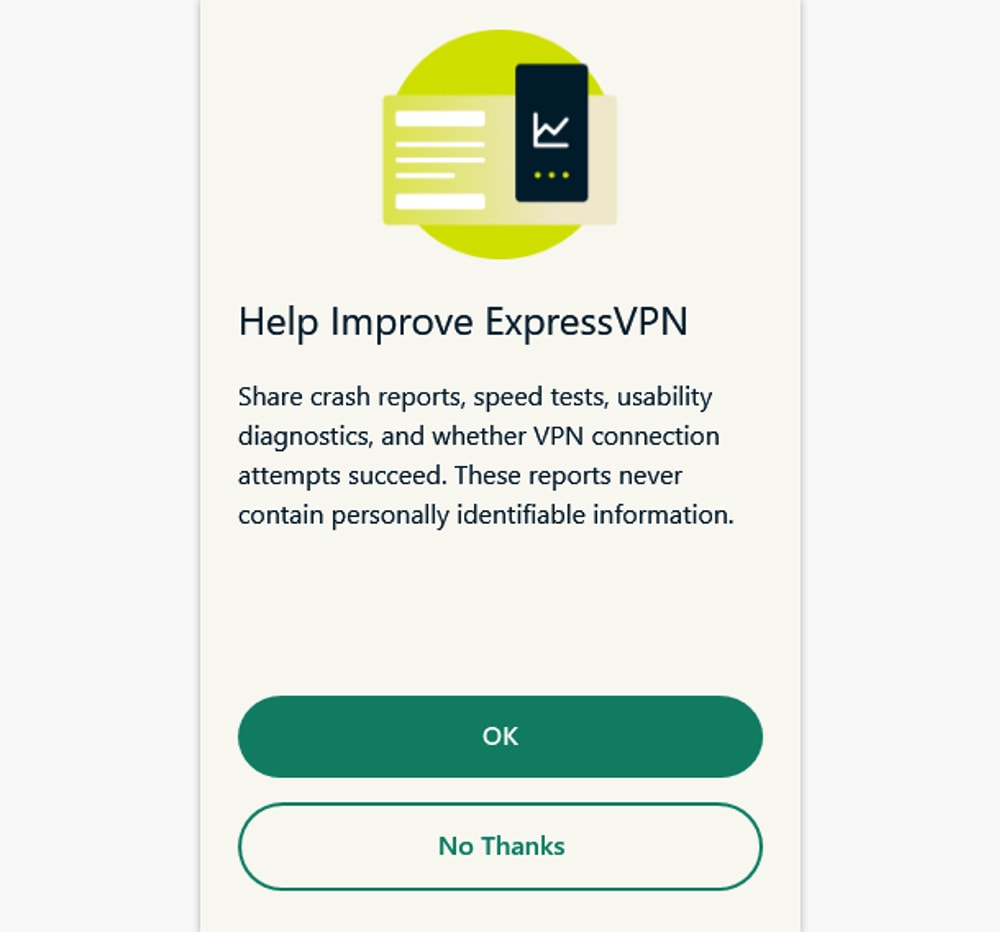
10. Pick 'OK' or 'No, Thanks' when asked about anonymous data logging.
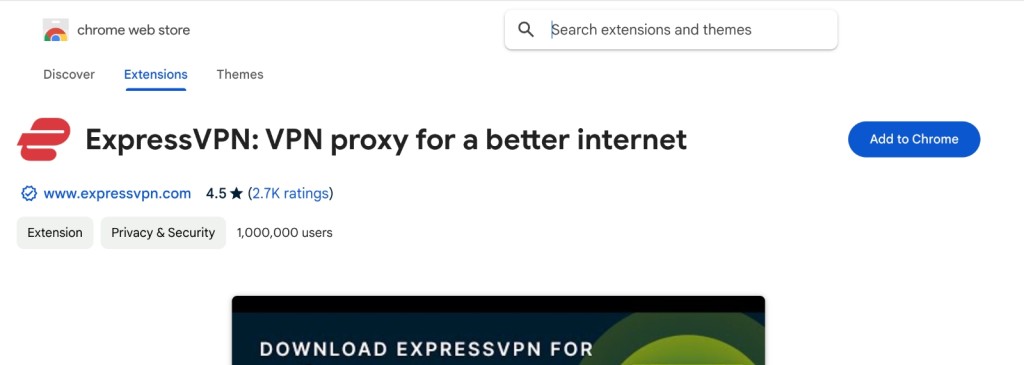
11. Using your Google Chrome browser, visit ExpressVPN's Chrome Web Store listing.
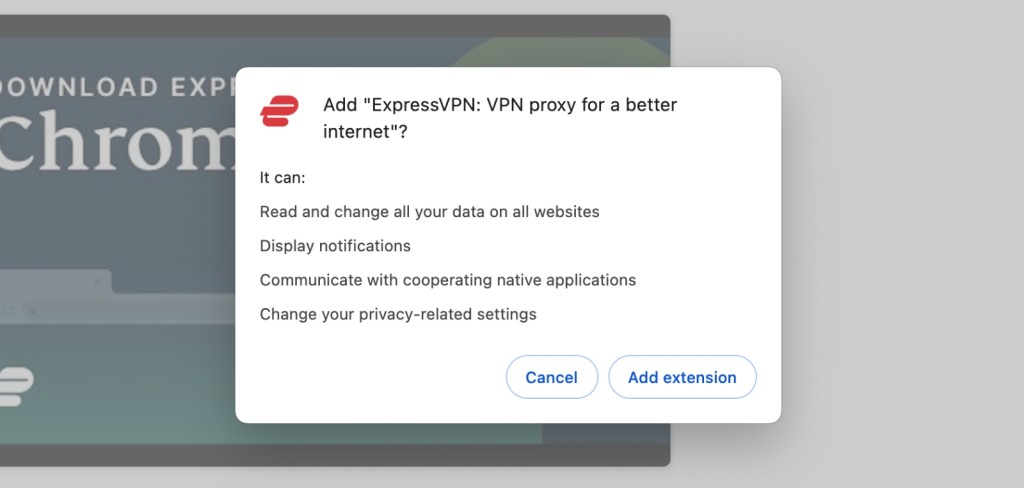
12. Select the 'Add to Chrome' button and confirm your decision when asked.
13. You'll now download ExpressVPN for Chrome, which will also install automatically.
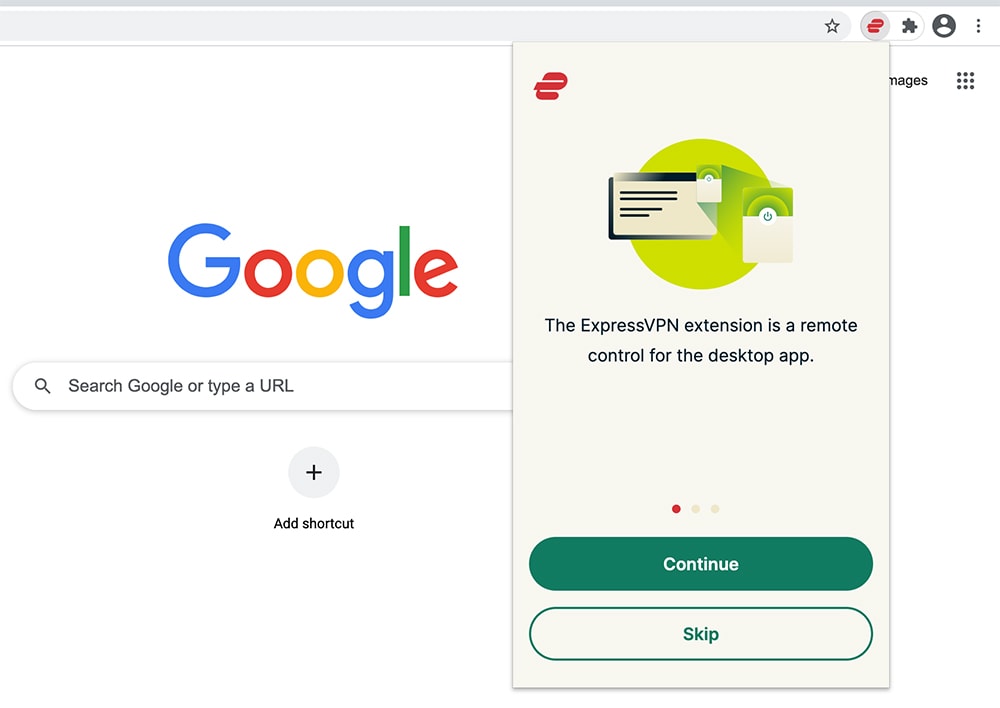
14. To access the extension, click the 'Extensions' button in the top-right corner.
15. Press 'Continue' several times to go through ExpressVPN’s setup guide.
16. If you haven't logged in to ExpressVPN, you will need to do that now.
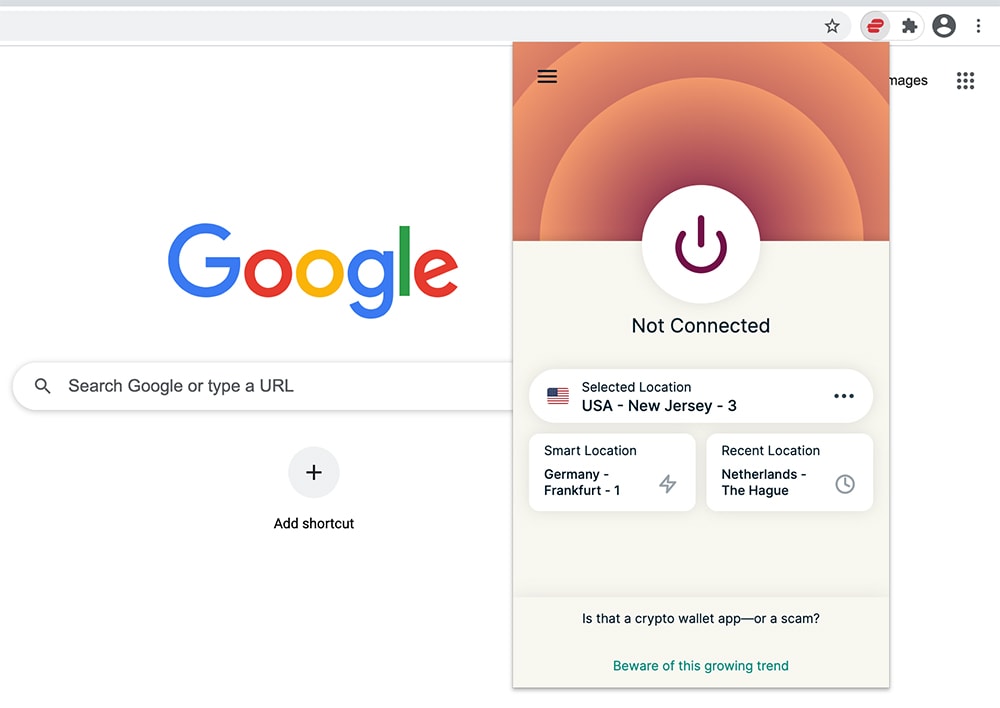
17. To connect to the nearest server, press the ON/OFF button (the UI will turn green).
18. To end your VPN session, press the ON/OFF button again (the UI will turn red).
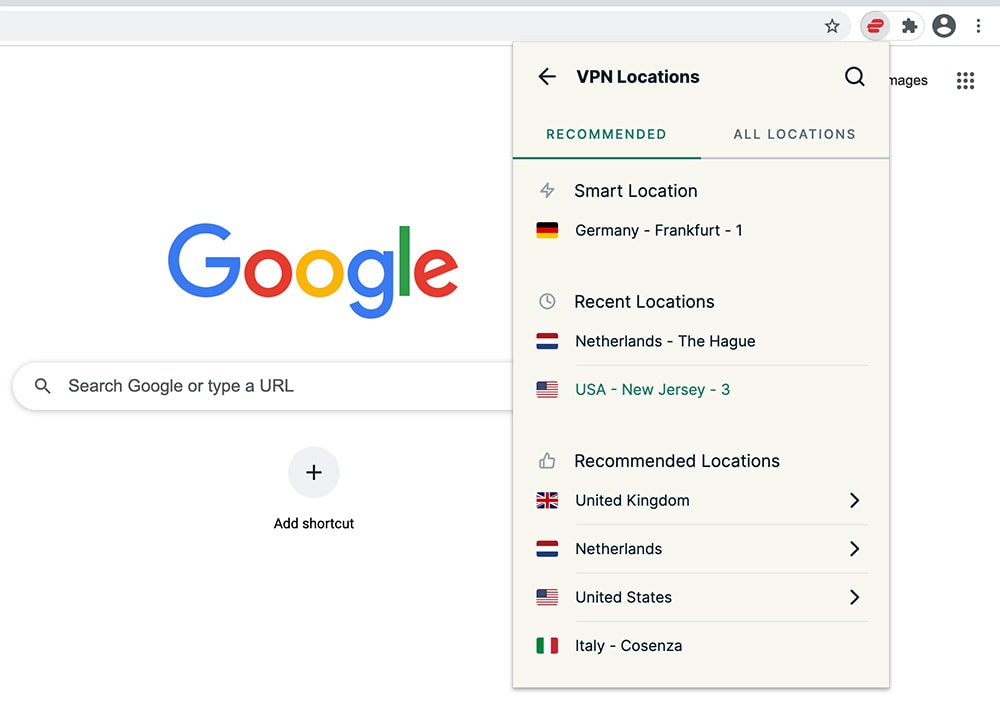
19. You can pick a server manually using the button below the ON/OFF switch.
20. Select any country or server name, and ExpressVPN will connect you automatically.
Final Thoughts
The ExpressVPN Chrome extension allows you to remote-control the ExpressVPN application. That means you'll protect your browser's data using highly sophisticated encryption (AES-256 or WolfSSL, based on your chosen VPN protocol), allowing you to secure your privacy, unblock websites, reach new streaming services, and more.
Also, you can use the ExpressVPN extension for Chrome on any Chromium-based browser (like Edge or Vivaldi, for example). Apart from that, you can set up ExpressVPN on over 60 devices and platforms. Use the provided link to learn more.
That would be all regarding how to install the ExpressVPN Chrome extension. If you have any doubts or questions, we're here to help – so make sure to post your comment below. Lastly, thank you for reading!


