When you purchase through links on our site, we may earn an affiliate commission. Here’s how it works.
How to Download, Install, and Use CyberGhost VPN on Synology NAS
Last updated June 14, 2024


If you're using Synology NAS to transfer or store files on your local network, CyberGhost VPN can help safeguard your data by encrypting it. However, you can only set up the default OpenVPN 2.3 UDP or OpenVPN 2.3 TCP protocols. Among these, TCP is more stable than UDP but relatively slower.
Also, note that CyberGhost VPN doesn't support certain Synology NAS devices. You can only configure a VPN if your device allows you to create VPN profiles and set up OpenVPN connections. To learn more about this, you can check your NAS device's manual.
In this article, we'll teach you how to set up CyberGhost VPN on Synology with detailed instructions.
How to Set Up and Use CyberGhost VPN on Synology NAS
To use CyberGhost VPN with Synology NAS, you first need to download the OpenVPN configuration files from your VPN's account dashboard and then update your Synology settings. Here's a step-by-step guide:
1. First, sign up for CyberGhost VPN using a computer and your preferred Web browser.
2. Go back to CyberGhost VPN's account login page and enter your Username and Password.
3. In your account's dashboard, navigate to 'VPN' > 'Configure Device' from under 'Manual Setup.'
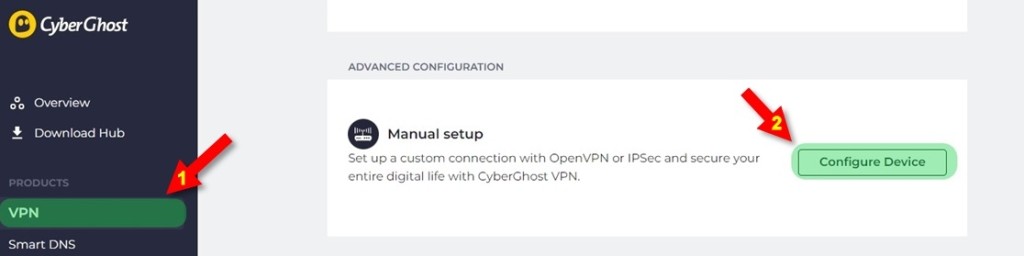

4. Click on the 'Configure' button.
5. Now, fill in the below details as mentioned:
- PROTOCOL - OpenVPN 2.3 or OpenVPN TCP 2.3
- COUNTRY - Select your preferred location
- SERVER GROUP - Choose the available server group (UDP/TCP)
- DEVICE NAME - OpenVPN NAS Synology
- EXTRA FEATURES - Tick all the boxes
6. Now, hit the Save Configuration button.

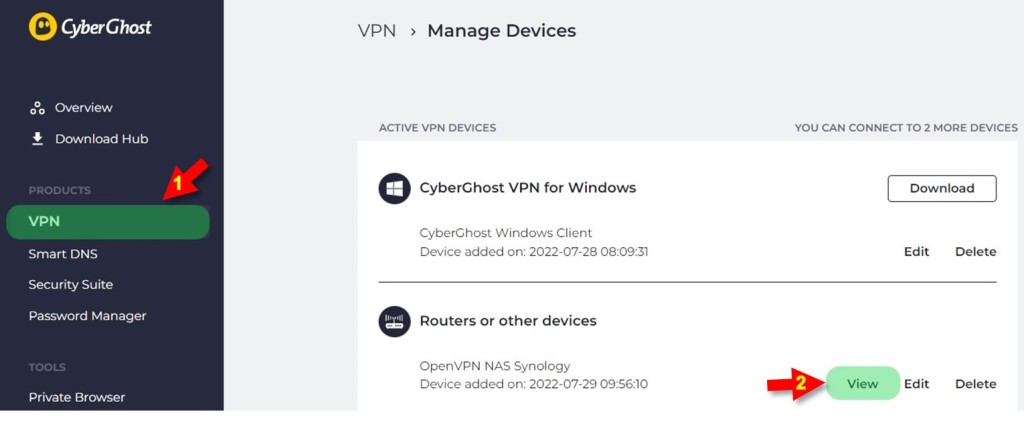
7. You'll be redirected to the Manage Devices page.
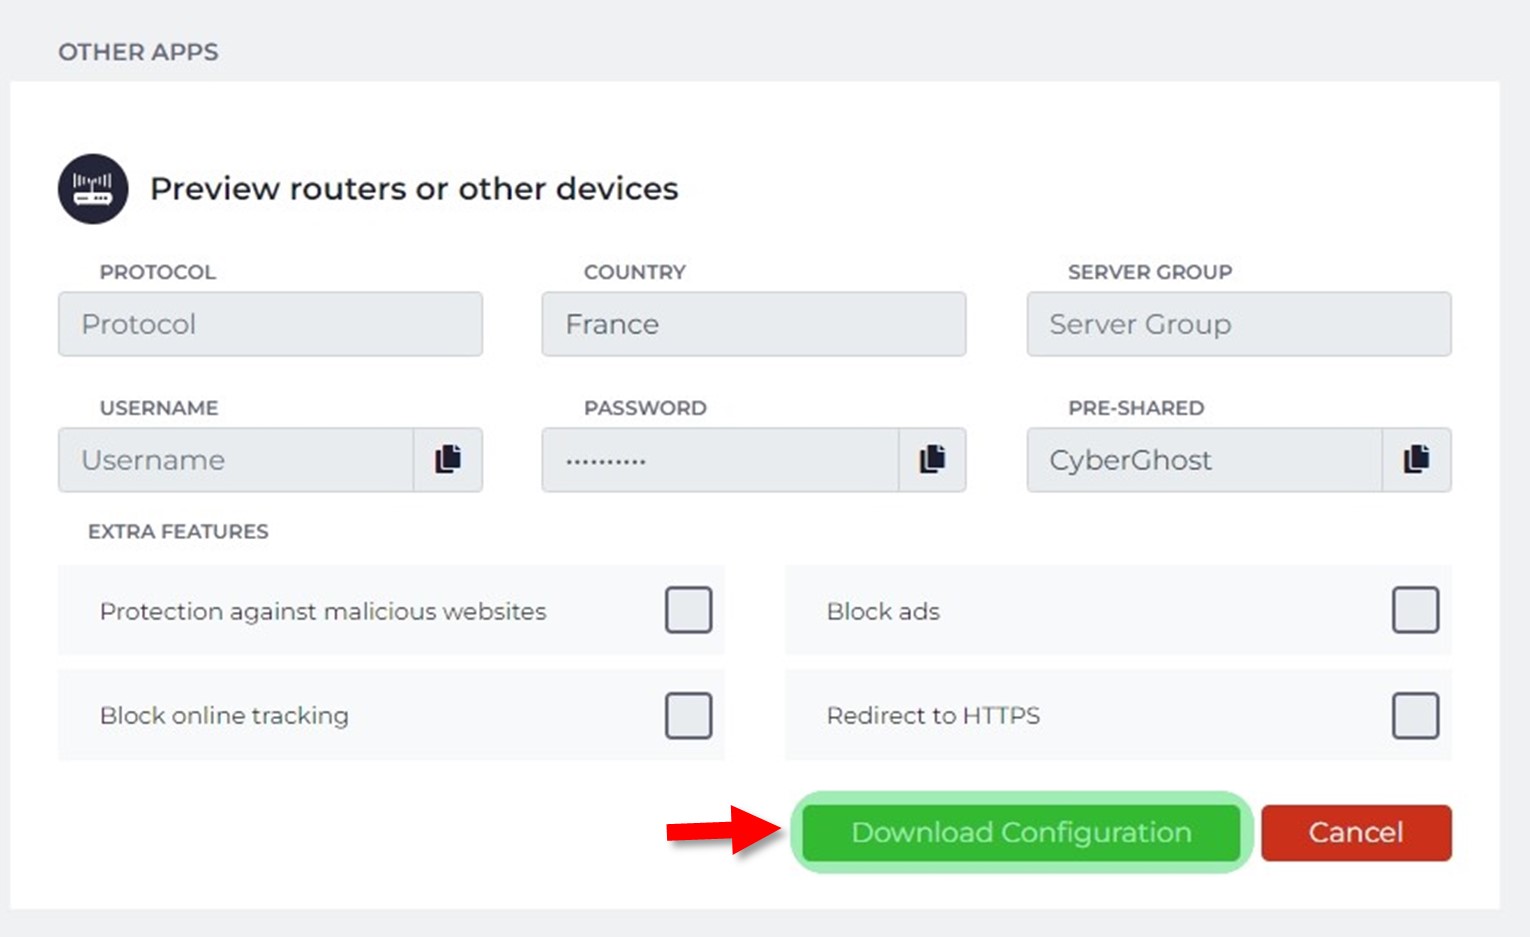
8. Click on 'View' under 'Router or other devices.'

9. Note your OpenVPN credentials (Server Group, Username, and Password) for future use.
10. Now, hit the 'Download Configuration' button.
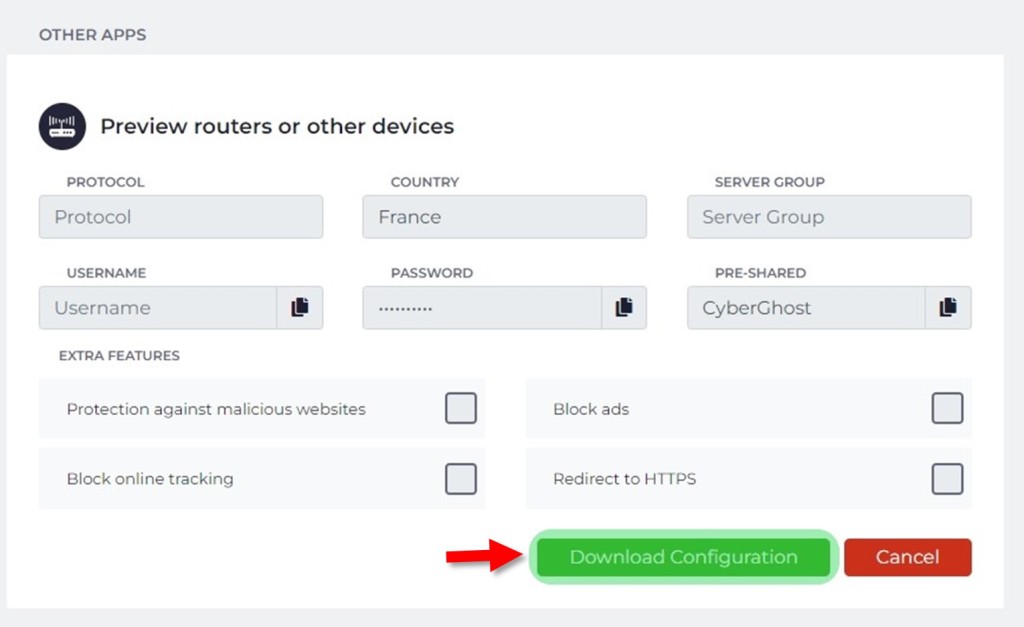
11. A .zip file will get downloaded now on your system; extract it to get the below documents:
- ca.crt - Server security certificate
- client.crt - Client safety certificate
- client.key - Key file
- openvpn.ovpn - OpenVPN configuration file
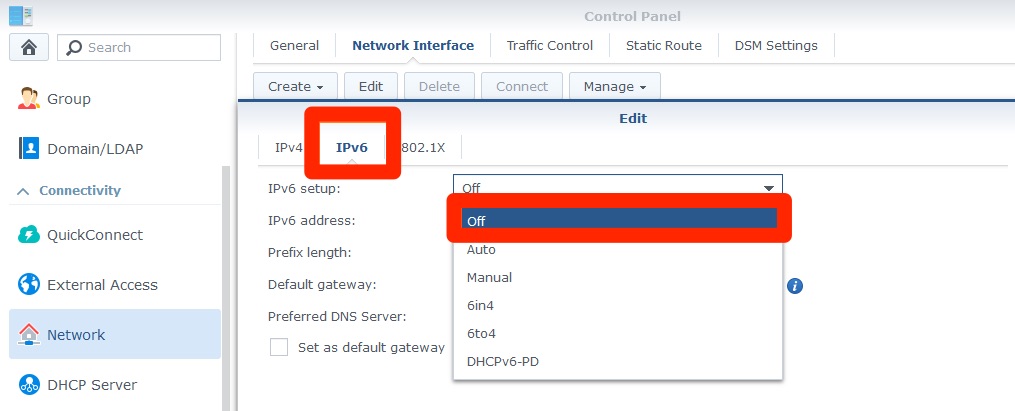
12. Now, disable IPv6 on your NAS device by following this path: 'Control Panel' > 'Network' > 'Network Interface' > 'LAN' > 'Edit' > 'IPv6' > 'Off' > 'OK.'
13. Next, reboot your Synology.
14. After that, create a new VPN profile by going to 'Control Panel' > 'Network' > 'Network Interface' > 'Create' > 'Create VPN Profile.'
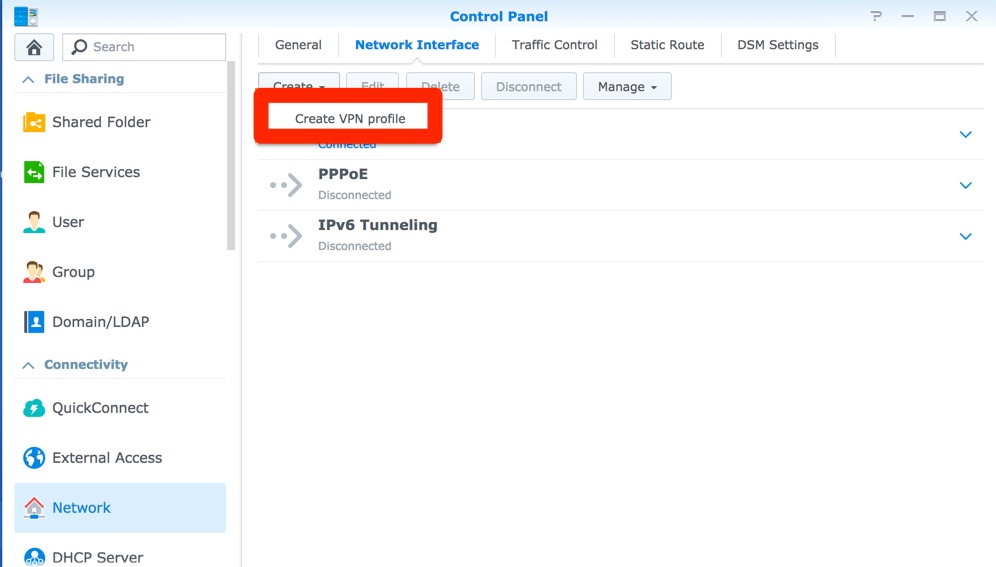
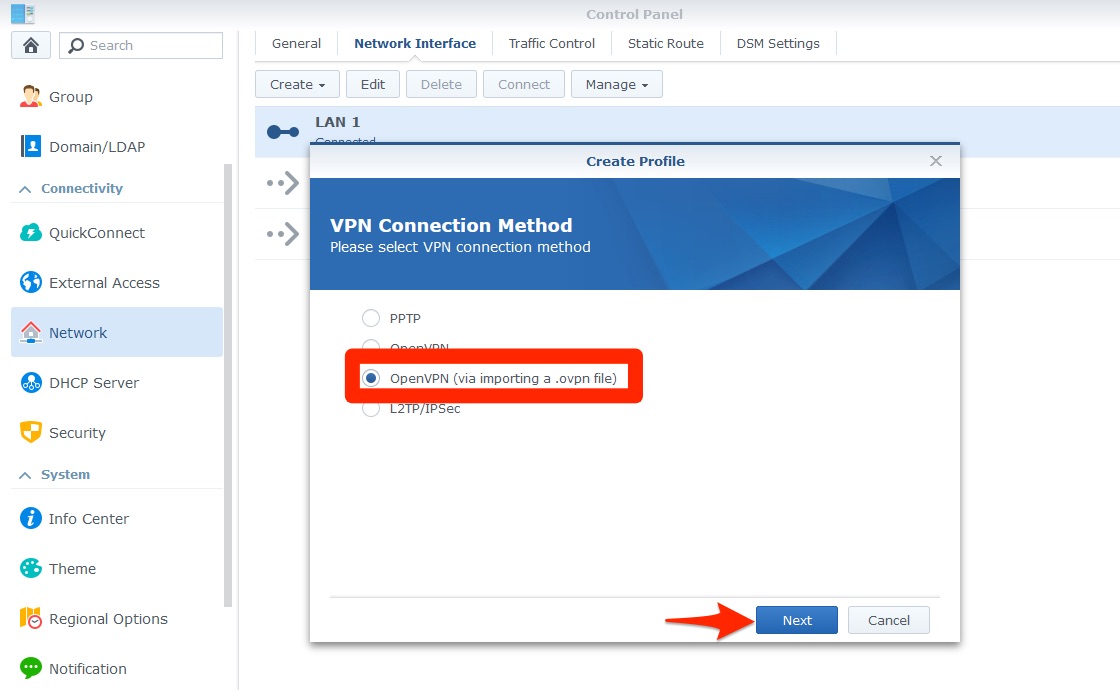
15. Click on Create VPN Profile and choose 'OpenVPN (via importing a .ovpn file)' > 'Next.'

16. Now, the General Settings screen will appear, where you have to fill in the following details:
- Profile name: Anything you want
- User name: Enter the user name that you've obtained from the configuration preview
- Password: The password should be the one shown in the configuration preview
- Import .ovpn files: Import the .ovpn file
- CA certificate: Import the file ca.crt
- Client certificate: Import the file client.crt
- Client key: Import the file client.key
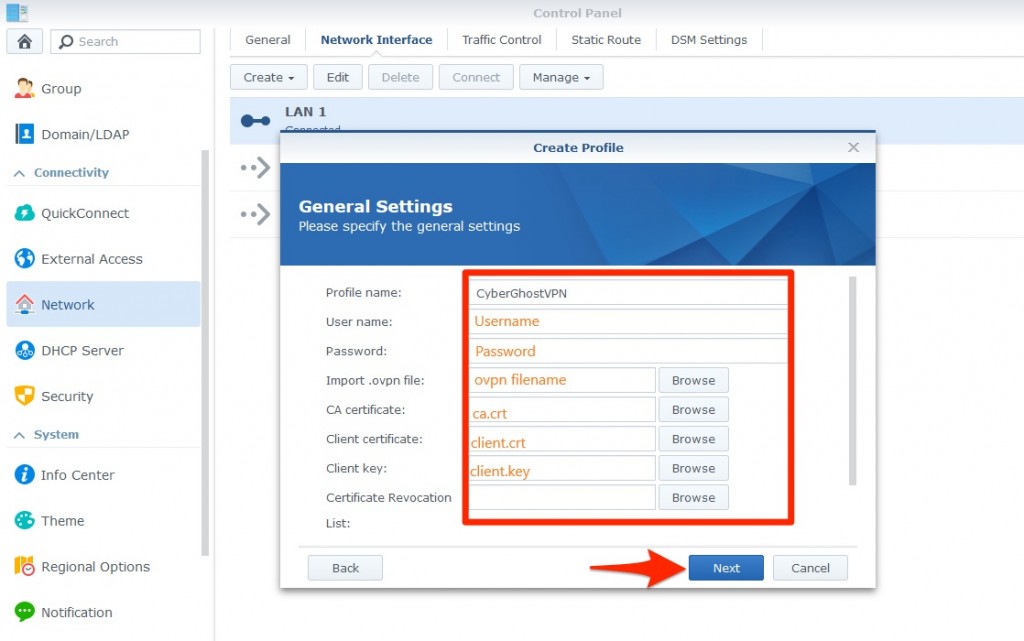

17. Once done, hit the 'Next' button.
18. On the next screen, check the following boxes:
- Use default gateway on a remote network
- Reconnect when the VPN connection is lost.
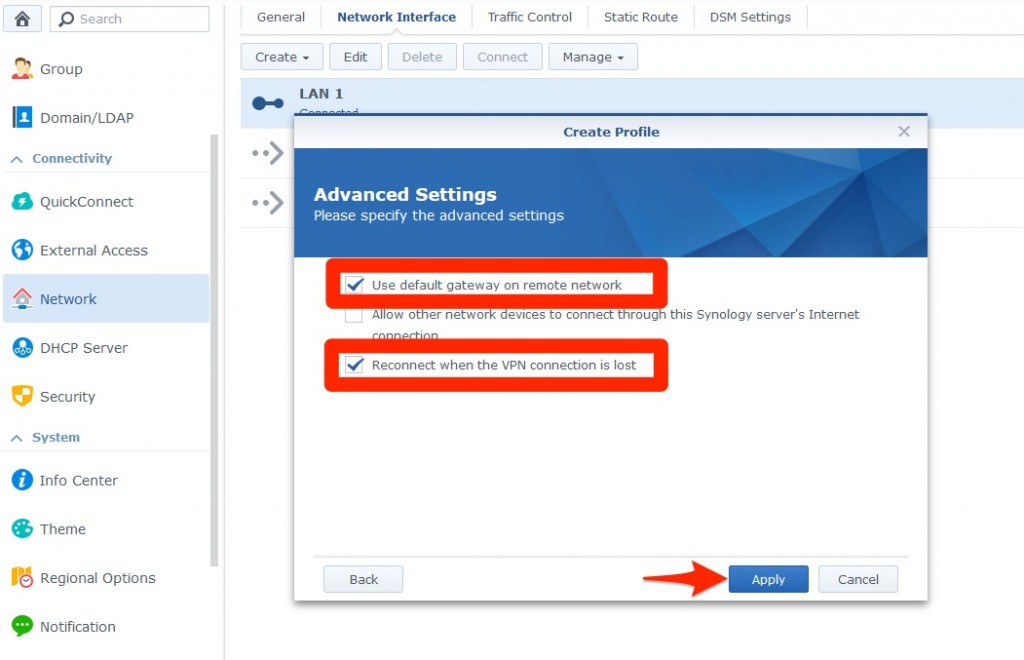

19. Now, hit the 'Apply' button to continue further.
20. Next, click on your new VPN profile in the Network Interface window and hit the 'Connect' button.
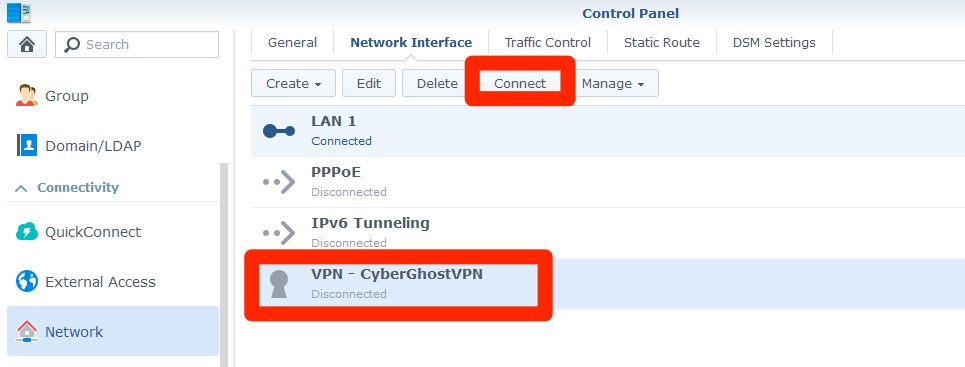
21. Finally, the status of your VPN profile will change from Disconnected to Connected.
Final Thoughts
While installing CyberGhost VPN on Synology NAS may appear to be a complex process, it is rather straightforward and can be completed within 5 minutes. It is also a one-time configuration process, using which you can secure your files and data with AES 256-bit encryption.
However, you will have to reconfigure it every time you want to change a server. Also, in certain situations, you may want to connect to CyberGhost VPN natively on your device. For that, take a look at our complete guide on how to install and set up CyberGhost VPN on a wide range of devices.
That's all! Now you know how to download, install, and use CyberGhost VPN on Synology NAS. If you want to share your experience with us, feel free to comment below. Thanks for reading.
Related