When you purchase through links on our site, we may earn an affiliate commission. Here’s how it works.
How to Set Up and Use CyberGhost on Enigma2
Enigma2 is a hugely customizable DVB device, so it's no surprise that it's compatible with VPN services. It's powered by Linux, which means that CyberGhost offers full support. More precisely, you can set up CyberGhost on Enigma2 by configuring an OpenVPN connection.
As a result, your Enigma2 traffic will be encrypted and kept private. In addition, CyberGhost will allow you to unblock new content on your DVB device, adding a whole new dimension to your entertainment.
In this guide, we'll show you how to configure CyberGhost VPN on your Enigma2 DVB device. We'll explain everything in depth, as the following procedure isn't the simplest one.
How to Set Up CyberGhost on Enigma2 DVB
You'll need to obtain a CyberGhost subscription, set up a manual OpenVPN connection via the VPN's website, and then upload the required files to your Enigma2 device. Just follow these steps:
1. Sign up for CyberGhost using a Web browser on your computer.
2. Visit the CyberGhost website and click 'My Account' in the top-right corner of your screen.
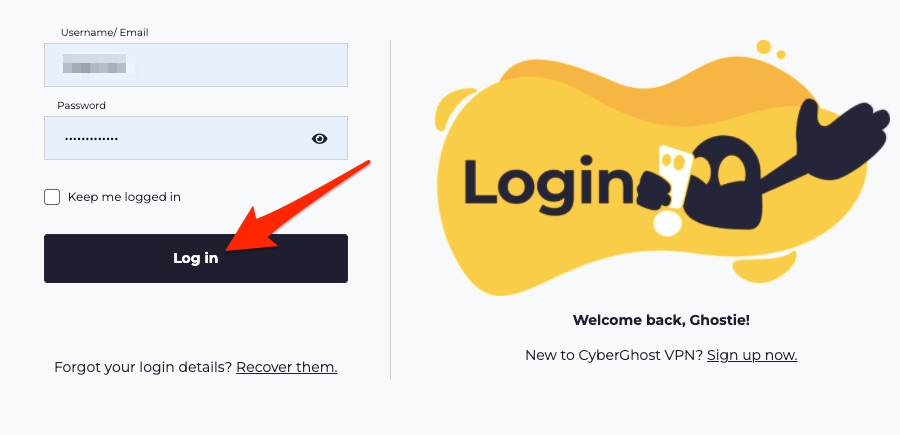
3. Enter your username and password on the next screen and hit the 'Log in' button.
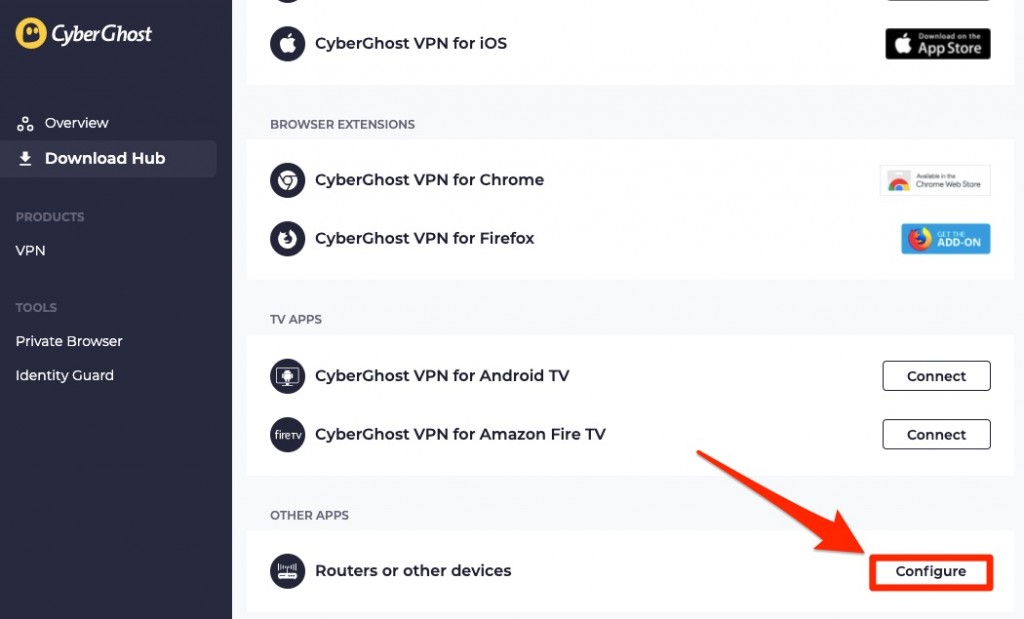
4. Locate 'Routers or other devices' and hit the 'Configure' button.
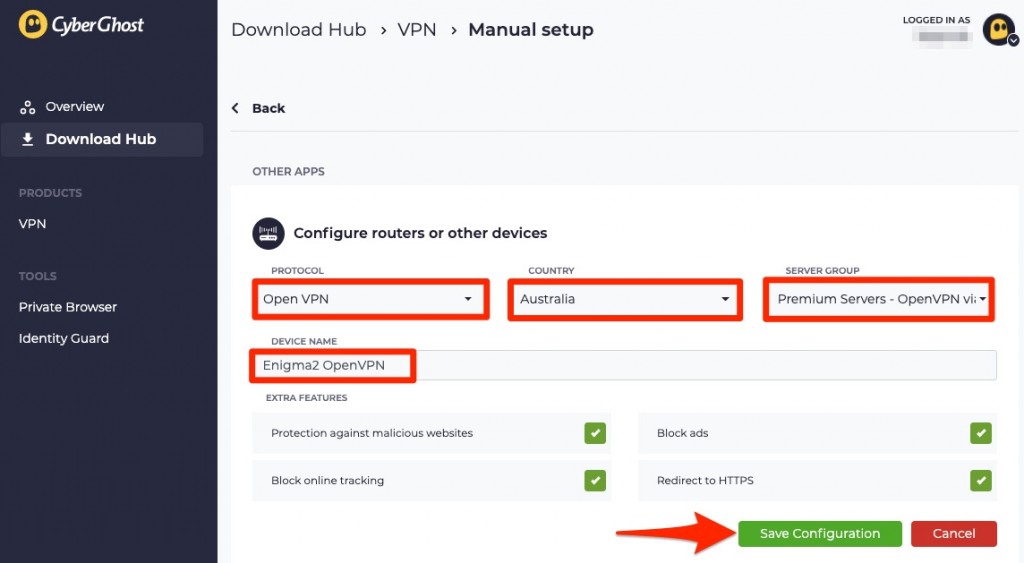
5. Now, fill in the details as mentioned below:
- PROTOCOL: OpenVPN.
- COUNTRY: Your preferred location.
- SERVER GROUP: Any of the available options (UDP/TCP).
- DEVICE NAME: Enigma2 OpenVPN.
- EXTRA FEATURES: Tick all the boxes.
6. Next, click the 'Save Configuration' button.
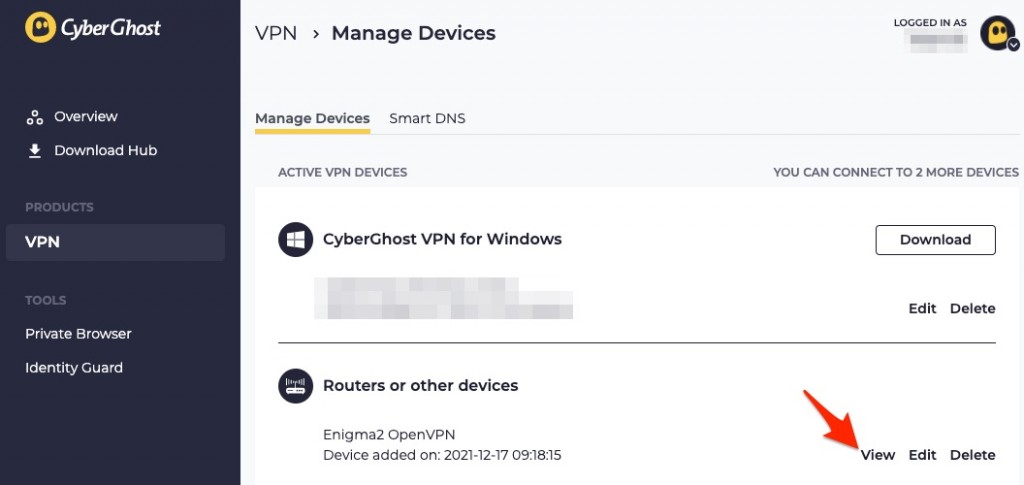
7. You'll be redirected to the Manage Devices page now. Find 'Routers or other devices' and click the 'View' option located beside Enigma2 OpenVPN.
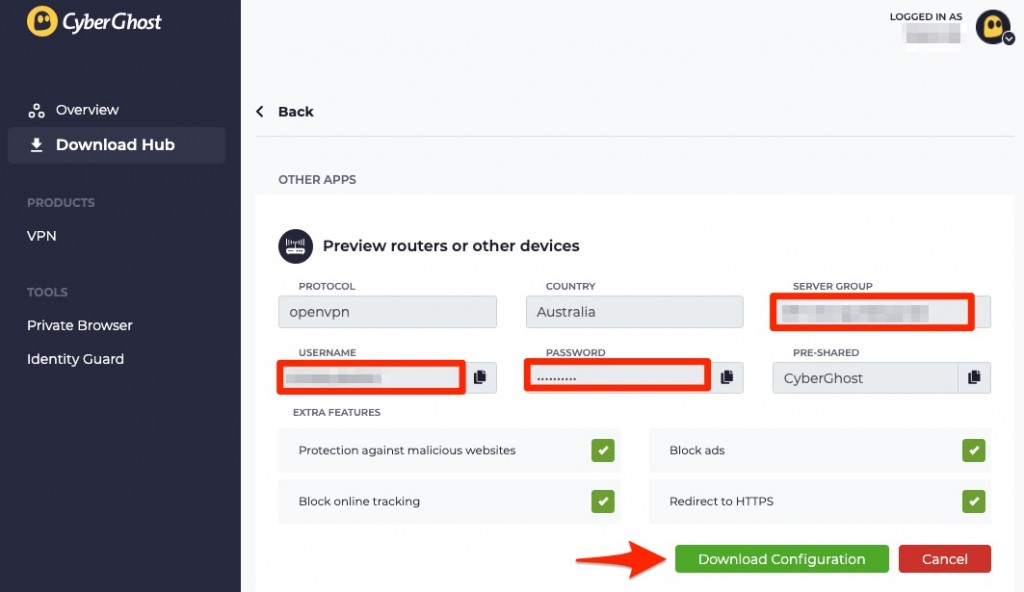
8. Note your username, password, and server group.
9. Hit the 'Download Configuration' button next. A .zip file will download on your system.
10. Once done, extract it to get the below entries:
- ca.crt - Certificate by the certification authority.
- client.key - Private key.
- client.crt - The user certification file.
- openvpn.ovpn - Complete OpenVPN configuration.
11. Now, rename the 'openvpn.ovpn' file to 'CyberGhost.conf.'
12. Open Terminal on your computer and enter the below command to save your username and password in the pas.key file.
sudo nano pas.key13. Then, type in your credentials, the ones you noted from your online account.
Username
Password
14. Save the changes with CTRL+O and exit the editor by pressing CTRL+X.
15. Now, open the configuration file by entering the below command:
sudo nano CyberGhost.conf16. Extend the 'auth-user-pass' command with your credentials file's location; it should look like this:
[...]
auth-user-pass /etc/openvpn/pas.key
[...]
17. Connect your device with Telnet and type in the following command:
opkg install openvpn18. The setup process will be finished; reboot your device. Then, connect through FTP or SSH.
19. Create a folder named 'openvpn' in the '/etc/' path.
20. Copy the CyberGhost.conf file along with all certificates and pas.key files into the OpenVPN folder on your Enigma2.
21. When done, follow the below path to start the OpenVPN connection: Menu > Setup > System > Network > OpenVPN Setup > Green To Start OpenVPN.
Final Thoughts
As you can see, setting up CyberGhost VPN on your Enigma2 isn't the simplest procedure out there. However, your effort will pay off. As soon as your VPN connection goes live, you'll get complete data privacy, as well as the ability to unblock new content on the Web.
Aside from Enigma2, CyberGhost works on a whole slate of other devices. That said, we have a guide on how to set up CyberGhost, where you can learn how to get started on Windows, macOS, Linux, Android, iOS, routers, and plenty more.
That's all for our guide on configuring CyberGhost on Enigma2. If you have any questions, let us know in the comments section below. Thanks for reading!

