When you purchase through links on our site, we may earn an affiliate commission. Here’s how it works.
Channel PEAR Kodi Addon Lets You Watch 100s of Live TV Streams in 2019!
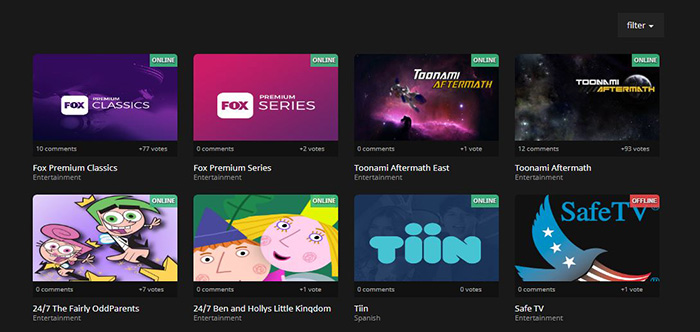
Channel PEAR is a popular website that lets you watch TV channels and different kinds of live streams. As you can imagine, this goes hand-in-hand with Kodi’s capabilities. Instead of using Channel PEAR’s website, you can import your data and enjoy personalized content on Kodi. For this to happen, you need to ‘connect’ these two applications. Let’s take a look at how to install Channel PEAR Kodi addon.
All You Need To Know About Channel PEAR Kodi Addon in 2019
Before we proceed, let’s take a look at what is this online streaming service. As you’ll see on its official website, this is a media platform. It allows developers to easily integrate media streams with different applications. As such, it is fully compatible with any desktop and mobile operating system, as well as with devices such as Amazon Fire TV, Roku, and Kodi.
By using a free-of-charge account, you can watch up to five channels of your choosing. Premium-priced plans range from $2.99 per month, up to $25.99 per year. All of the premium accounts are the same and they allow you to add unlimited media sources to your library. The only difference is how long they last.
We are going to teach you how to easily integrate Channel PEAR with your Kodi in 2019. All you need to do is to download a ZIP file and use Kodi to install it. However, this isn’t where this process ends. Unlike similar addons, you need to make certain customization before you can use it.
12 Steps to Install Channel PEAR Addon on Kodi
As said previously, the Channel PEAR Kodi addon brings a somewhat unique type of installation. To make it easy for you to install this addon, you’ll find a step-by-step guide below. In addition, we have included helpful screenshots to help you to find your way around the guide. Let’s begin.
- First, you need to download this ZIP file to your computer. Once you download it, make sure to leave it – do not unzip it;
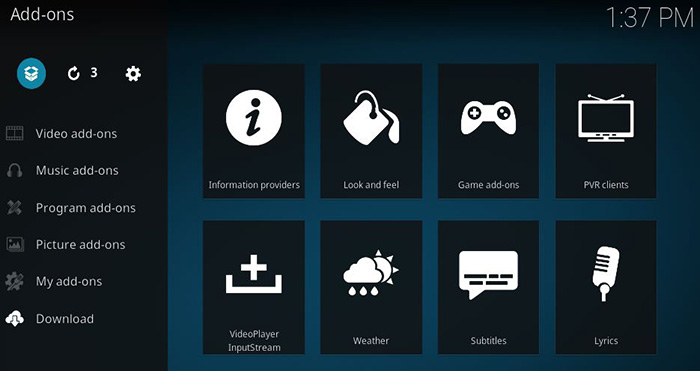
- Now open Kodi and click on ‘Add-ons’ in the main menu;
- Next, click on the open box icon (top-left corner);
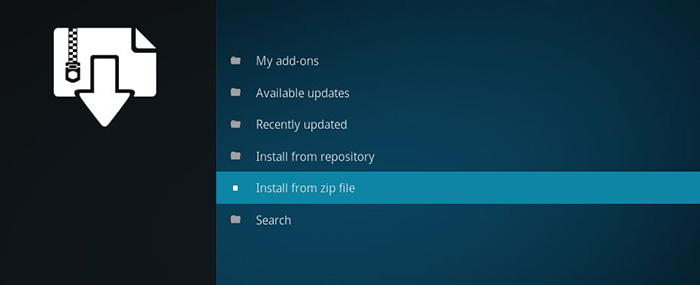
- Select ‘Install from ZIP file’;
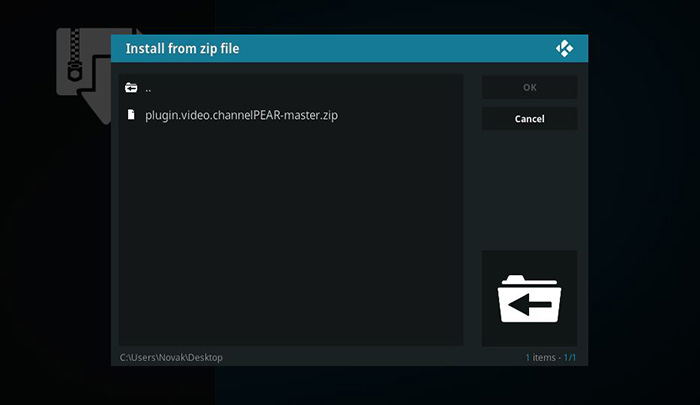
- A pop-up will appear. You need to navigate to the ZIP file you’ve previously downloaded. For example, Windows users will need to go to C: > Users > Your User Name. You will find the file in the ‘Desktop’ or ‘Downloads’ folder. Mac users will find this file in the Downloads folders (/Users/Your User Name/Downloads);
- Once you find the ZIP file, click on it;
- After a few seconds, you will see that Channel PEAR has been installed.
That’s it! You’ve installed the Channel PEAR Kodi addon. You can find and open it by going to the ‘Add-ons’ section of Kodi. Still, this isn’t where this process ends. We need to associate your username with this addon. Let’s continue;
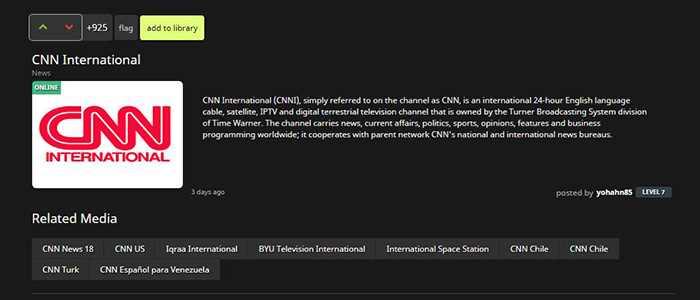
- If you don’t have an account, sign up at Channel PEAR’s website;
- Once done, proceed to Media DB > Most Recent using the website’s navigation bar;
- Now open any of the available choices;
- Once opened, click on the ‘Add to Library’ button. You can add up to five media sources;
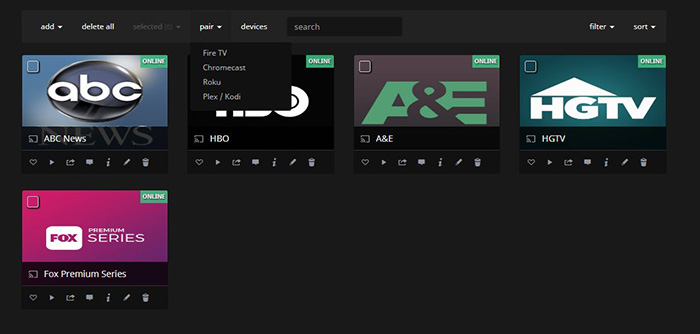
- Now click on ‘Library’ in the website’s navigation bar;
- Select Pair > Plex/Kodi;
- A pop-up will appear with your library URL. Make sure to copy this Web address;
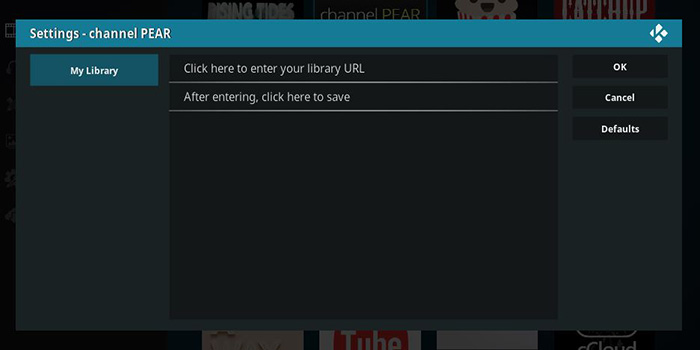
- Return to Kodi and find the Channel PEAR Kodi addon. However, do not open it. Instead, right-click and select ‘Settings’;
- Using the newly opened pop-up, enter your library URL and then save it.
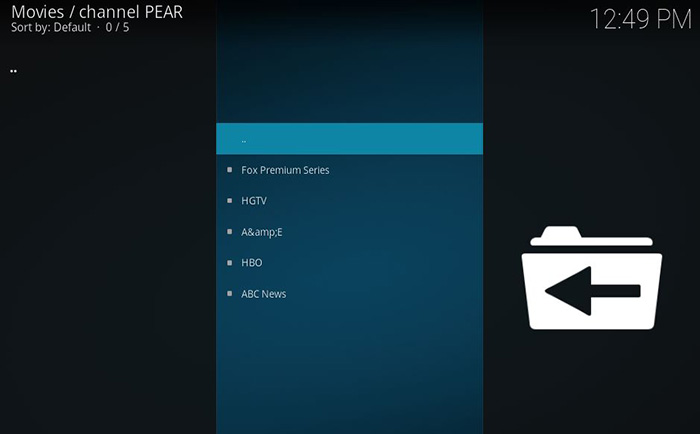
- Feel free to open the addon. You should see your library successfully imported. Enjoy!
What to Expect from Channel PEAR Addon?
Once you add your library to the Channel PEAR Kodi addon, there isn’t much to do. Even though it comes with a somewhat complicated installation method, this addon is incredibly simple to use.
After adding your library, you will see a simple list of entries. Click on any of these and that media source will start playing in an instant.
Alternative to Channel PEAR Addon
We are sure that Channel PEAR will be here for a while. Still, this isn’t the reason not to try alternatives. The world of Kodi addon is a highly active one, where interesting options can be found on a daily basis. Let’s take a look at some of them:
- When it comes to big-name addons, you can’t go wrong with Maverick TV and Midian. Both of these offer on-demand content and live-streaming links;
- We shouldn’t forget about some of the recently released addons. Even though they are not as popular, they still deserve your attention. Some of the notable options are USTVCatchup and FilmON Simple.
We hope you’ve found our guide to the Channel PEAR Kodi addon to be useful. In case you’re encountering installation issues, don’t hesitate to let us know. You can use the comments section below to talk to us.
Also, feel free to share this article on social networks like Facebook and Twitter. Let’s reach as many Kodi users as we can. Thanks!

