
When you purchase through links on our site, we may earn an affiliate commission. Here’s how it works.
How to Add a Repository to Kodi
Last updated March 6, 2025


Aside from using Kodi's official repository, which comes built-in, you can find countless excellent Kodi repositories online. They usually come as ZIP files and require manual installation. Once you add them to the application, you can access their content and install third-party add-ons. As such, they offer a great way to expand Kodi's capabilities and reach additional streaming sources.
This guide will show you how to add a repository to Kodi, and we'll take you through the entire procedure one step at a time. Of course, expect helpful screenshots to make this process as easy as possible, and we'll also share some useful tips.
Guide to Installing a Repository on Kodi
Once you find a repository you'd like to add to Kodi, you'll need to use the application's file manager to add that specific source. Then, you'll access that source through Kodi and install the repository, which is when you can start installing individual add-ons. These are the steps you need to take:
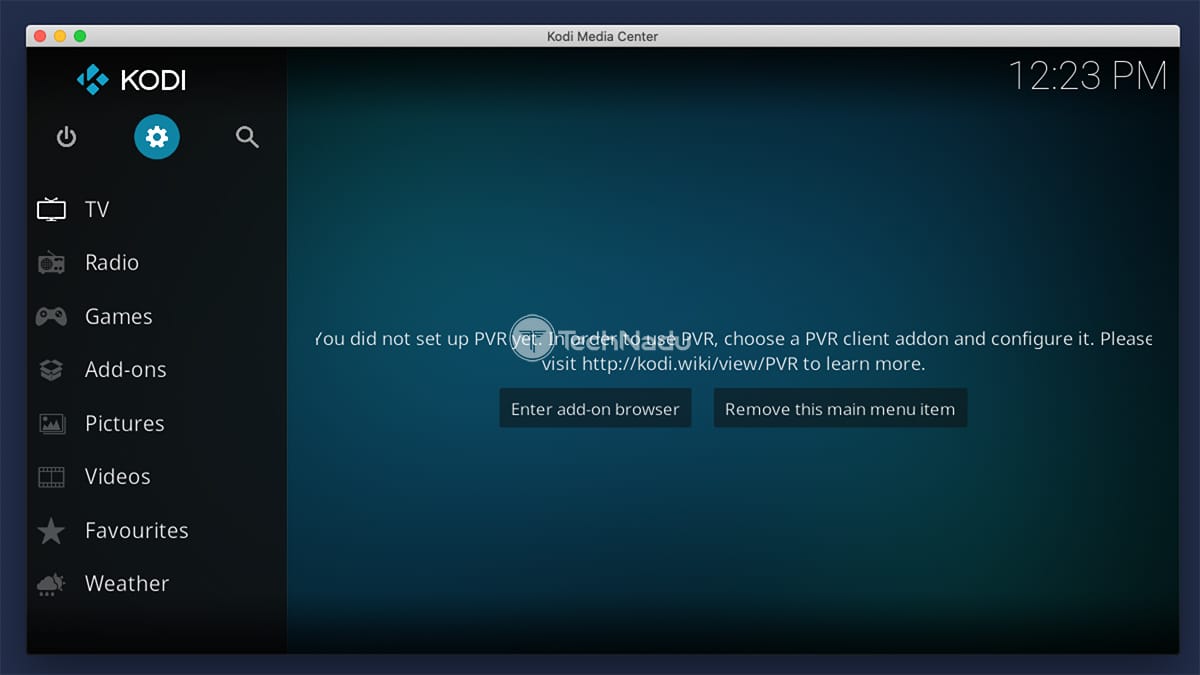
1. Launch Kodi and click the cogwheel icon (top-left corner) to access its settings.
2. In the top-left corner, you'll see an icon named 'File Manager.' Click on it.
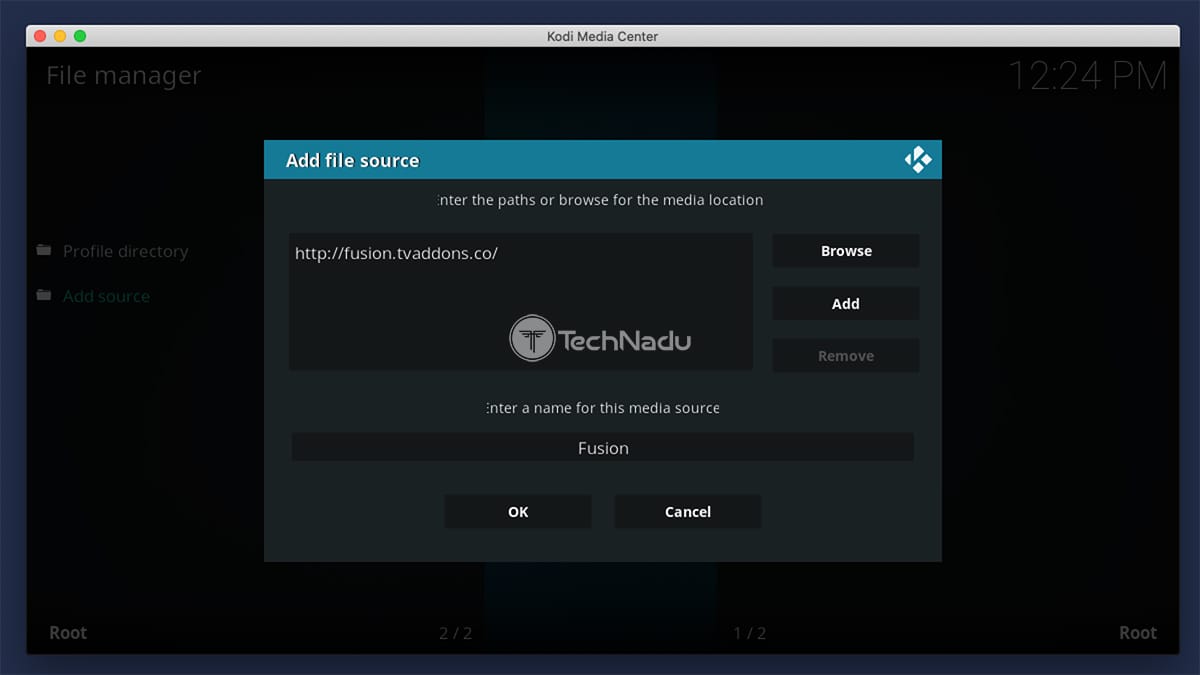
3. You need to double-click on 'Add Source,' and a pop-up window should appear.

4. This is where you'll get to enter two types of information. First, click '<None>' and input the repository URL you'd like to use. Click 'OK' to dismiss that field once done.
5. Don't forget to name your new source. So, at the bottom of the pop-up window, provide a name and click on 'OK' to dismiss the pop-up.
6. Return to Kodi's home screen and select 'Add-ons' from the main menu.
7. Take a look at the top-left corner and click on the 'open box' icon.
8. Select 'Install from ZIP File,' and another pop-up will appear.
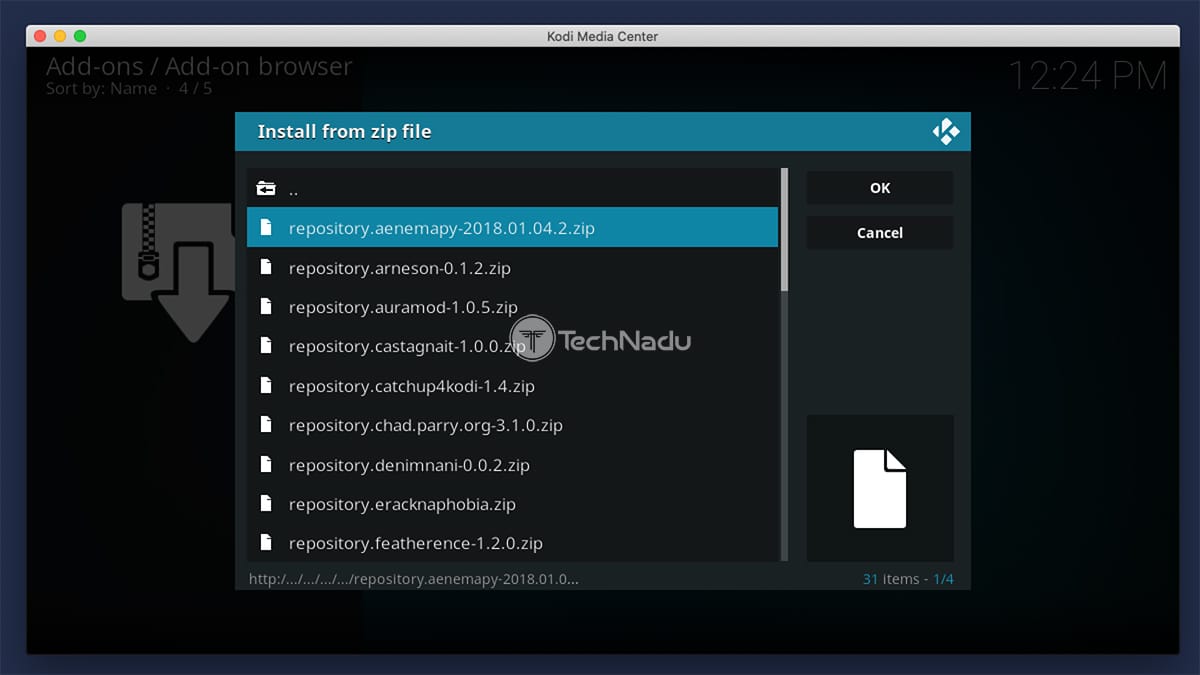
9. You now need to find a ZIP file. Click on the repository's name, and its ZIP should be located there. Once you find it, click on the file's name. Wait a couple of moments.
10. You've now added a repository to Kodi. To access it, select 'Install from Repository,' select its name, and browse its selection of addons.
Before we let you go, we'd like to provide a few useful resources. Since you'll be dealing with third-party add-ons, make sure to know the difference between official and unofficial Kodi addons. And also, here's why unofficial Kodi addons aren't safe to use.
Final Thoughts
Adding third-party repositories to Kodi takes only a minute, especially once you have learned all the steps needed through practice. However, make sure to be responsible with your newly acquired knowledge, as external repositories can lead to copyright infringement and malware. This can be especially dangerous on Android-based devices, where anti-malware tools are rarely used.
So, if you wish to stay on the safe side, stick to Kodi's official repository. You'll find safe-to-use add-ons there, giving you a quick way to access mainstream and niche streaming services. We'll also remind you that pairing Kodi with a VPN, such as NordVPN, is always a good idea, as that's how you'll prevent tracking and ensure no one knows what you do in Kodi.
That would be all we've prepared for this guide. If you have any questions for us, post your comment below. And finally, don't forget to share this article online. Thank you – and enjoy using Kodi!
Related


Get expert insights on threats, breaches, scams, and security trends — delivered every Monday.
Most Popular

Get expert insights on threats, breaches, scams, and security trends — delivered every Monday.
Most Popular