When you purchase through links on our site, we may earn an affiliate commission. Here’s how it works.
How to Set up and Use NordVPN Proxy on Vuze
Vuze is the go-to choice for many Windows and Android users when it comes to downloading torrents because it is open-source and doesn't have ads. However, like with all torrenting clients, you must configure a VPN to hide your real IP and location to stay safe from hackers on the Web.
Fortunately, it is very easy to install a NordVPN proxy on Vuze. Overall, NordVPN's installation process takes under 5 minutes. However, you should also note the differences between a proxy and a VPN. More precisely, a proxy will not encrypt your torrenting traffic and will mainly change your IP address.
In this article, we'll teach you how to set up a NordVPN proxy on Vuze using detailed instructions.
How to Set up NordVPN Proxy on Vuze
You can set up NordVPN proxy on Vuze simply by updating your chosen proxy server's IP address in Vuze's settings. Here's a step-by-step guide for it.
1. Sign up for NordVPN using your favorite Web browser.
2. When done, launch the Vuze app.
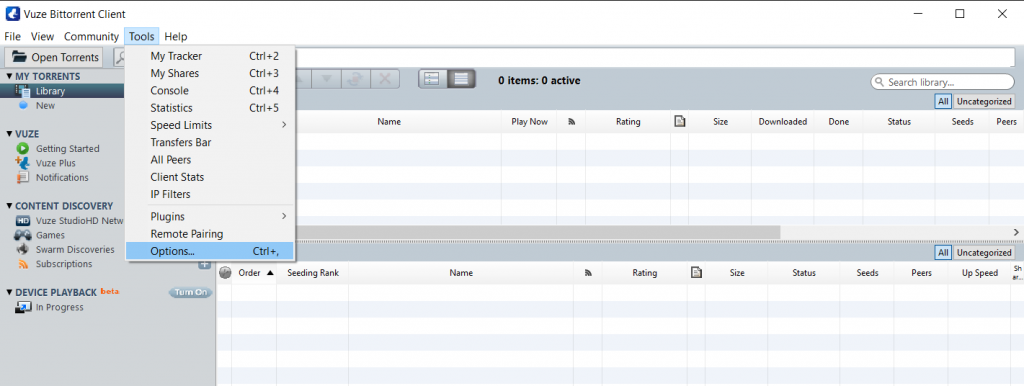
3. Next, click 'Tools' on the toolbar and choose Options... from the menu.
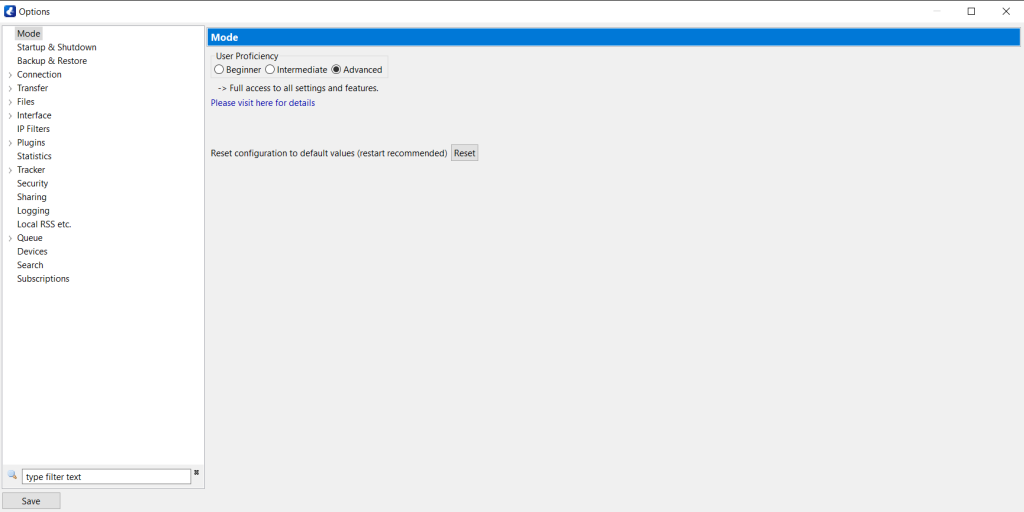
4. Navigate to the Mode section next and switch the User Proficiency from 'Beginner' to 'Advanced.'
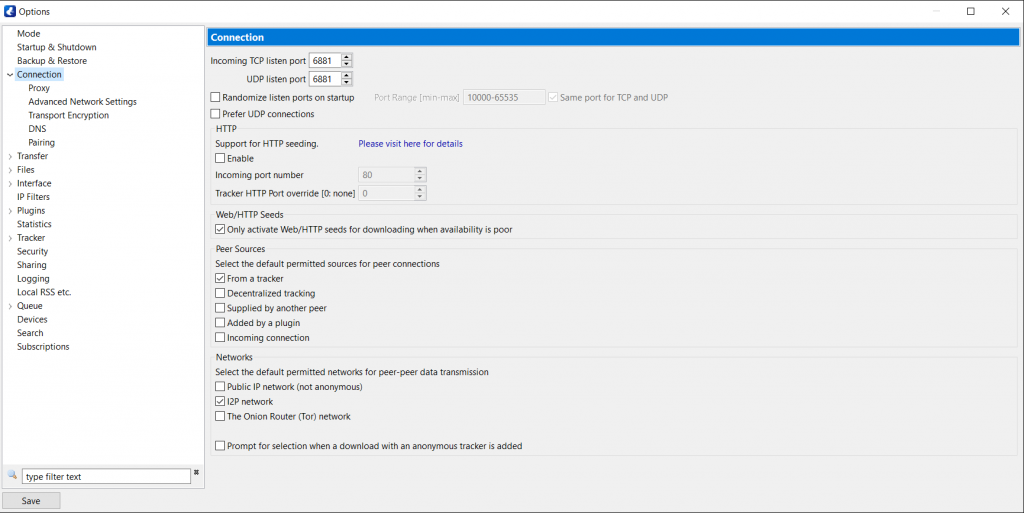
5. Navigate to Connection next.
6. Expand the Connection menu next to your left pane by double-clicking on it.
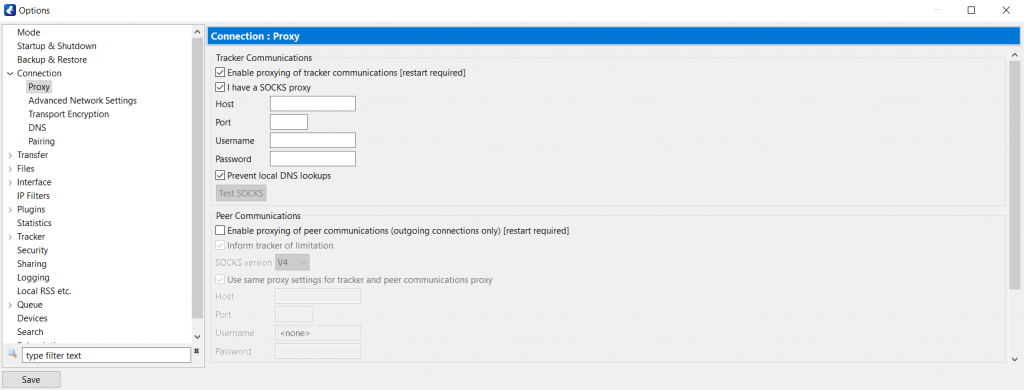
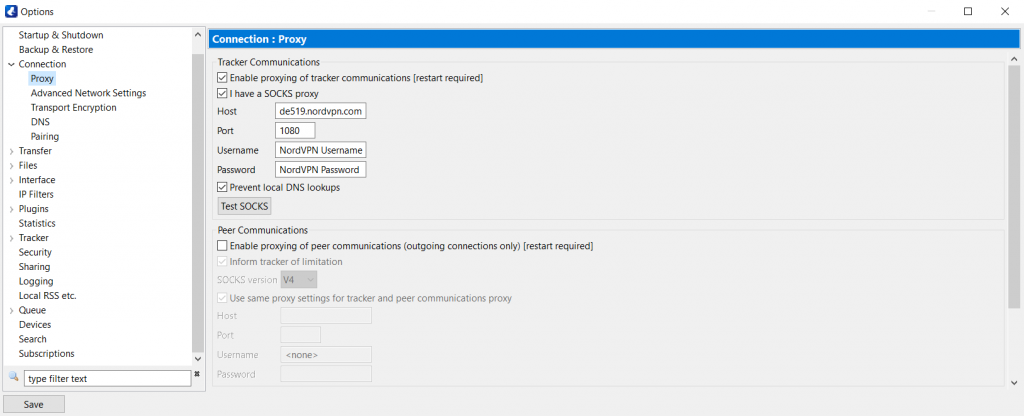
7. Now, click Proxy.
8. Under Tracker Communications, check the following boxes:
- Enable proxying of tracker communications [restart required]
- I have a SOCKS proxy option
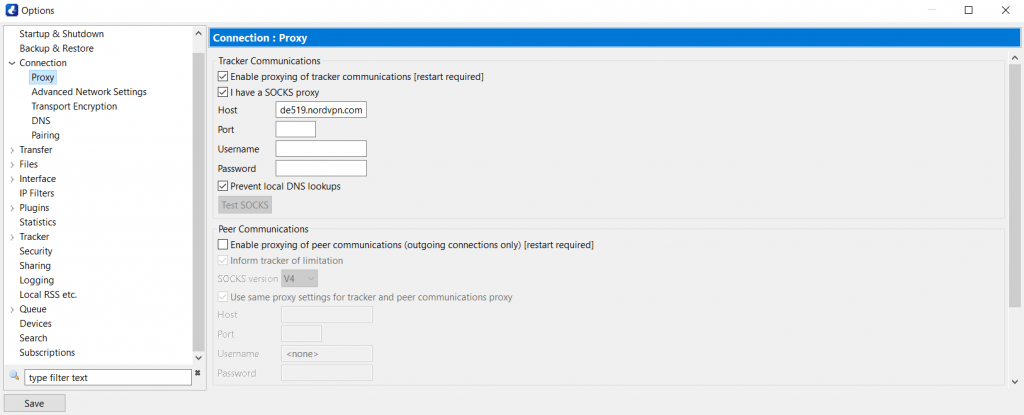
9. Then, enter any of the below-mentioned IP addresses in the Host field:
amsterdam.nl.socks.nordhold.net
atlanta.us.socks.nordhold.net
dallas.us.socks.nordhold.net
los-angeles.us.socks.nordhold.net
nl.socks.nordhold.net
se.socks.nordhold.net
stockholm.se.socks.nordhold.net
us.socks.nordhold.net
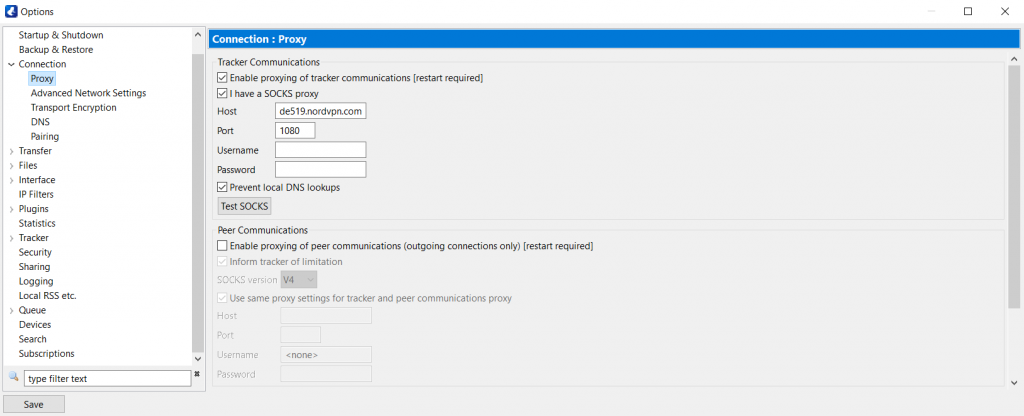
10. Enter 1080 in the Port field.
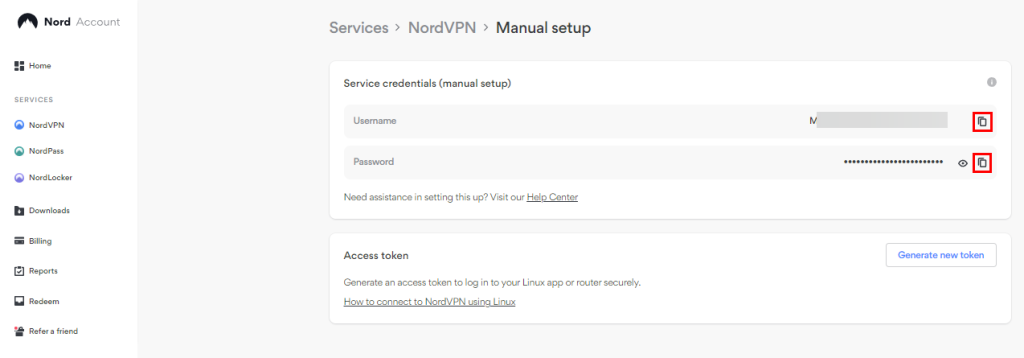
11. Access your NordVPN account dashboard and then choose 'NordVPN.'
12. Click on 'Set up NordVPN manually.'
13. Enter the security code from your NordVPN-associated email for verification.
14. Copy the Service Username and Password from the box titled 'Service credentials (manual setup).'
15. Enter your NordVPN service credentials within the 'Username' and 'Password' field.
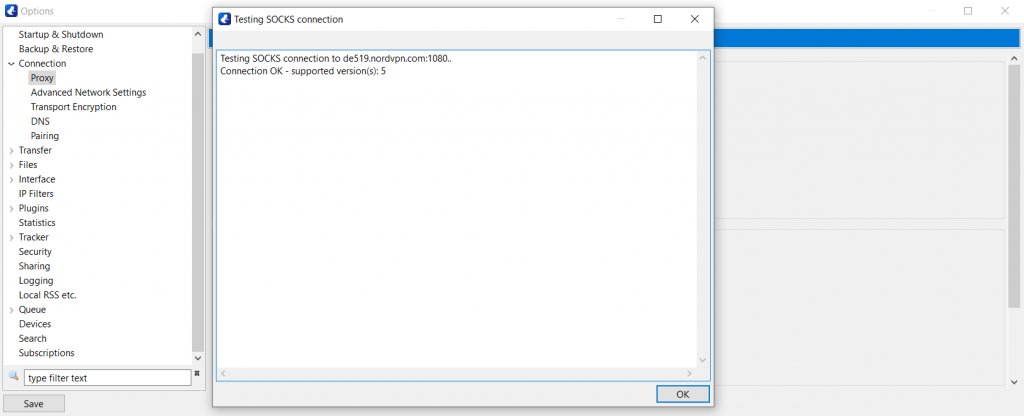
16. Once done, click Test SOCKS.
17. A window 'Testing SOCKS5 connection' will pop up with 'Connection OK - supported version(s): 5'.
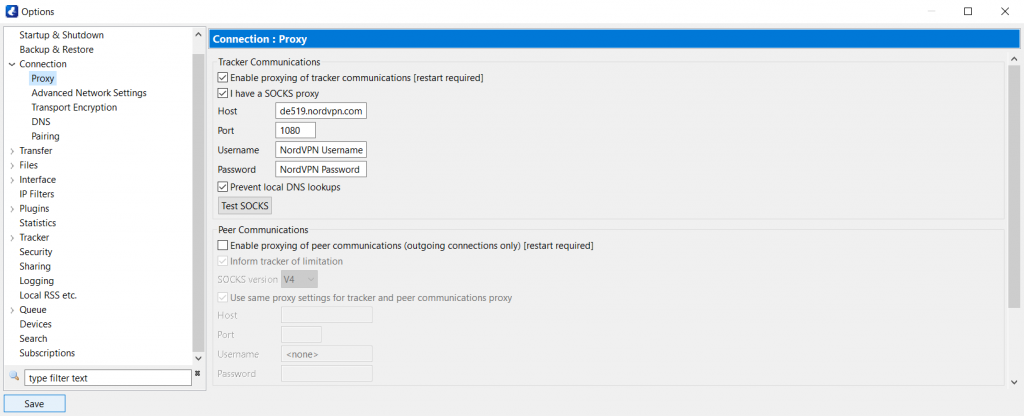
18. Click 'OK' next and press the 'Save' button at the left-bottom corner of the Options screen.
19. Now, you have to close the 'Options' menu and restart your Vuze client.
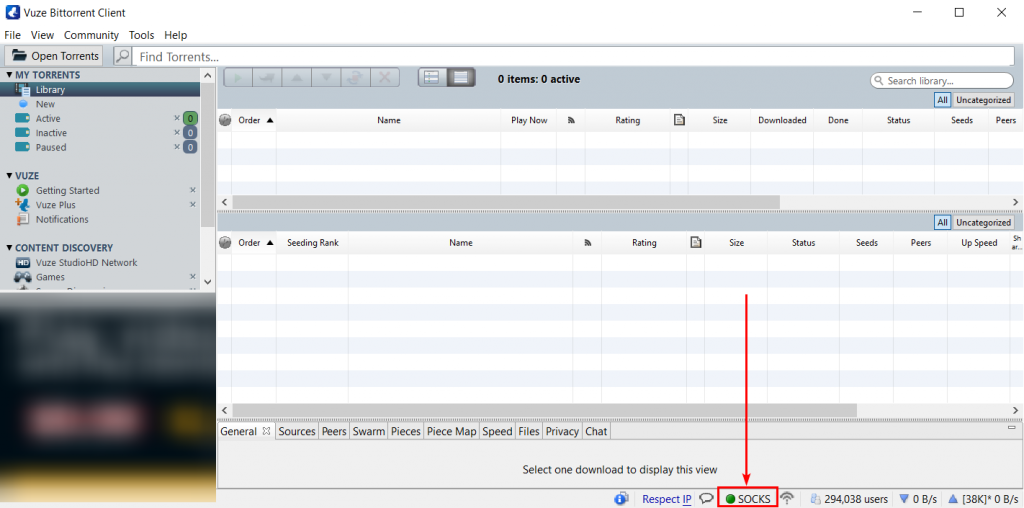
20. Next, look for Socks with a green indicator right under the Status bar. If you see a green indicator, you've successfully connected your Vuze client to the NordVPN proxy.
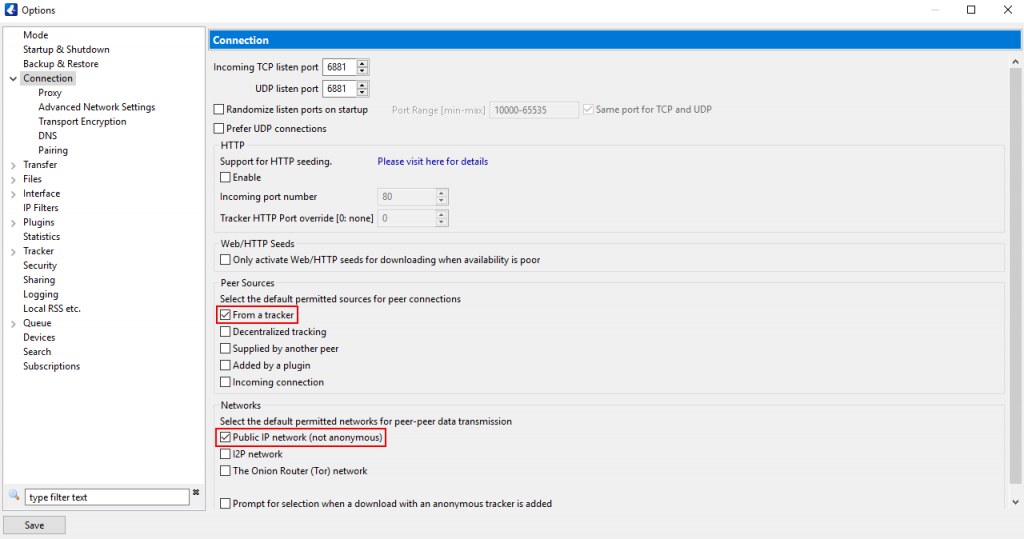
If you're using NordVPN's SOCKS5 proxy with Vuze, you may need additional changes, such as disabling features that can cause IP leaks. You can adjust these from the Peer Sources section by deselecting all the options except 'From a tracker.' Then, in the Networks section, uncheck the boxes next to every entry on the list other than 'Public IP network (not anonymous).'
Final Thoughts
When setting up a NordVPN proxy on Vuze, it is best to choose a server closest to your physical location if you want top speeds. That said, all NordVPN proxy servers work well with Vuze and maintain your anonymity on the P2P network. However, it is important to know a proxy's limitations.
While a proxy is great for hiding your IP address and location, you may want more protection in some situations. To achieve so, you need to install and set up NordVPN natively on your device or an OpenVPN-compatible router. That way, you can encrypt your entire network traffic across all devices.
That's all! Now you know how to set up and use NordVPN Proxy on Vuze. If you have further queries, drop us a comment using the below button. Thanks for reading!

