How to Screen-Record on Your iPhone 13, Mini, Pro & Pro Max
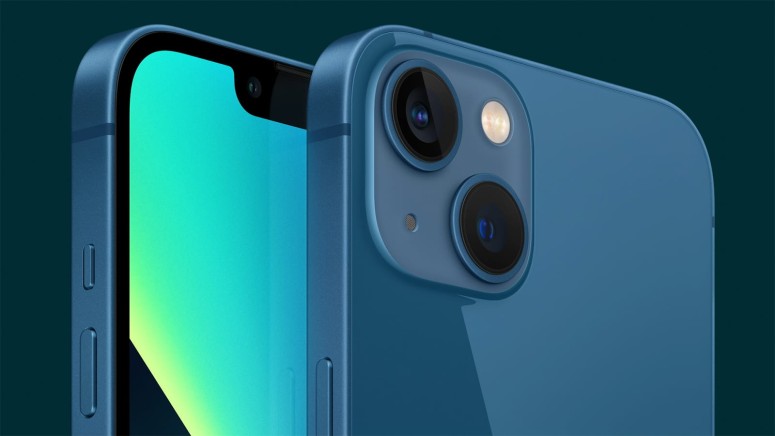
In the past, we were forced to use third-party workarounds to record our iPhones' screens. Still, the situation has changed recently, with screen recording becoming part of iOS. With that said, we'll show you how to screen-record on your iPhone 13, 13 Mini, 13 Pro, and 13 Pro Max – without relying on third-party apps.
How to Screen-Record on Your iPhone 13
It should be said that screen recording is somewhat hidden in iOS. So, here's how to activate and use that feature.
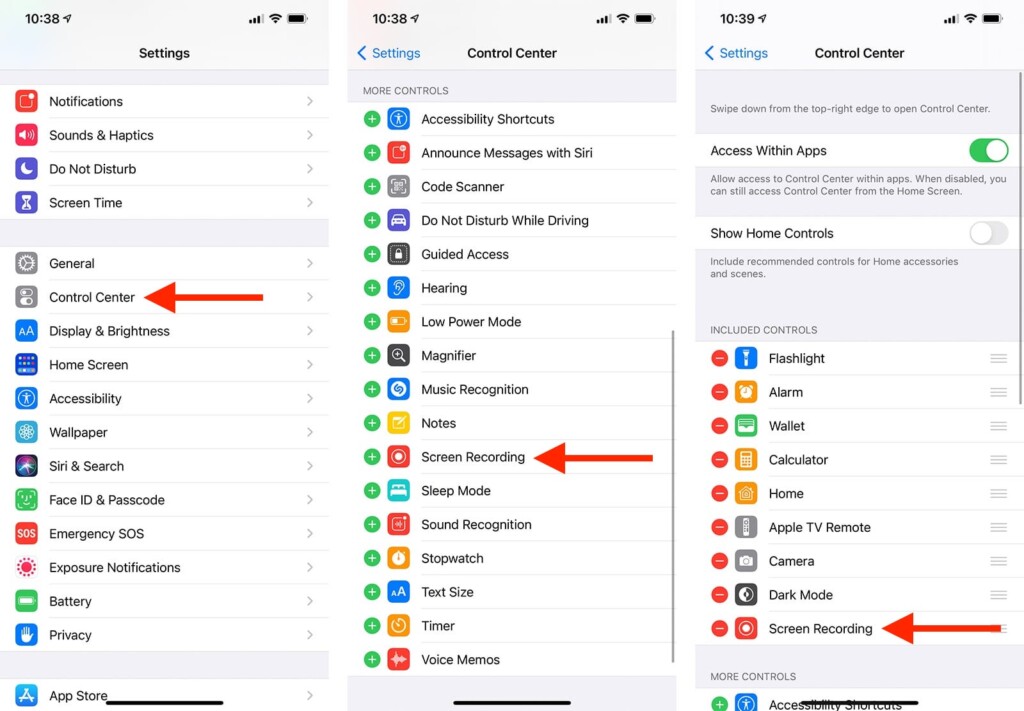
1. Navigate to Settings > Control Center. Then, scroll a bit down.
2. You should find the 'More Controls' section, with plenty of tools.
3. Find 'Screen Recording' and tap on the 'plus' icon on the left-hand side.
4. You’ll now see 'Screen Recording' in the 'Included Controls' section.
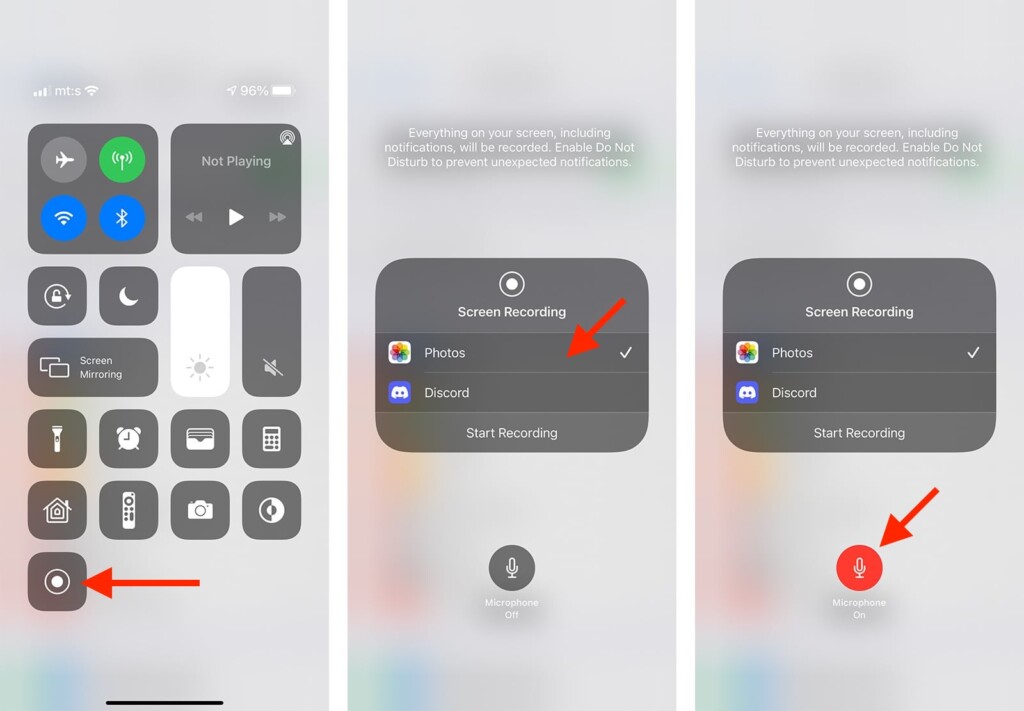
5. Access 'Control Center' by swiping from the top-right corner of your screen.
6. Find the 'Record' button, which looks like a full circle within another circle.
7. To fine-tune how screen-recording works, tap and hold on the 'Record' button.
8. Now, pick the app that you'll use for screen recording.
9. Then, enable or disable your phone’s microphone by tapping on its icon.
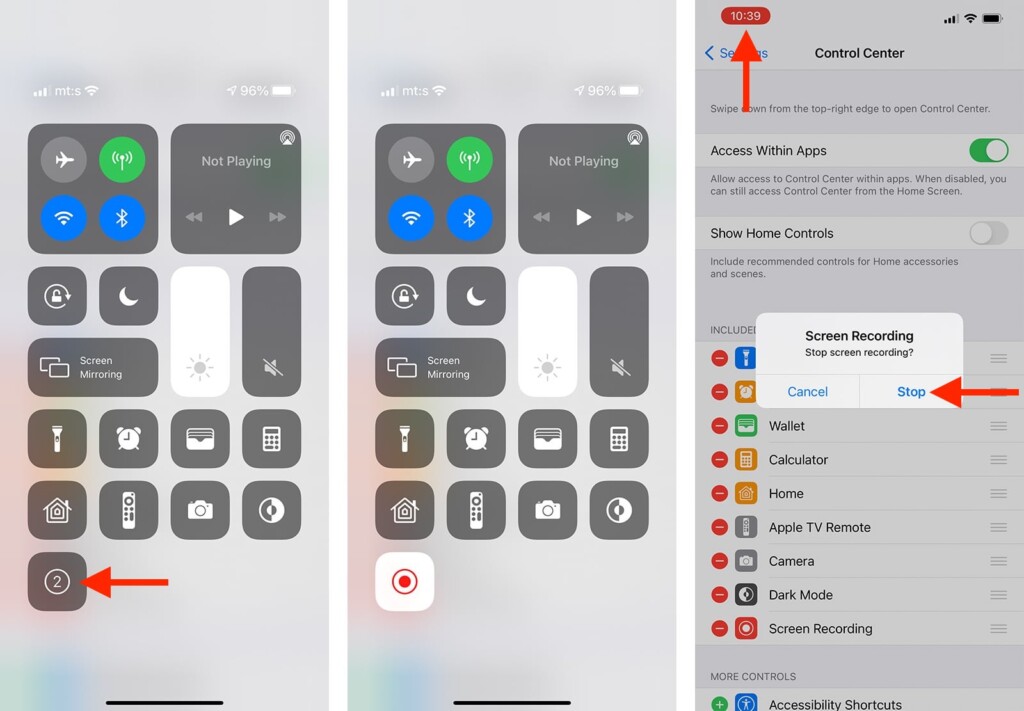
10. To return to 'Control Center,' tap anywhere on your screen.
11. Tap on the 'Record' button to start recording your screen.
12. You’ll have three seconds to prepare before your screen starts being recorded.
13. To stop, tap on the red status bar at the top of your screen.
14. Finally, tap on 'Stop' to confirm your decision. That’s it!
That would be all on how to screen record on your iPhone 13, Mini, Pro, and Pro Max. In case you have any questions, let us know via the comments section below. And finally, thank you for reading!

