When you purchase through links on our site, we may earn an affiliate commission. Here’s how it works.
How to Turn Your Windows Computer into a VPN Hotspot
VPN technology has a lot of great advantages. You can spoof your location to access blocked services. Your browsing is hidden from your ISP. You can even improve your browsing speeds on a throttled connection.
The problem is that most VPN subscriptions only come with a few device slots, which means you either have to buy an expensive VPN-capable router or rotate your devices.
Even worse, some devices don’t have native VPN applications at all. That could include your media box, game console and more. So is there a way to share one VPN connection without having to buy a VPN router? The answer is yes!
All for One and One for All
By now everyone is pretty much aware that you can share your phone or tablet mobile data connection with other devices. All you have to do is switch on the “mobile hotspot” option on the device, and you’re good to go.
Did you know you can do the same thing with a laptop or desktop computer with WiFi? Basically, you connect the computer to your router using an Ethernet cable. Then when devices connect to that computer through WiFi, it can use the VPN-protected connection. There are a few ways this can be achieved, but we’ll start off looking at one of the easier methods.
Use Special Software
There are more than a few free software packages out there to help you instantly create a WiFi hotspot on your Windows PC. Not only that but with most of these programs you can also specify which network connection should be the source of your internet for all the devices sharing the WiFi. For example, Virtual Router 1.0 automatically sets up and enables the virtual WiFi hotspot. It also lets you choose which internet connection to share. Just remember to connect to the VPN server using its client software so that all the traffic over your connection is protected.
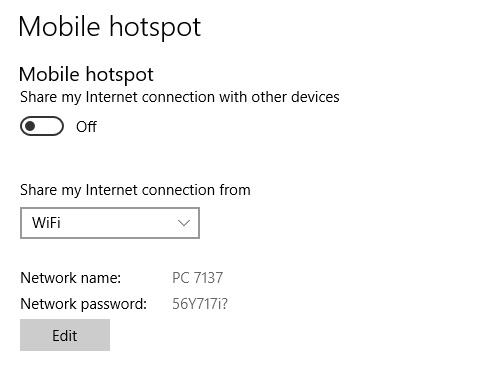
If you're on Windows 10 you don't even need to use special software. Simply right-click on your network icon in the system tray.
Choose "Open Network Internet Settings" and then click on "Mobile Hotspot" and then enable internet sharing of your protected connection.
Manually Create a WiFi Hotspot
If you don’t want to use a piece of software to set up your virtual WiFi router for some reason, you can do it manually too. This involves using the Windows Command Prompt. This can feel a little intimidating. However, it’s actually quite simple, and you’ll get the hang of it in no time.
Windows 7 and 8 both use essentially the same set of steps to do this. So here is how you create a so-called “hosted network” on Windows.
Step 1: Get to the Command Prompt
The command prompt is a simple text-based shell where you can directly input commands to the operating system. This includes commands that are not available through the normal graphical interface.
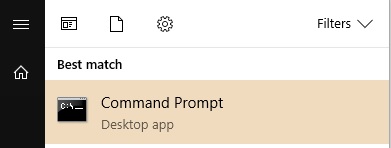
To get to the command prompt, you need to find a Windows app called “cmd.” In Windows 7 and later all you have to do is type “cmd” into the start menu search bar and it will appear. Don’t just click on it though; we want to run it as an administrator. So right-click on it and choose “run as administrator.”
Depending on your user account type you’ll either have to approve this with just a click or type in a password to approve it.
Step 2: Look for Hosted Network Support
Now that the command prompt is open, you can type in commands. Type NETSH WLAN SHOW DRIVER to see details on the network drivers installed. We are only doing this the first time. Why? Because we have to check if your computer is set up to operate a hosted network.
Look for text that says “Hosted network supported: Yes”. If it’s there, we are good to go.
What do you do if it says "no"?
If it isn’t then you’ll have to make sure your version of Windows has been updated to the latest patch level.
If it still doesn’t say the support is there even after updating, then your WiFi adapter probably doesn’t support it at all. In this case, your only real choice is to use a different adapter. After confirming that your computer supports hosted networking, you can close the command prompt and then restart it as in Step 1.
Step 3: Creating the Hosted Network
Here comes the bit where you actually create the hosted network. Type the following:
netsh wlan set hostednetwork mode=allow ssid=Choose One key=Choose One
Where I have written “choose one,” you need to replace the text with your own choice. The SSID is the name of the network you’ll see on other devices. The passphrase is the password you’ll need to enter when connecting to another device.
This is what it should look like:
Step 4: Starting the Hosted Network
Now we actually want to make the network active. To do that enter the following command:
netsh wlan start hostednetwork
If everything is OK, then you'll see the message "The Hosted Network Started."
Step 5: Sharing Your Internet Connection
Luckily we are now done with messing around with the command prompt. At least until you want to restart the hosted network again.
If users connect to the network now, all they’ll have access to is one another. To give them a VPN-protected internet connection, we have to share it.
Search for “Network and Sharing Center” in the start menu and then open it.
Now click on the adapter that’s connecting you to the internet.
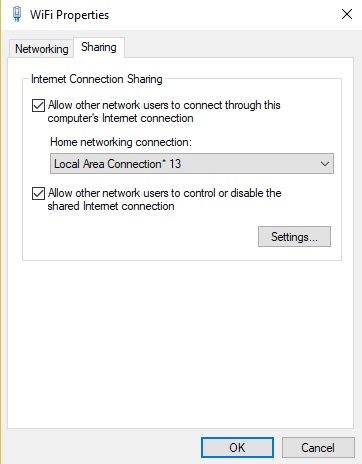
Next click “properties.” This opens up the adapter’s properties as you can see here. Now click on “sharing.”
Now check the box that allows other users to connect through this computer’s internet connection. Under “Home Networking Connection” choose “Microsoft Hosted Virtual Adapter.” Click OK, and you are done.
Alternatively, if you're using a Windows 10 machine like I am, just right click on the network icon in the system tray. Choose "open network internet settings."
From here the steps are the same as above.
That’s All Folks!
Given that your VPN is connected and active, any device that you connect to your virtual WiFi network should now have full VPN protection. If you happen to restart your computer, you’ll have to start the virtual network again, but once you have the hang of it, there’s not much hassle involved.
If you’re still looking for a good VPN to use for your home security, why not try ExpressVPN? It’s one of our favorite services and supports an incredibly wide array of devices. It’s definitely one of the elite choices in our book.


