When you purchase through links on our site, we may earn an affiliate commission. Here’s how it works.
How to Download and Install ExpressVPN on Qubes OS
To set up ExpressVPN on Qubes OS, you need to install the VPN's Linux Fedora application. So, you'll end up with a command-line application using which you can connect to any of the VPN's 3,000+ encrypted servers.
Keep in mind that ExpressVPN doesn’t provide support for Qubes OS. This VPN’s customer support team will be able to assist with general Linux-related questions. However, resolving issues that might be specific to Qubes OS is something you’ll have to do on your own.
Also, ExpressVPN should work well even on older Qubes releases, but we recommend using the latest available one. Doing so will provide you with optimal performance and a leak-free environment. So, make sure to learn more about the latest stable release of Qubes OS.
How to Download and Install ExpressVPN on Qubes OS
Qubes comes with a component that lets you create VPN connections, which is what you'll use to install ExpressVPN on your Qubes OS machine. Here's what you need to do:
1. Subscribe to ExpressVPN using your computer and any Web browser.
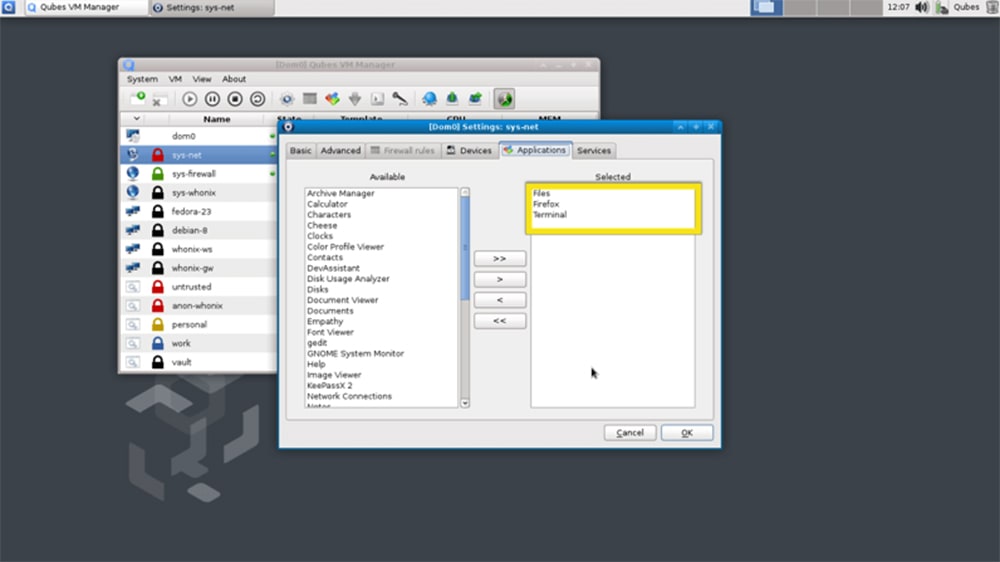
2. Launch the Qubes VM Manager. Right-click on "sys-net" and select "VM Settings." Then, select the "Applications" tab. Now, select "Files," "Firefox," and "Terminal."
3. Now, return to ExpressVPN’s website. Click "My Account" using the website’s main menu (in the top-right corner). Provide your email address and password, and then click "Sign In."
4. Navigate to Set Up Other Devices > Linux. Pick "Fedora 32-bit" or "64-bit," based on your Qubes OS version. Use the "Download" button to download the installation file.
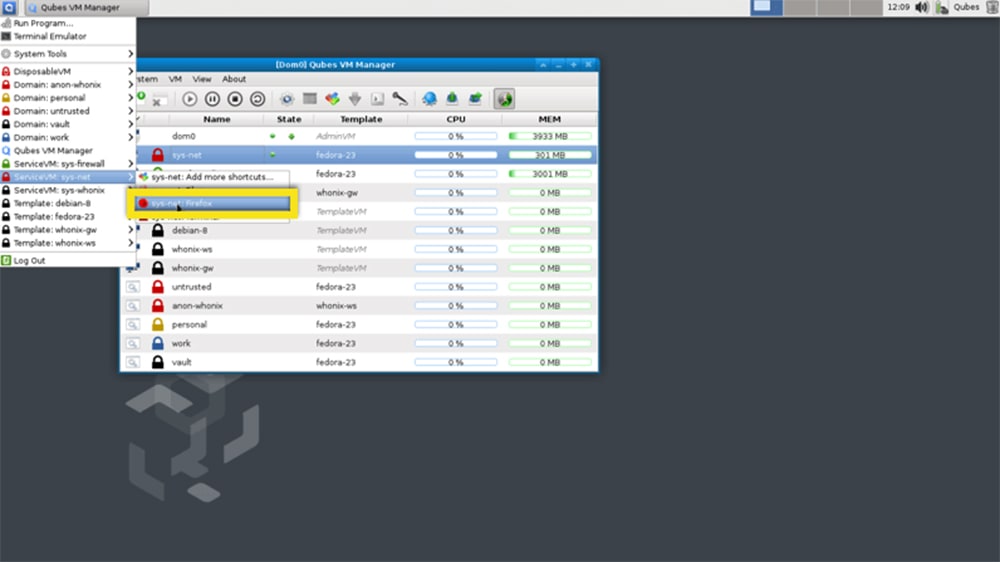
5. Now, launch Terminal (make sure you’re in the sys-net environment). Navigate to the folder that contains your ExpressVPN installation file. By default, visit the Downloads folder using this command: cd ~/Downloads/.
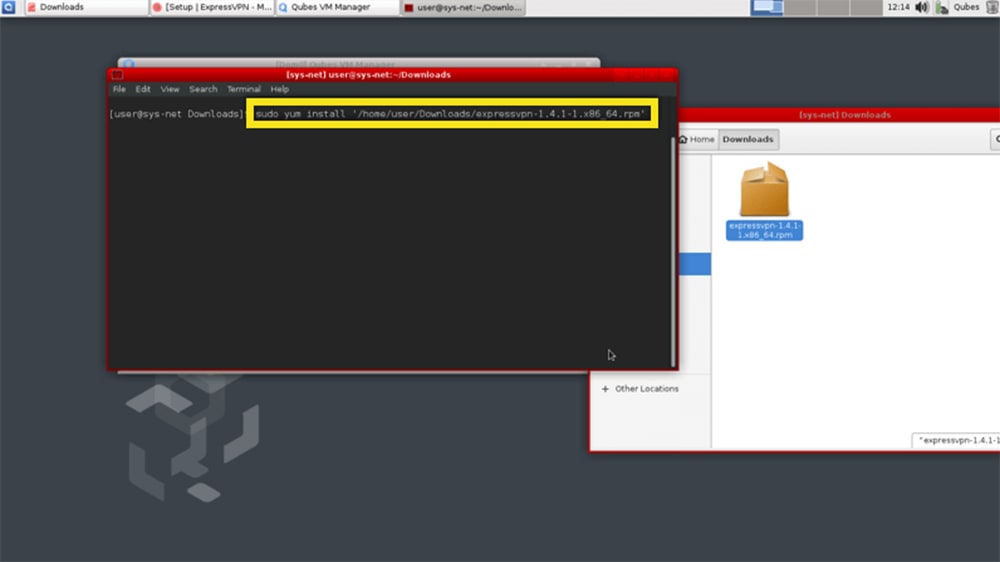
6. Install the application using the following command: sudo yum install [file_name].
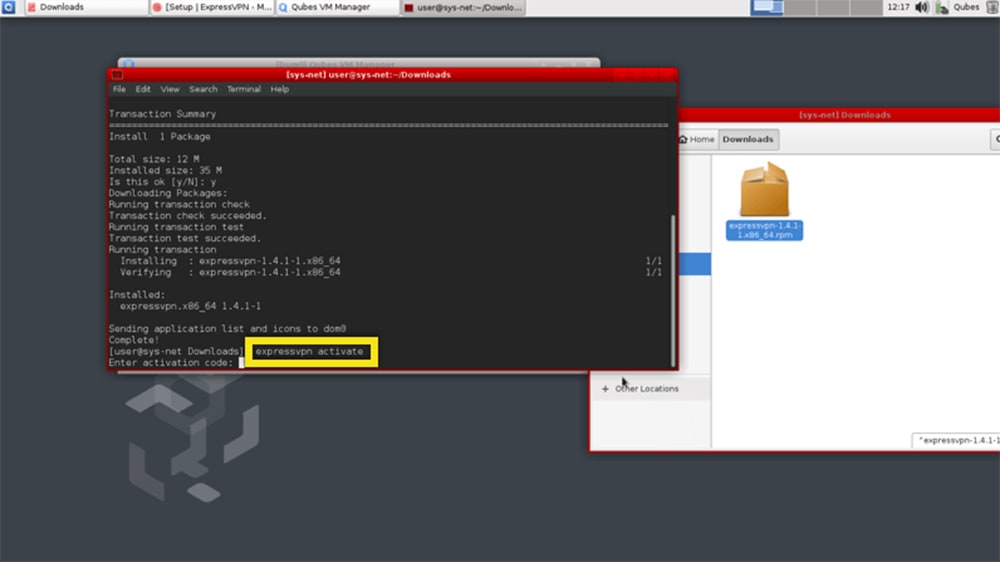
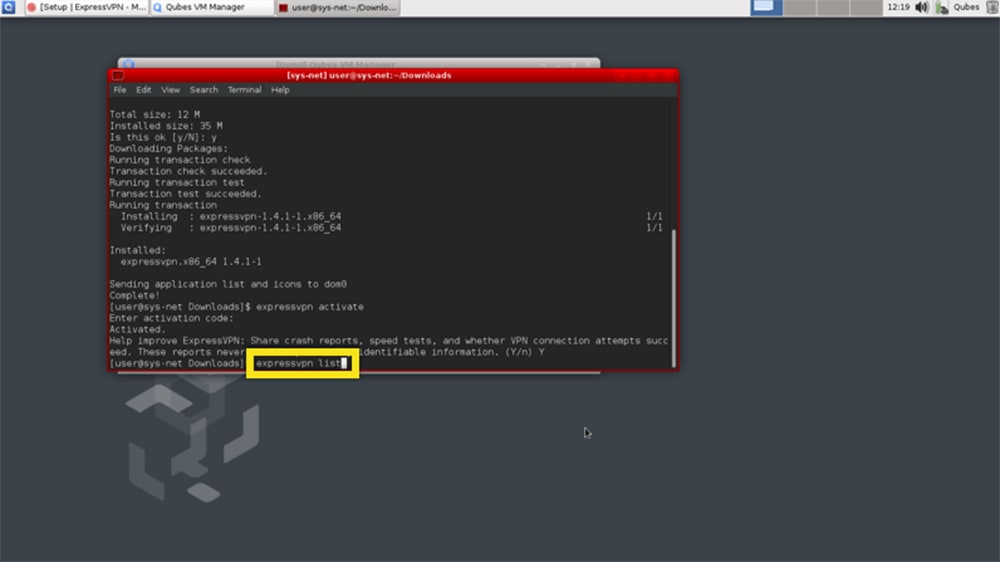
7. Now, let’s activate the application using the following command: "expressvpn activate." When asked about your ExpressVPN activation code, copy it from your dashboard. Starting at this moment, you can begin to interact with ExpressVPN’s servers.
8. To connect to the nearest available server, go with "expressvpn connect."
9. To disconnect and end your VPN session, go with "expressvpn disconnect."
10. If you want to pick a custom server, use this command: "expressvpn list." You'll see three columns showing a list of server codes, names, and countries. To connect, use the following command: "expressvpn connect [LOCATION]."
11. We also recommend using the following command: "man expressvpn." You'll see a list of the available ExpressVPN commands, showing you how else you can use this VPN. That's it!
Final Thoughts
Setting up ExpressVPN on Qubes OS is a quick and painless procedure done in under a few minutes. And once you're done, all it takes is to remember a few short commands. That's all it takes to start using ExpressVPN and all its features.
Of course, a VPN as powerful as ExpressVPN works on many other devices and platforms. So, find more info in our guide on how to set up ExpressVPN on Linux. And to protect other Web-connected devices, check our central guide that explains how to set up ExpressVPN.
That would be all on setting up and using ExpressVPN on Qubes OS. If you have any questions or doubts, let us know using the comments section below. Lastly, thank you for reading!

