How to Set Up User Profiles in Kodi 18 in 2019
Did you know that you can easily create different Kodi profiles? This is an often-overlooked feature that brings numerous helpful options. When it comes to Kodi, each profile has a different data folder which stores user-specific files. This means that different profiles can have different addons installed, along with skins and other customizations.
The screenshots in this article apply to Kodi 18 Leia. However, the process is very similar to earlier Kodi versions, and we'll tell you what to keep in mind. Also, note that you can create user profiles in Kodi on all the supported platforms.
Without further ado, here's how to set up new user profiles in Kodi in 2019.
- Launch Kodi and wait until it fully loads;
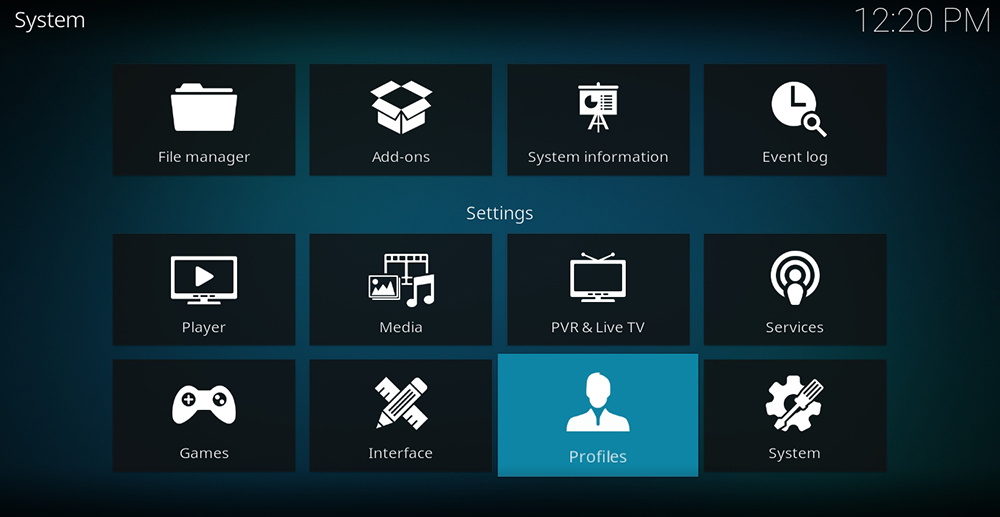
- Then, click on the Gear icon (top-left corner) to open Kodi’s Settings;
- Click on ‘Profiles’. If you use an earlier Kodi version, click on 'Profile Settings'.
- Take a look at the left-placed sidebar and click on ‘Profiles’;
- At this point, you will see all of the currently created profiles. The Master User is created by Kodi the first time you run the application. We are talking about how to set up Kodi profiles, so we need to click on ‘Add Profile’;
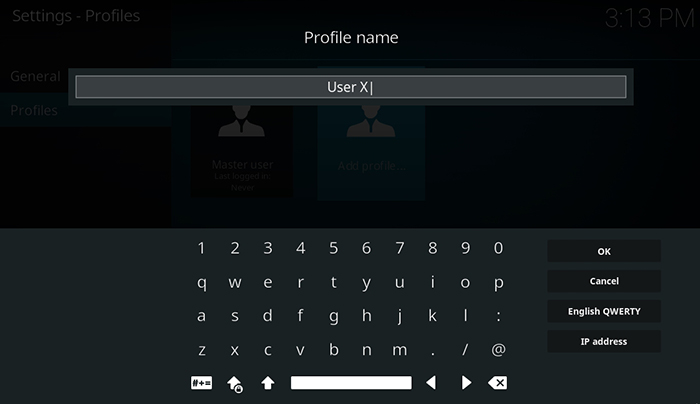
- Kodi will ask you to name a new user. Let’s go ahead with ‘User X’. Click ‘OK’ to confirm the entry;
- Next, you’ll see a pop-up named ‘Browse for Folder’. You can skip this step and click ‘OK’ to apply Kodi’s default values for the new user;
- Finally, you will see a dialog box named ‘Edit Profile’. This is a very important step, so we’ll take a moment to explain everything. Keep on reading.
We have arrived to the final step of creating a new Kodi profile. Even though it doesn’t look like much, the ‘Edit Profile’ window brings numerous different options. Let’s take a moment to explain what can be done here.
- Profile Name: If you decide to change the user’s name, you can do it here;
- Profile Picture: The name says it all. You can assign a picture as well;
- Profile Directory: This is where you can select a folder where individual settings can be stored;
- Lock Preferences: This option allows you to set up a password for specific content categories. For example, you can set up a lock for music, videos, pictures, addons, or file manager.
- Media Info: Using this interesting option, you can set separate information for pieces of media. If you want to create fully independent profiles, you can go with ‘Separate’;
- Media Sources: This option allows you to set separate media sources for each profile. We recommend using the ‘Separate’ option to create fully individual profiles.
Once you set up everything, confirm your entry - and that's it. You've just created a new Kodi profile!
Read More
Interested in learning more about Kodi? If that's the case, we've collected a list of articles that you'll certainly find useful. Take a look.
- How to Enable Unknown Sources on Kodi
- Get the Best Kodi Addons
- Get the Best Kodi Builds
- Get the Best Kodi Skins
- How to Change Skins on Kodi
- How to Create a Library in Kodi
- How to Import Videos to Kodi
- How to Add Music to Kodi
- How to Add Photos to Kodi
- How to Add Subtitles to Kodi
Dear Kodi fans, that would be all. We hope you managed to find your answers in this article on how to create Kodi profiles. If you have any questions, don’t hesitate to let us know.
Finally, we would appreciate if you could share this article online. In addition, don’t forget to follow TechNadu on Facebook and Twitter. Thanks!


